
The 'Dynamic Clamp Systems' function allows precise adjustment and repositioning of clamp systems in SuCri.
Video Tutorial
Step-by-Step Guide
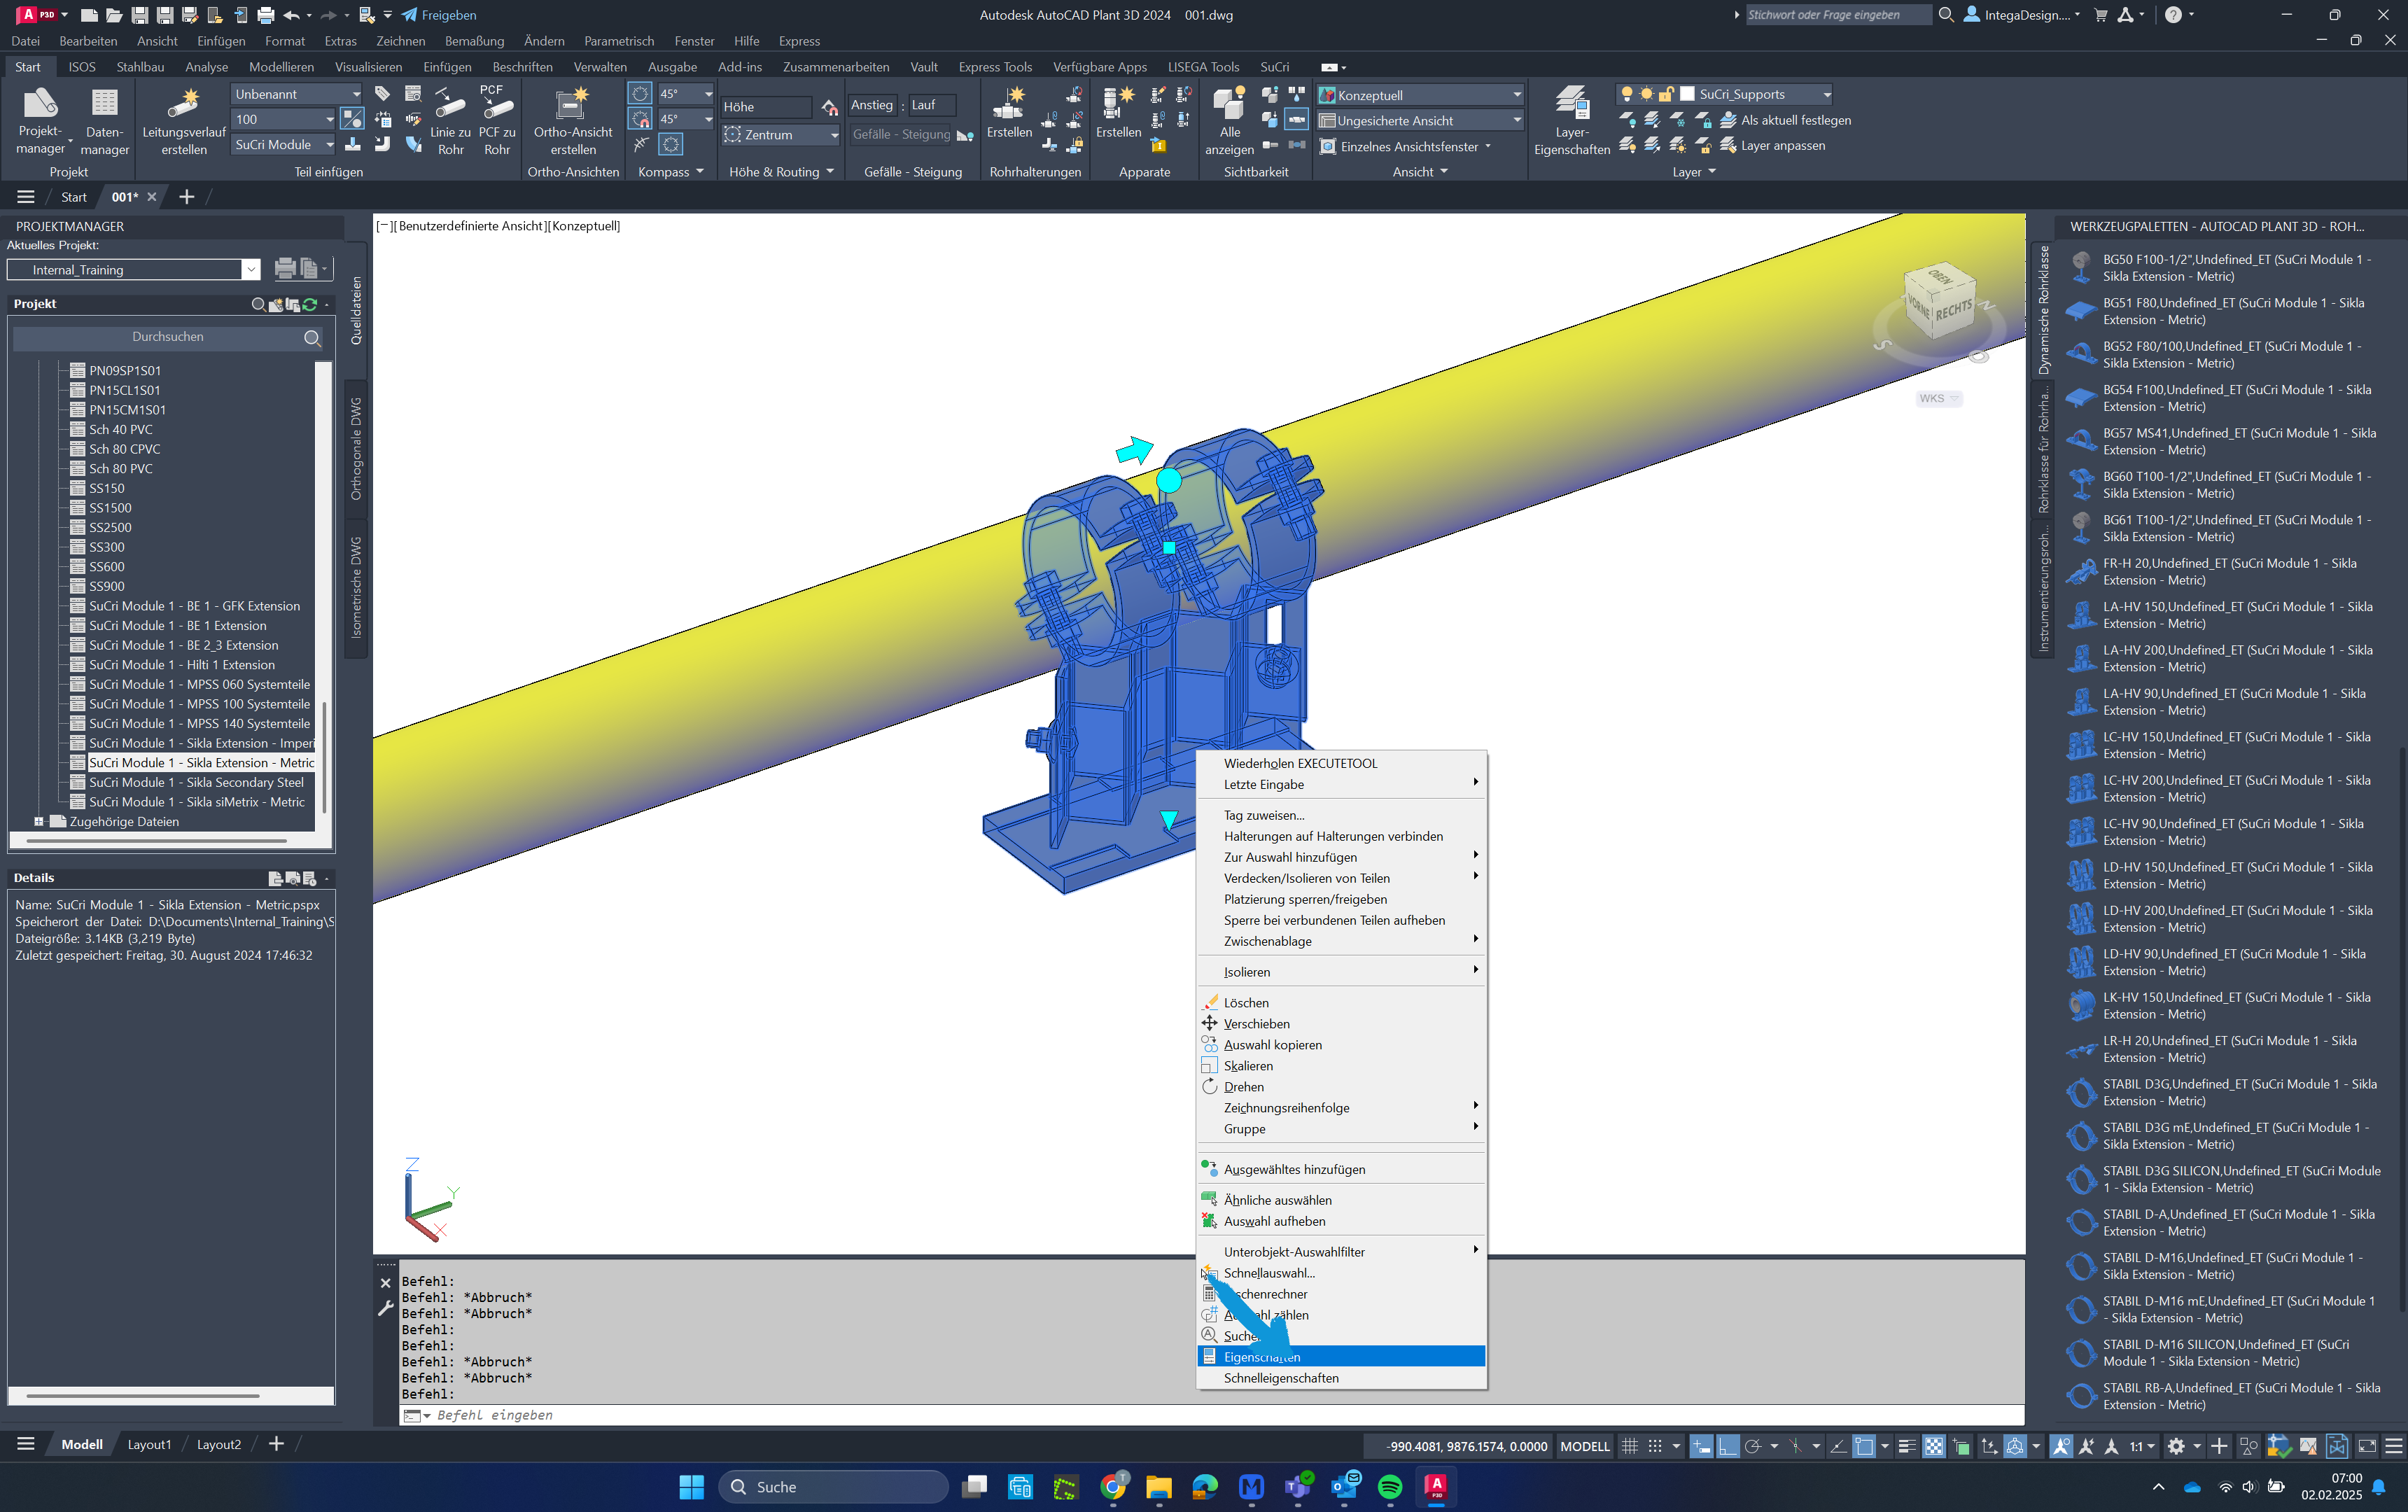
Step 1: Select the Support
To add a clamp system to a support, select a support and then right-click.

Step 2: Open Properties
Select the "Properties" option from the context menu.
Step 3: Assign the Clamp System
Click on the "CLAMP" parameter and enter the desired clamp index according to the index sheet.

Step 4: Add the Clamp System
The clamp system has now been added to the geometry.
Step 5: Adjust the Clamping Range
You will now see one or two arrows pointing in the axial direction of the pipe. Click on the outer arrow to adjust the clamping range of the clamp system.
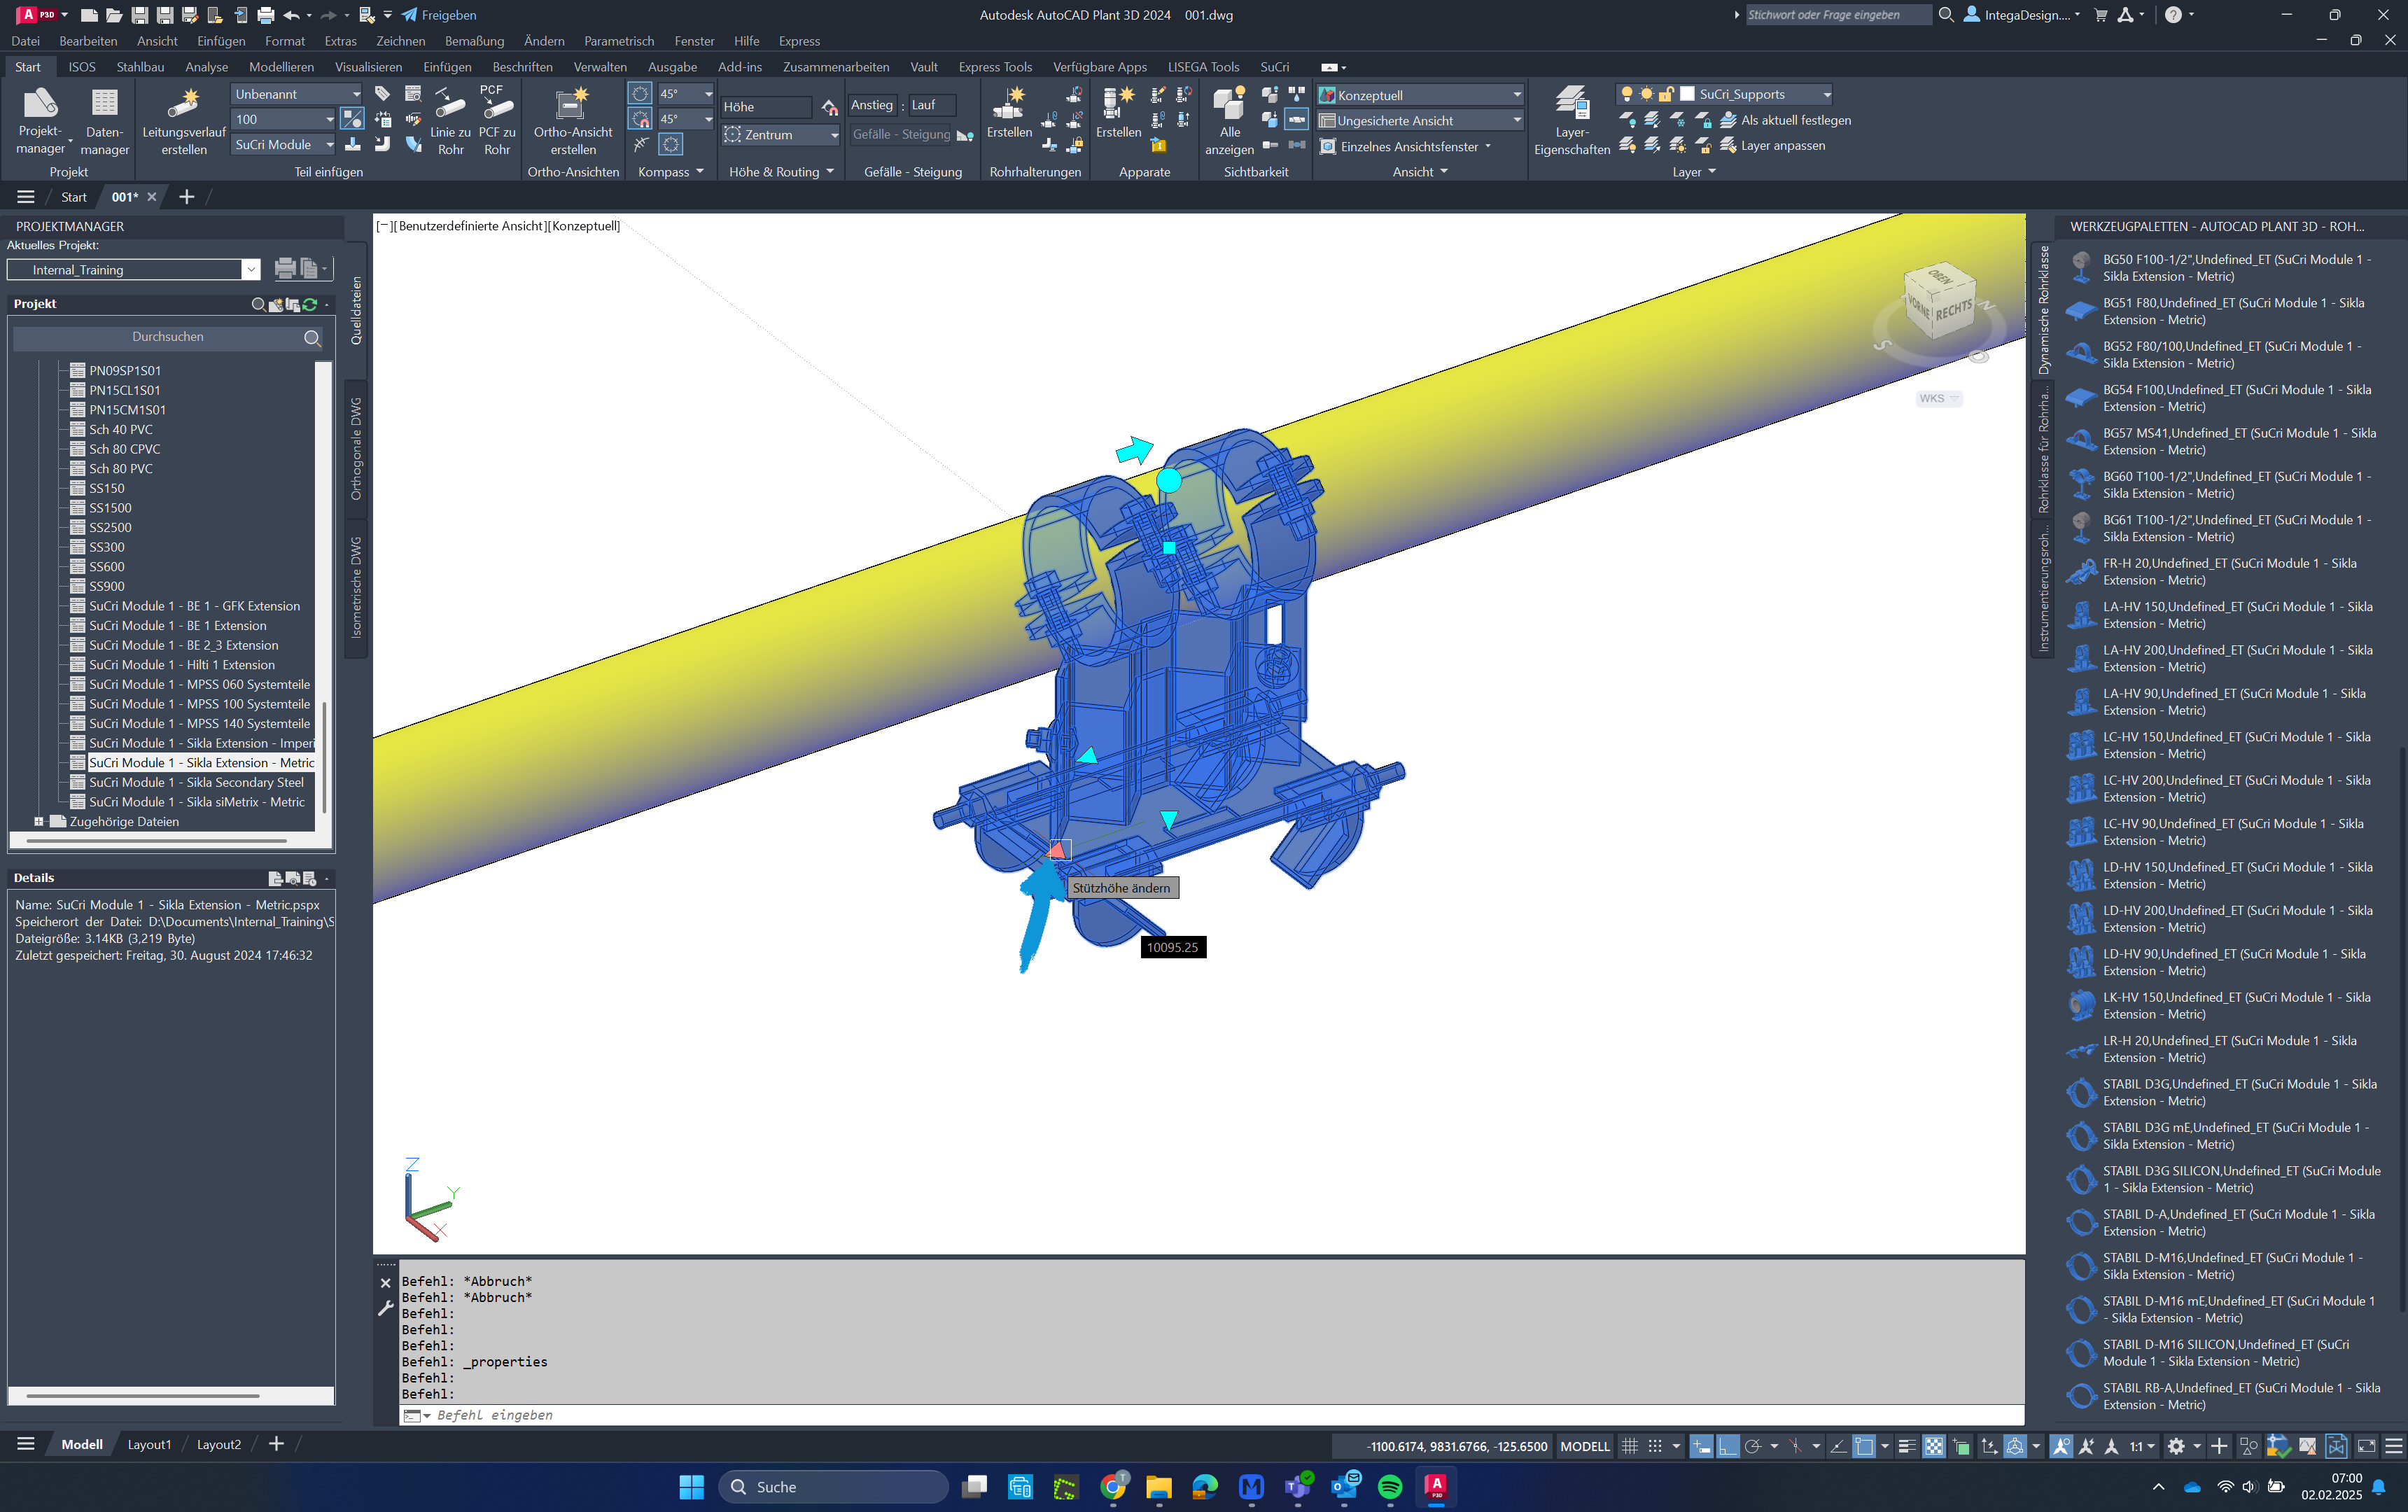
Step 6: Position the Clamp System
Clicking on the middle arrow of the clamp system allows you to move its position.
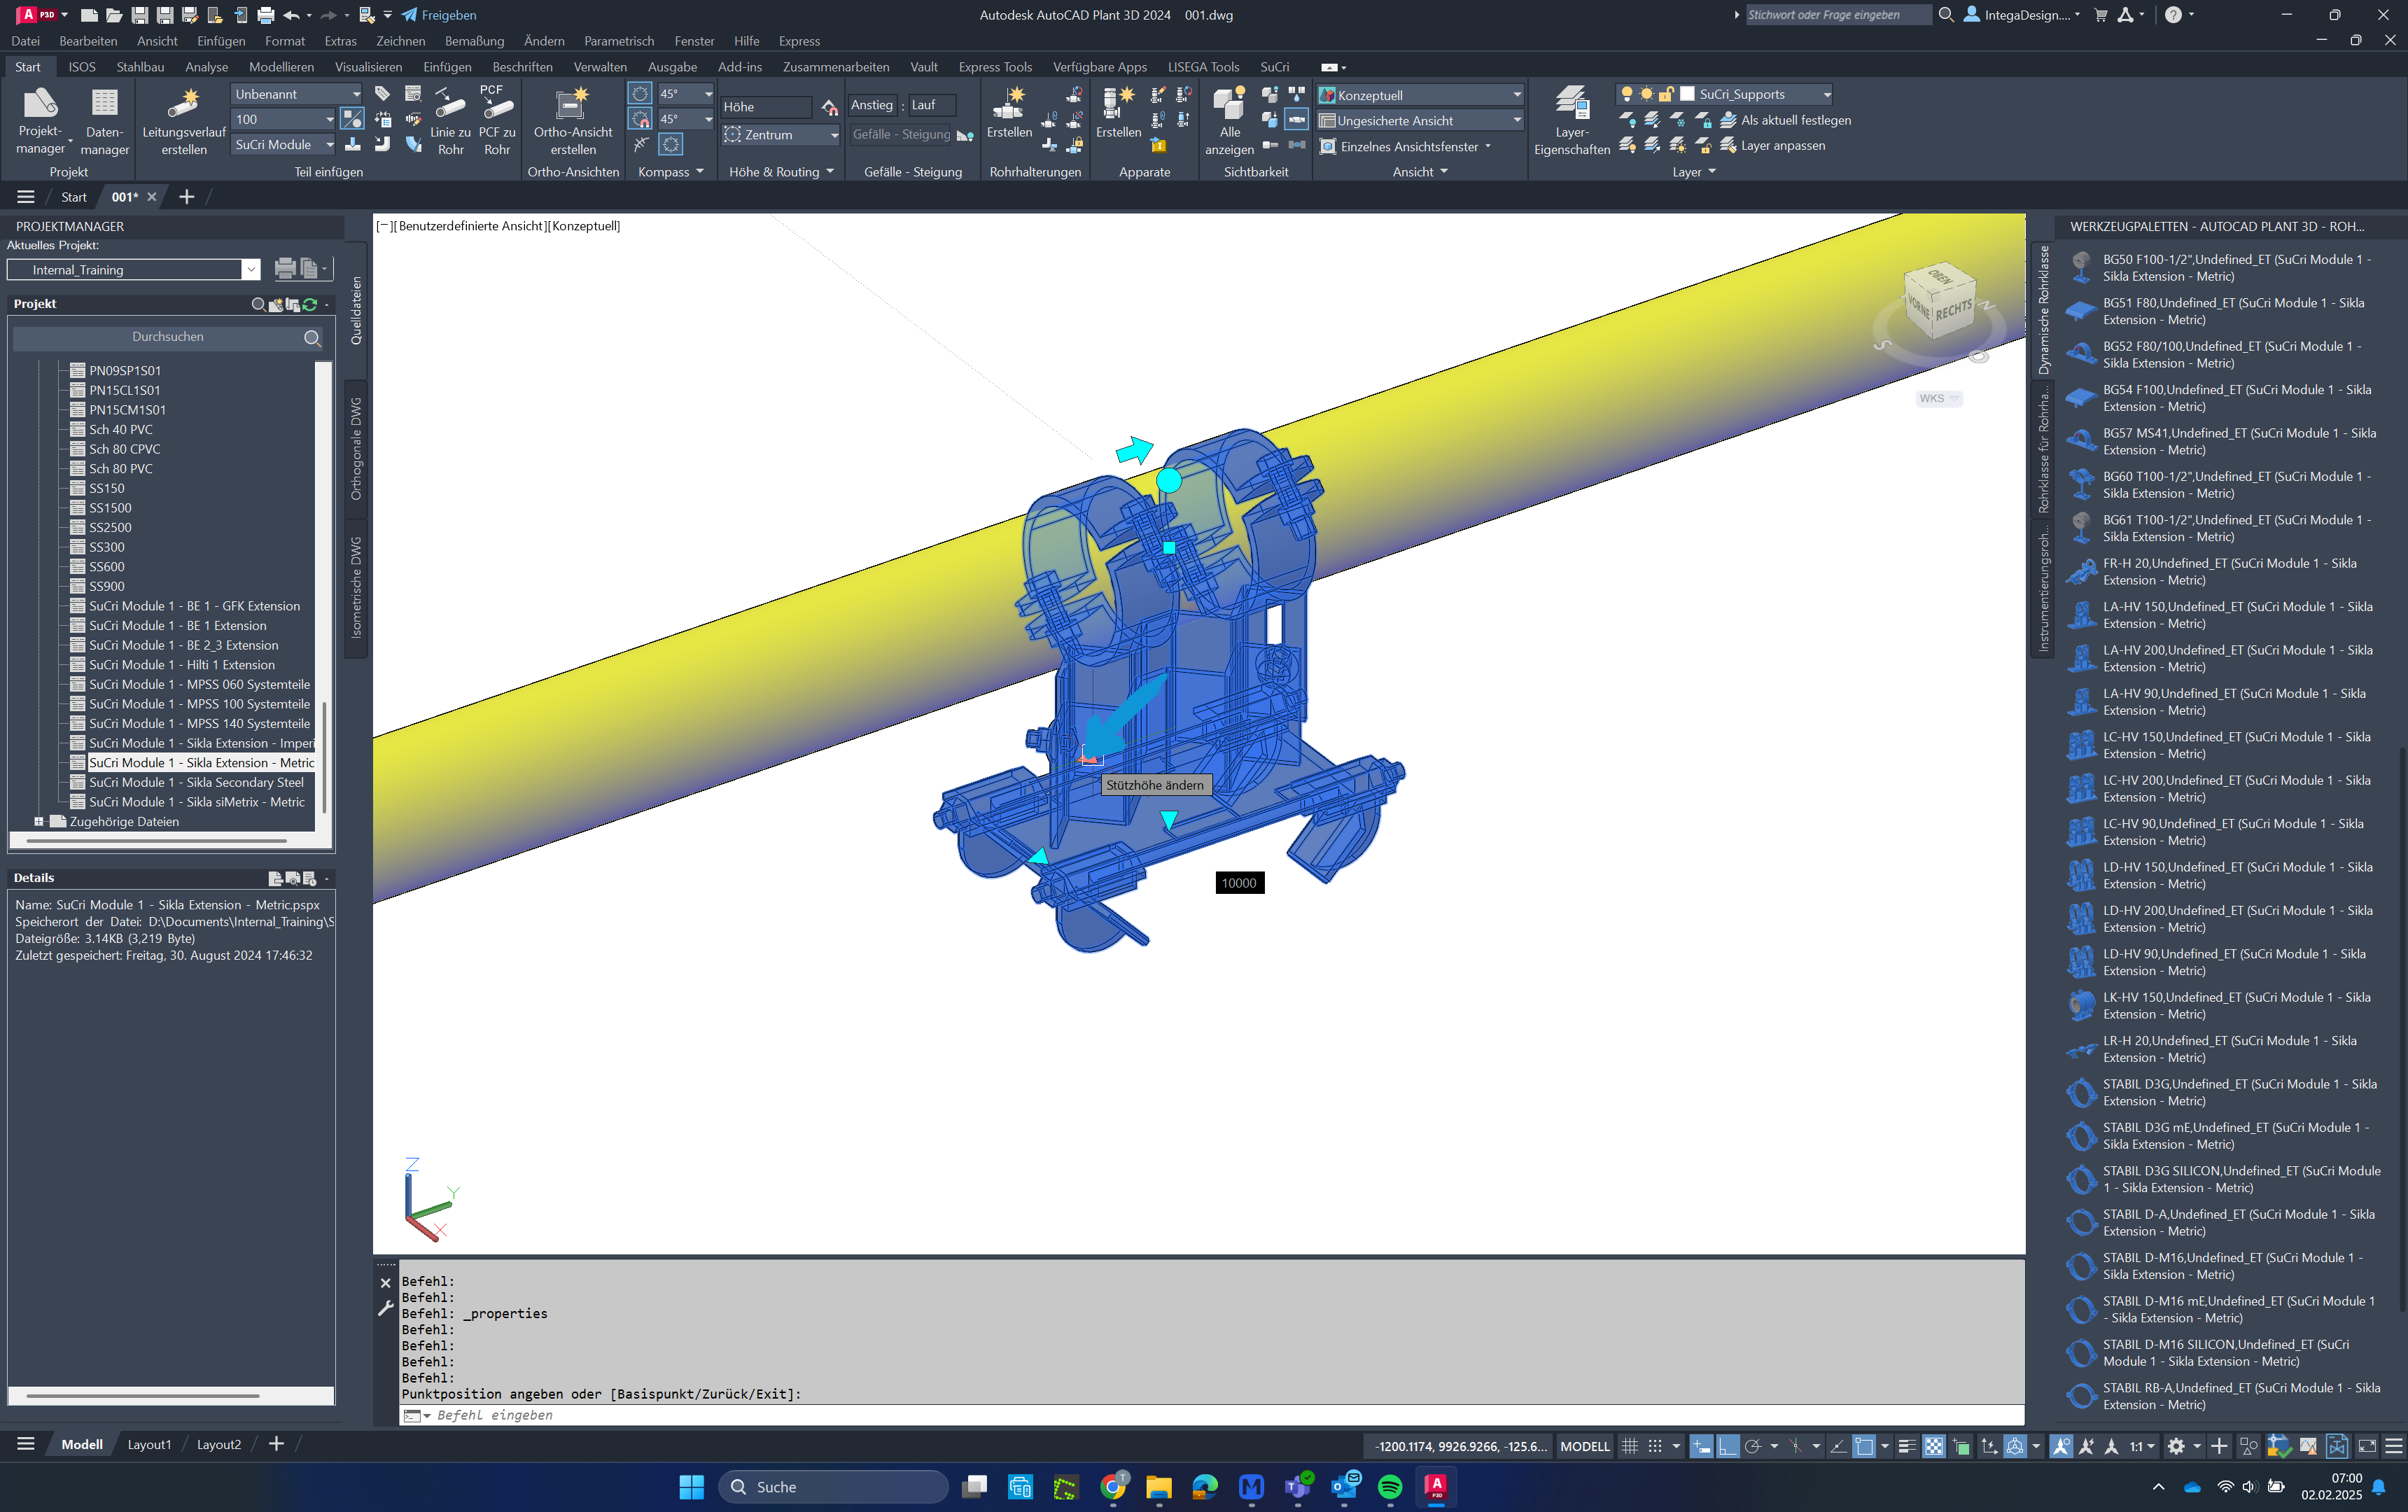
Step 7: Final Adjustment
The clamp system has now been moved off-center, allowing precise adjustment to an offset steel structure.