The 'Automatic Drawings' function in SuCri enables efficient creation of multiple drawings based on an ortho template.
Video Tutorial
tbc
Plant3D Command
SUCRI4PLANTORTHOCREATEMULTIPLESU
Step-by-Step Guide
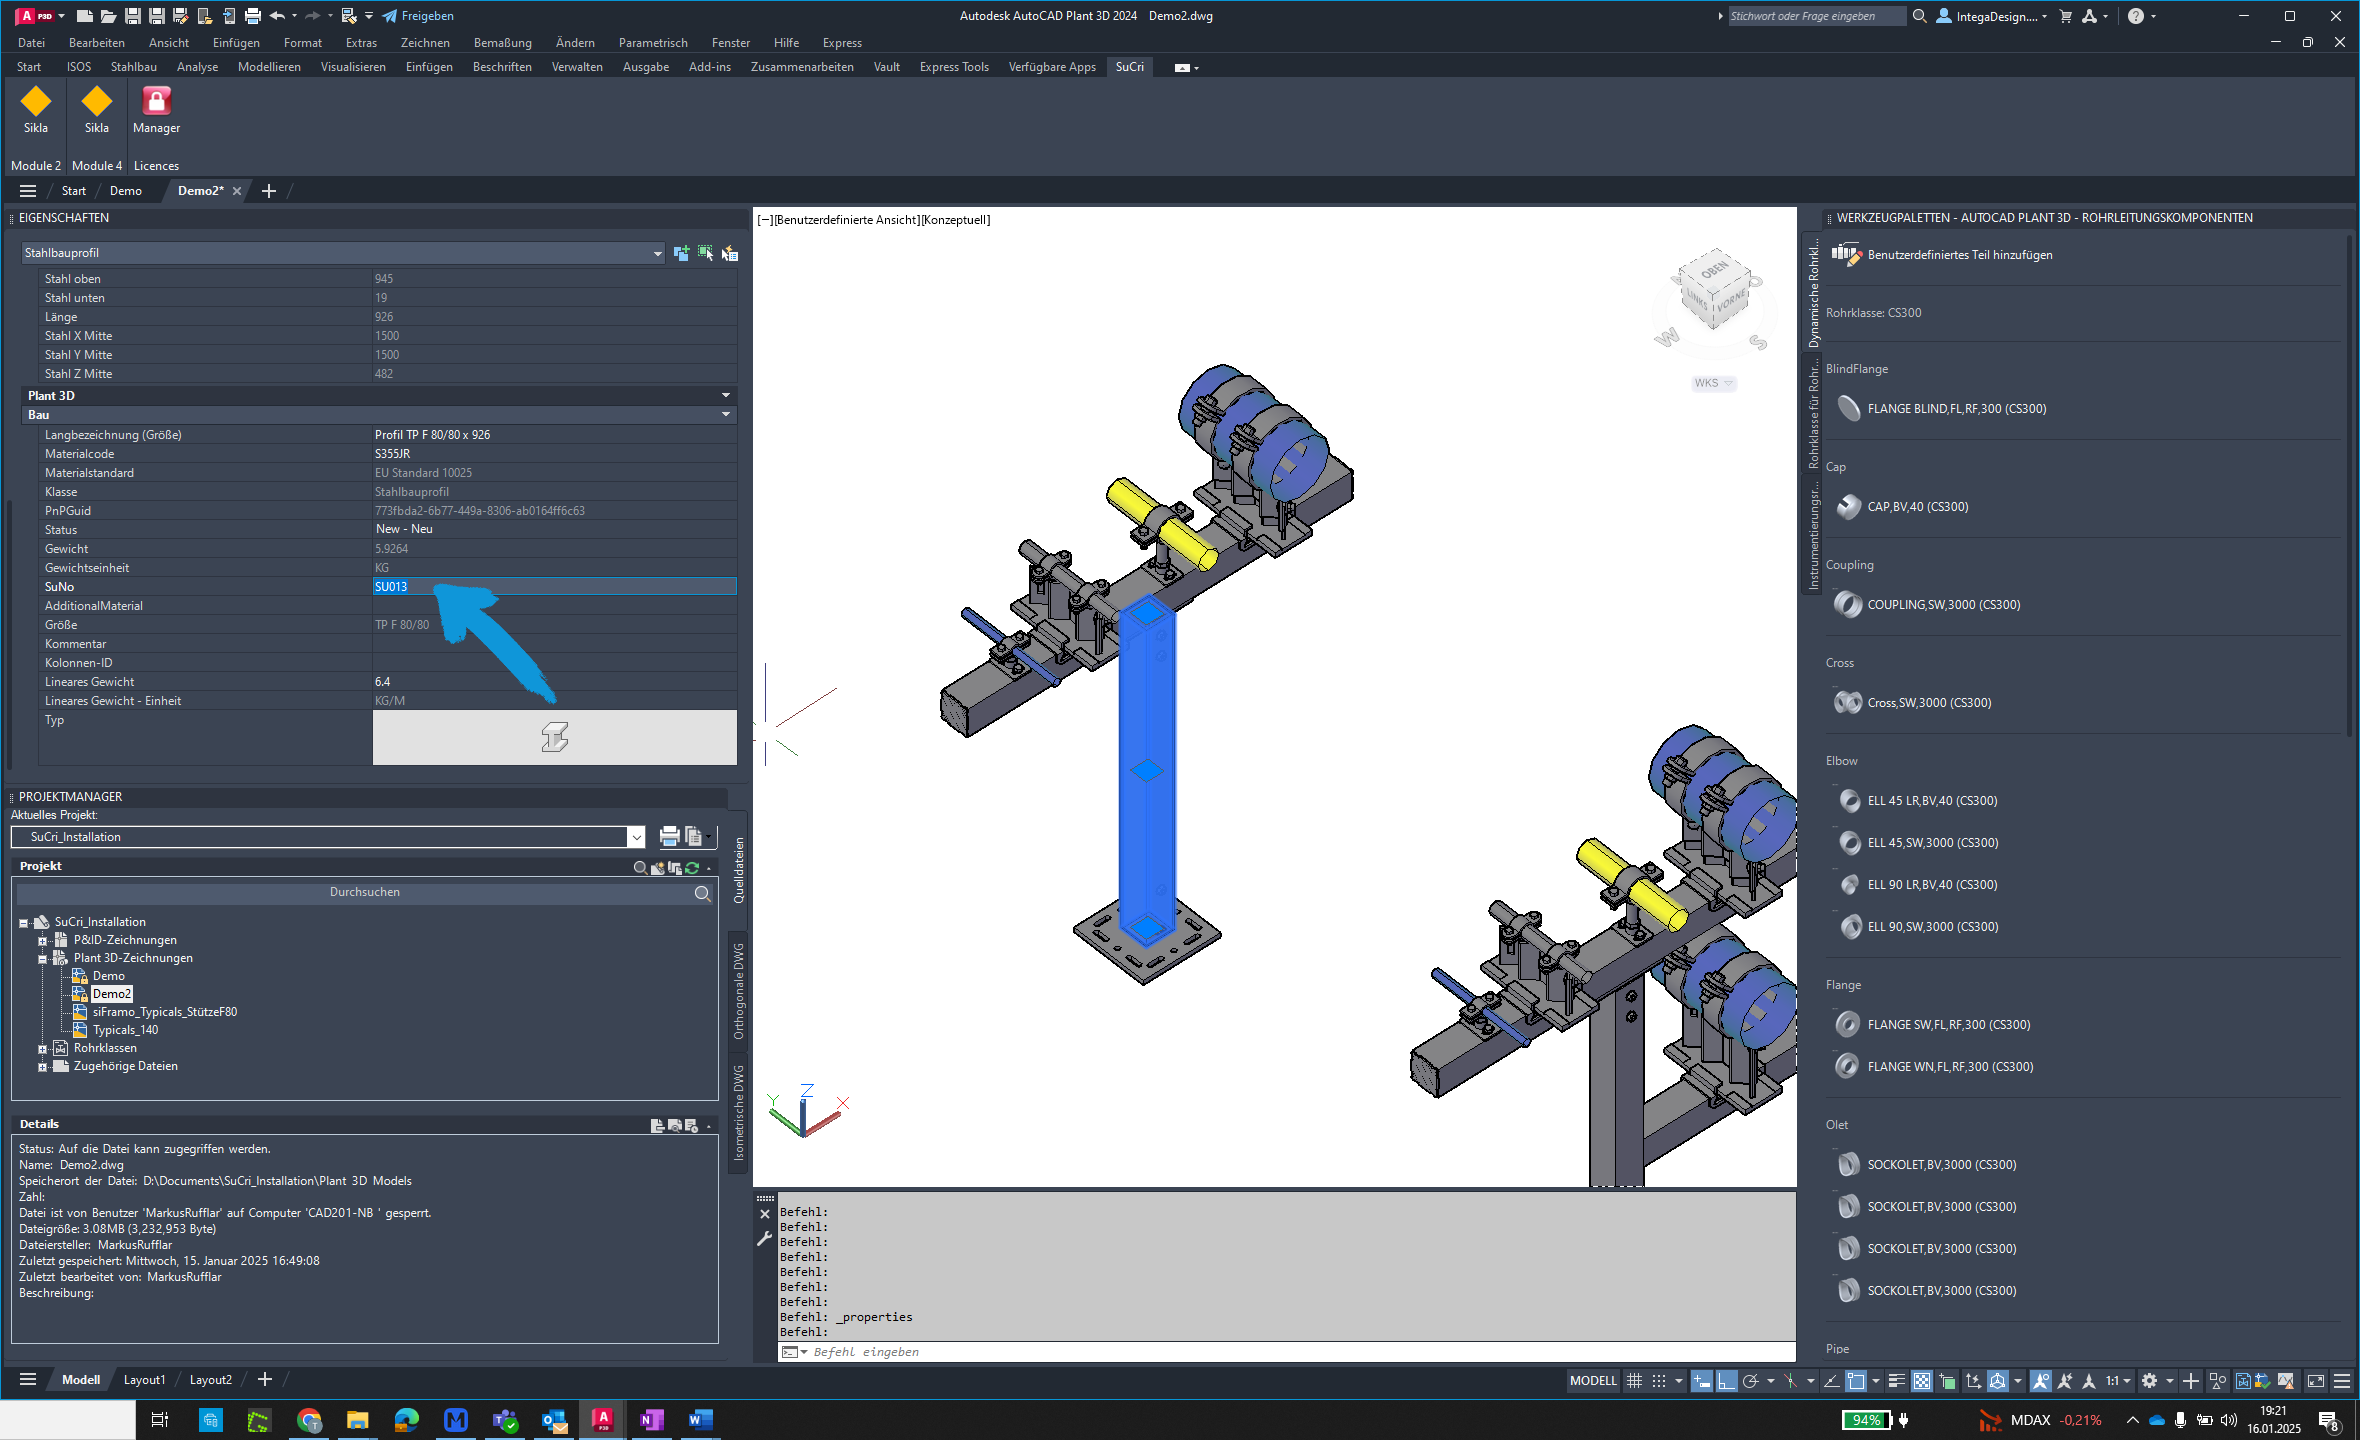
Step 1: Check components
Before creating the drawing, check if all components belong to an SU. Use the selection command for this.
Step 2: Open Module 4 dialog
Open the SuCri Module 4 dialog to start the function.
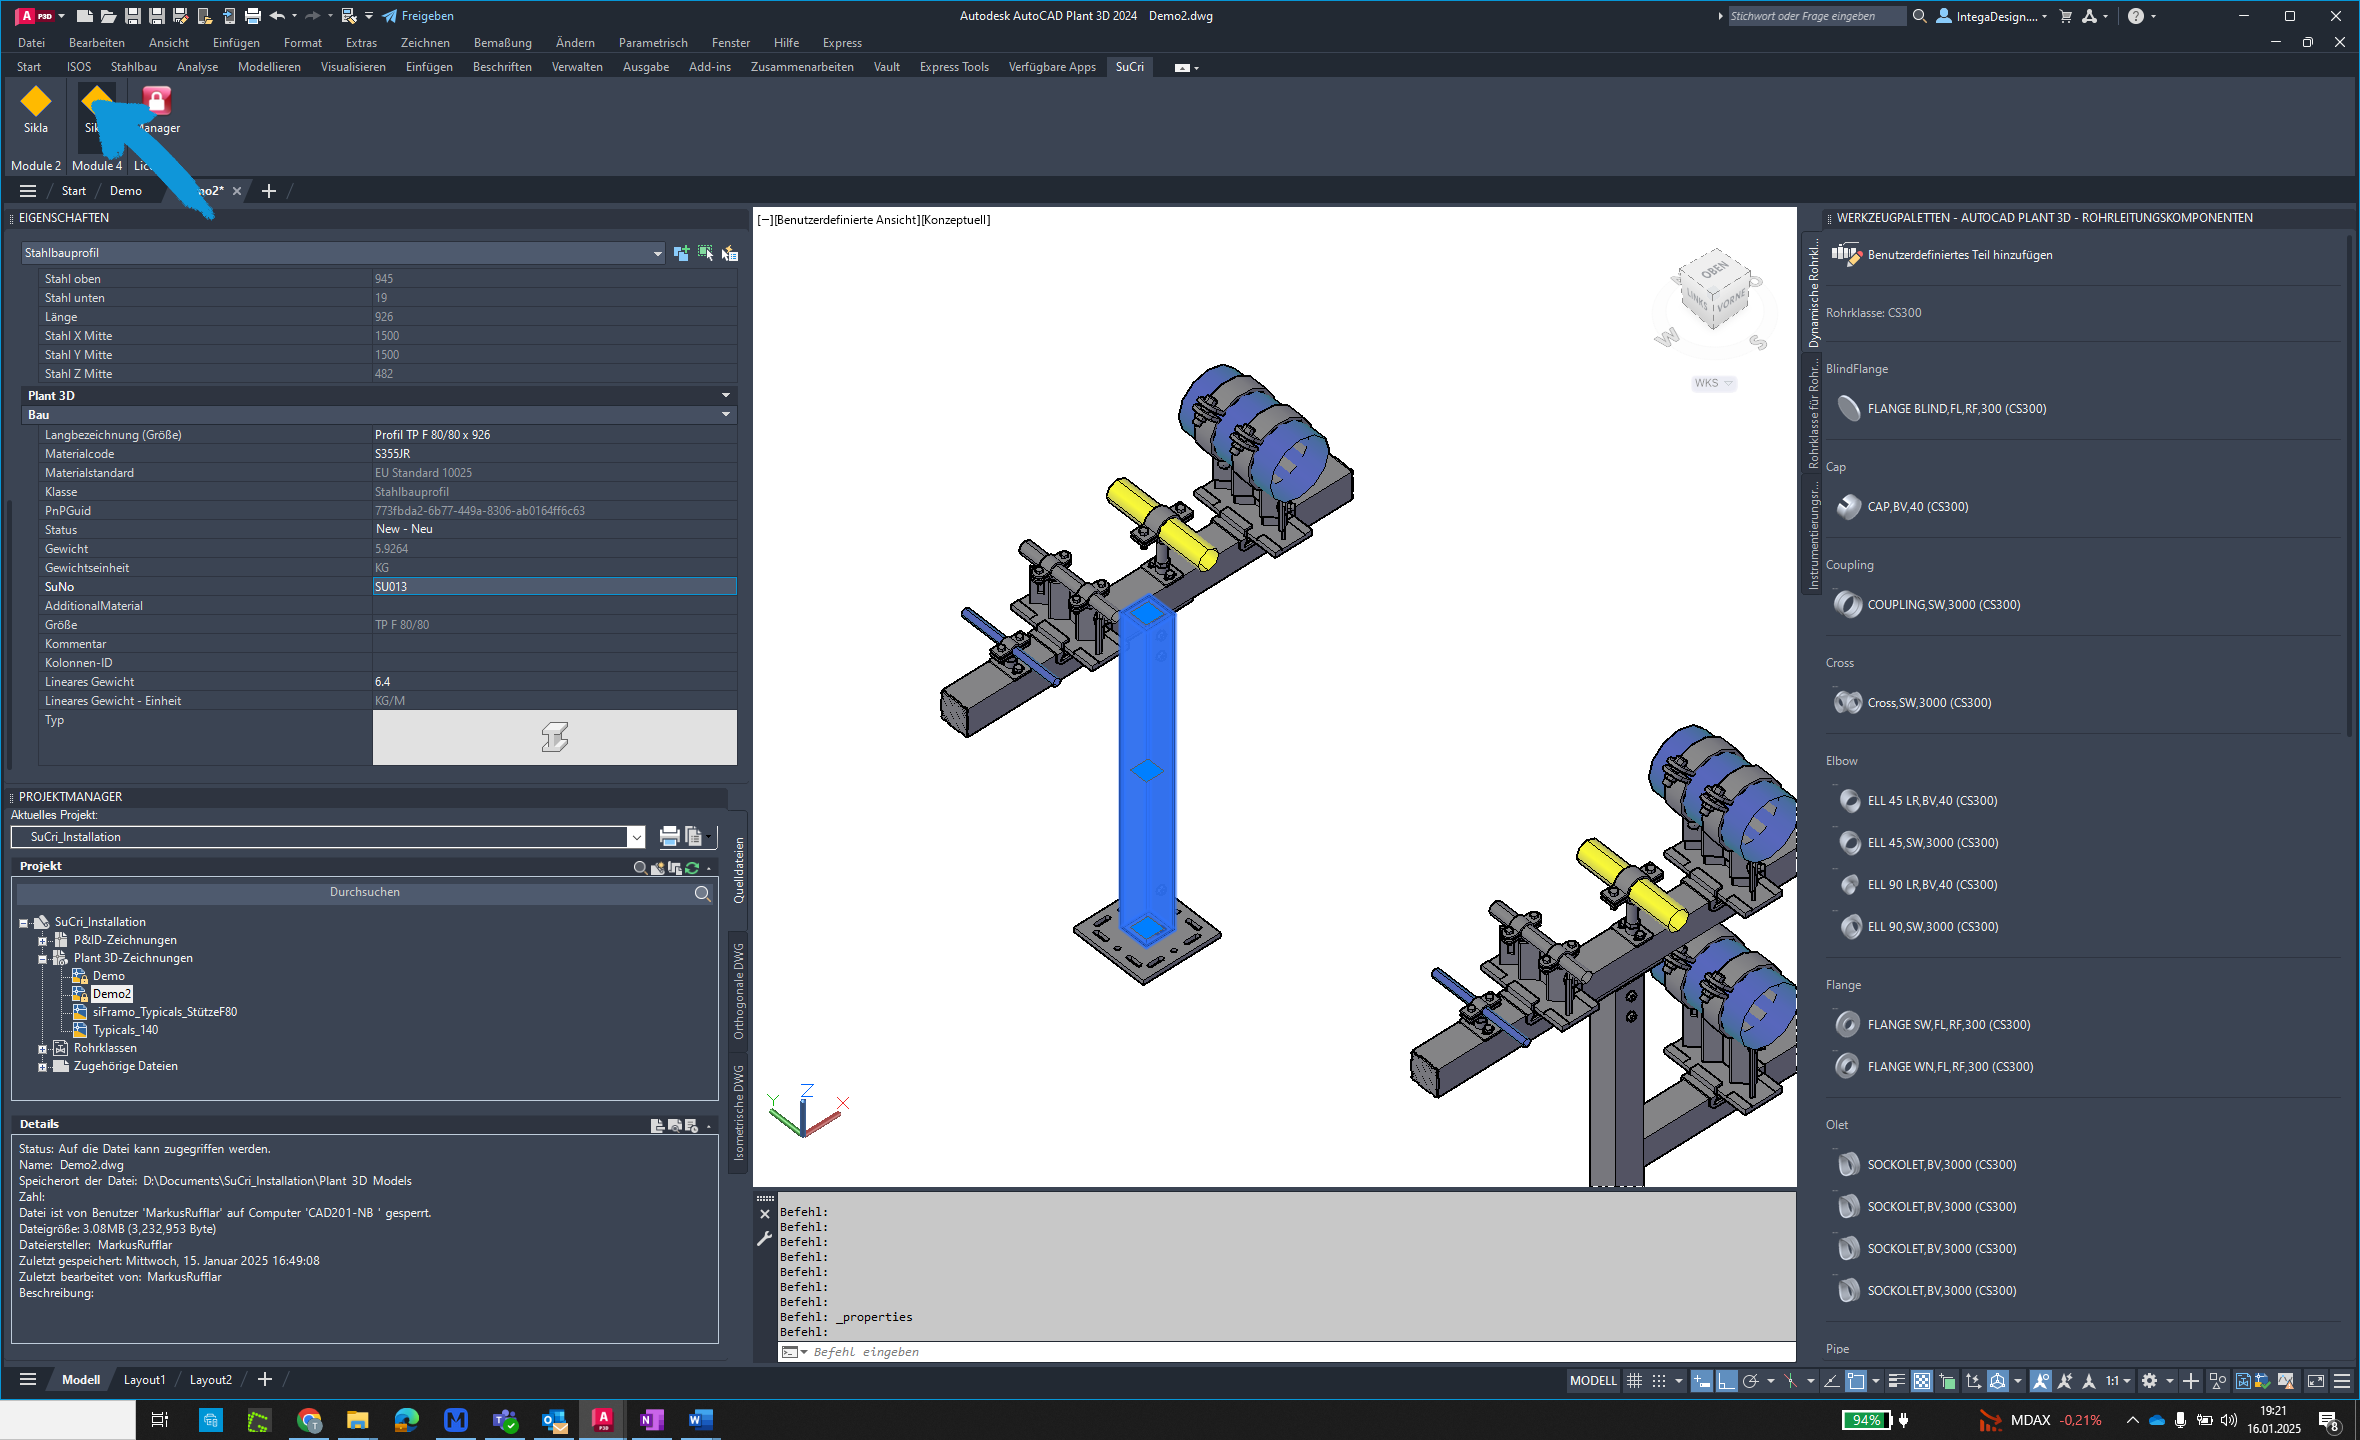
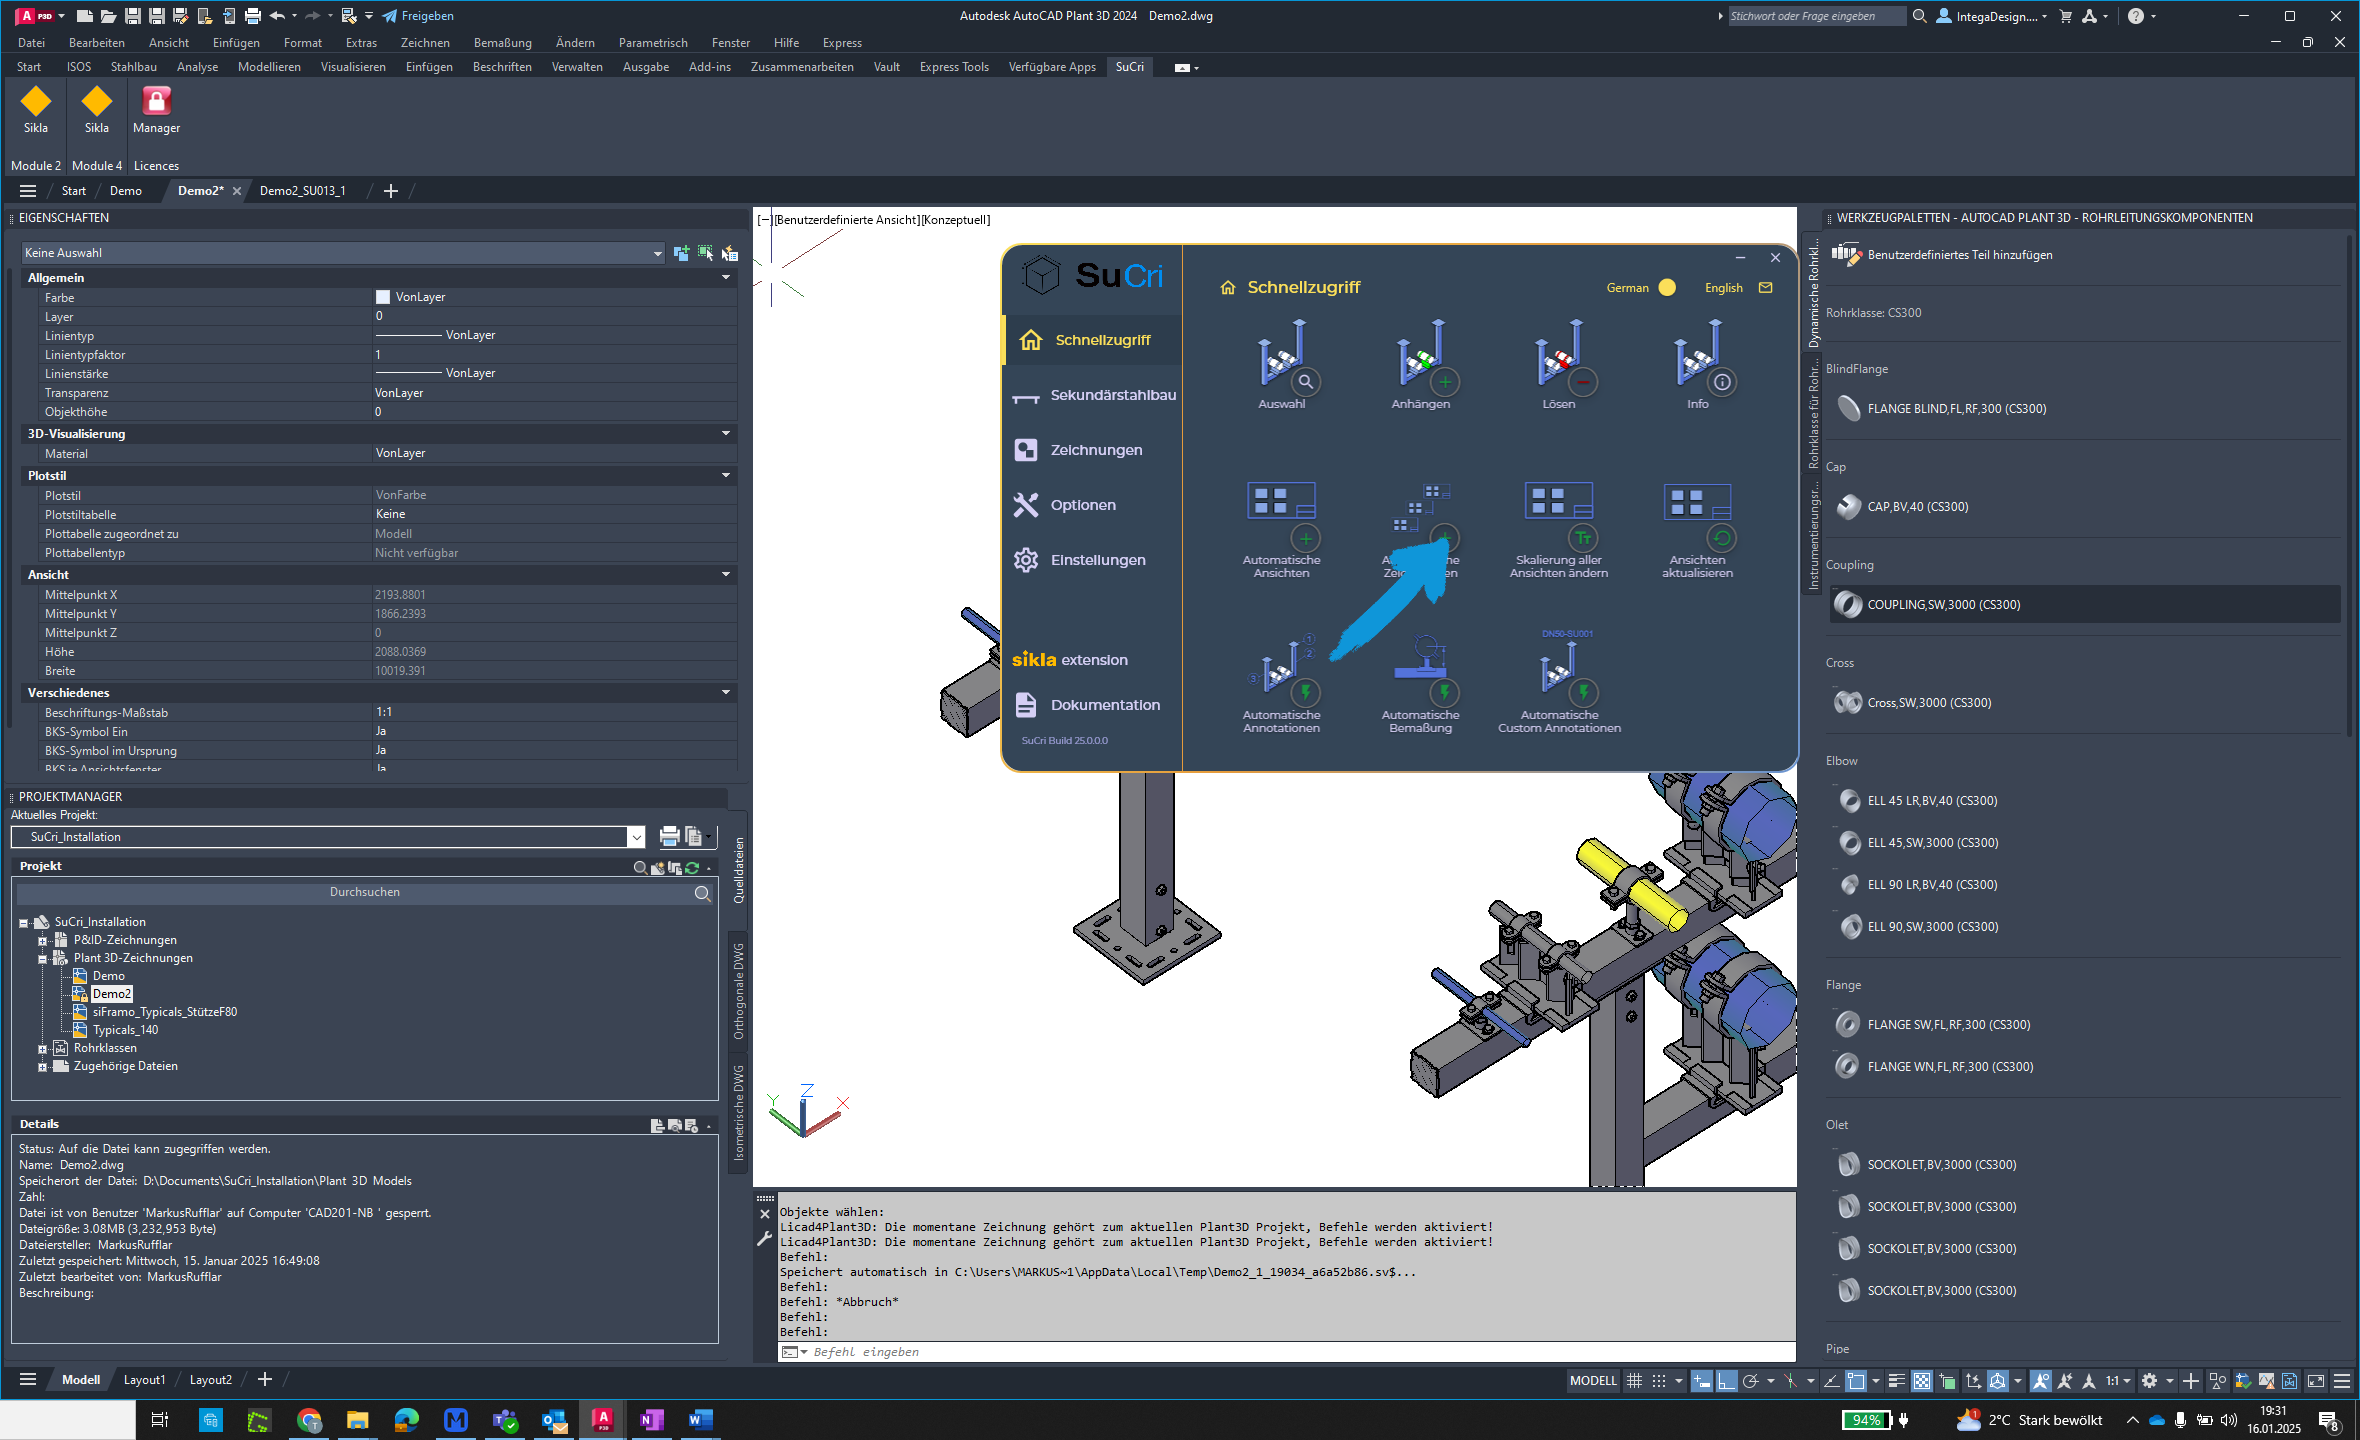
Step 3: Click the button
Locate the button and click it.
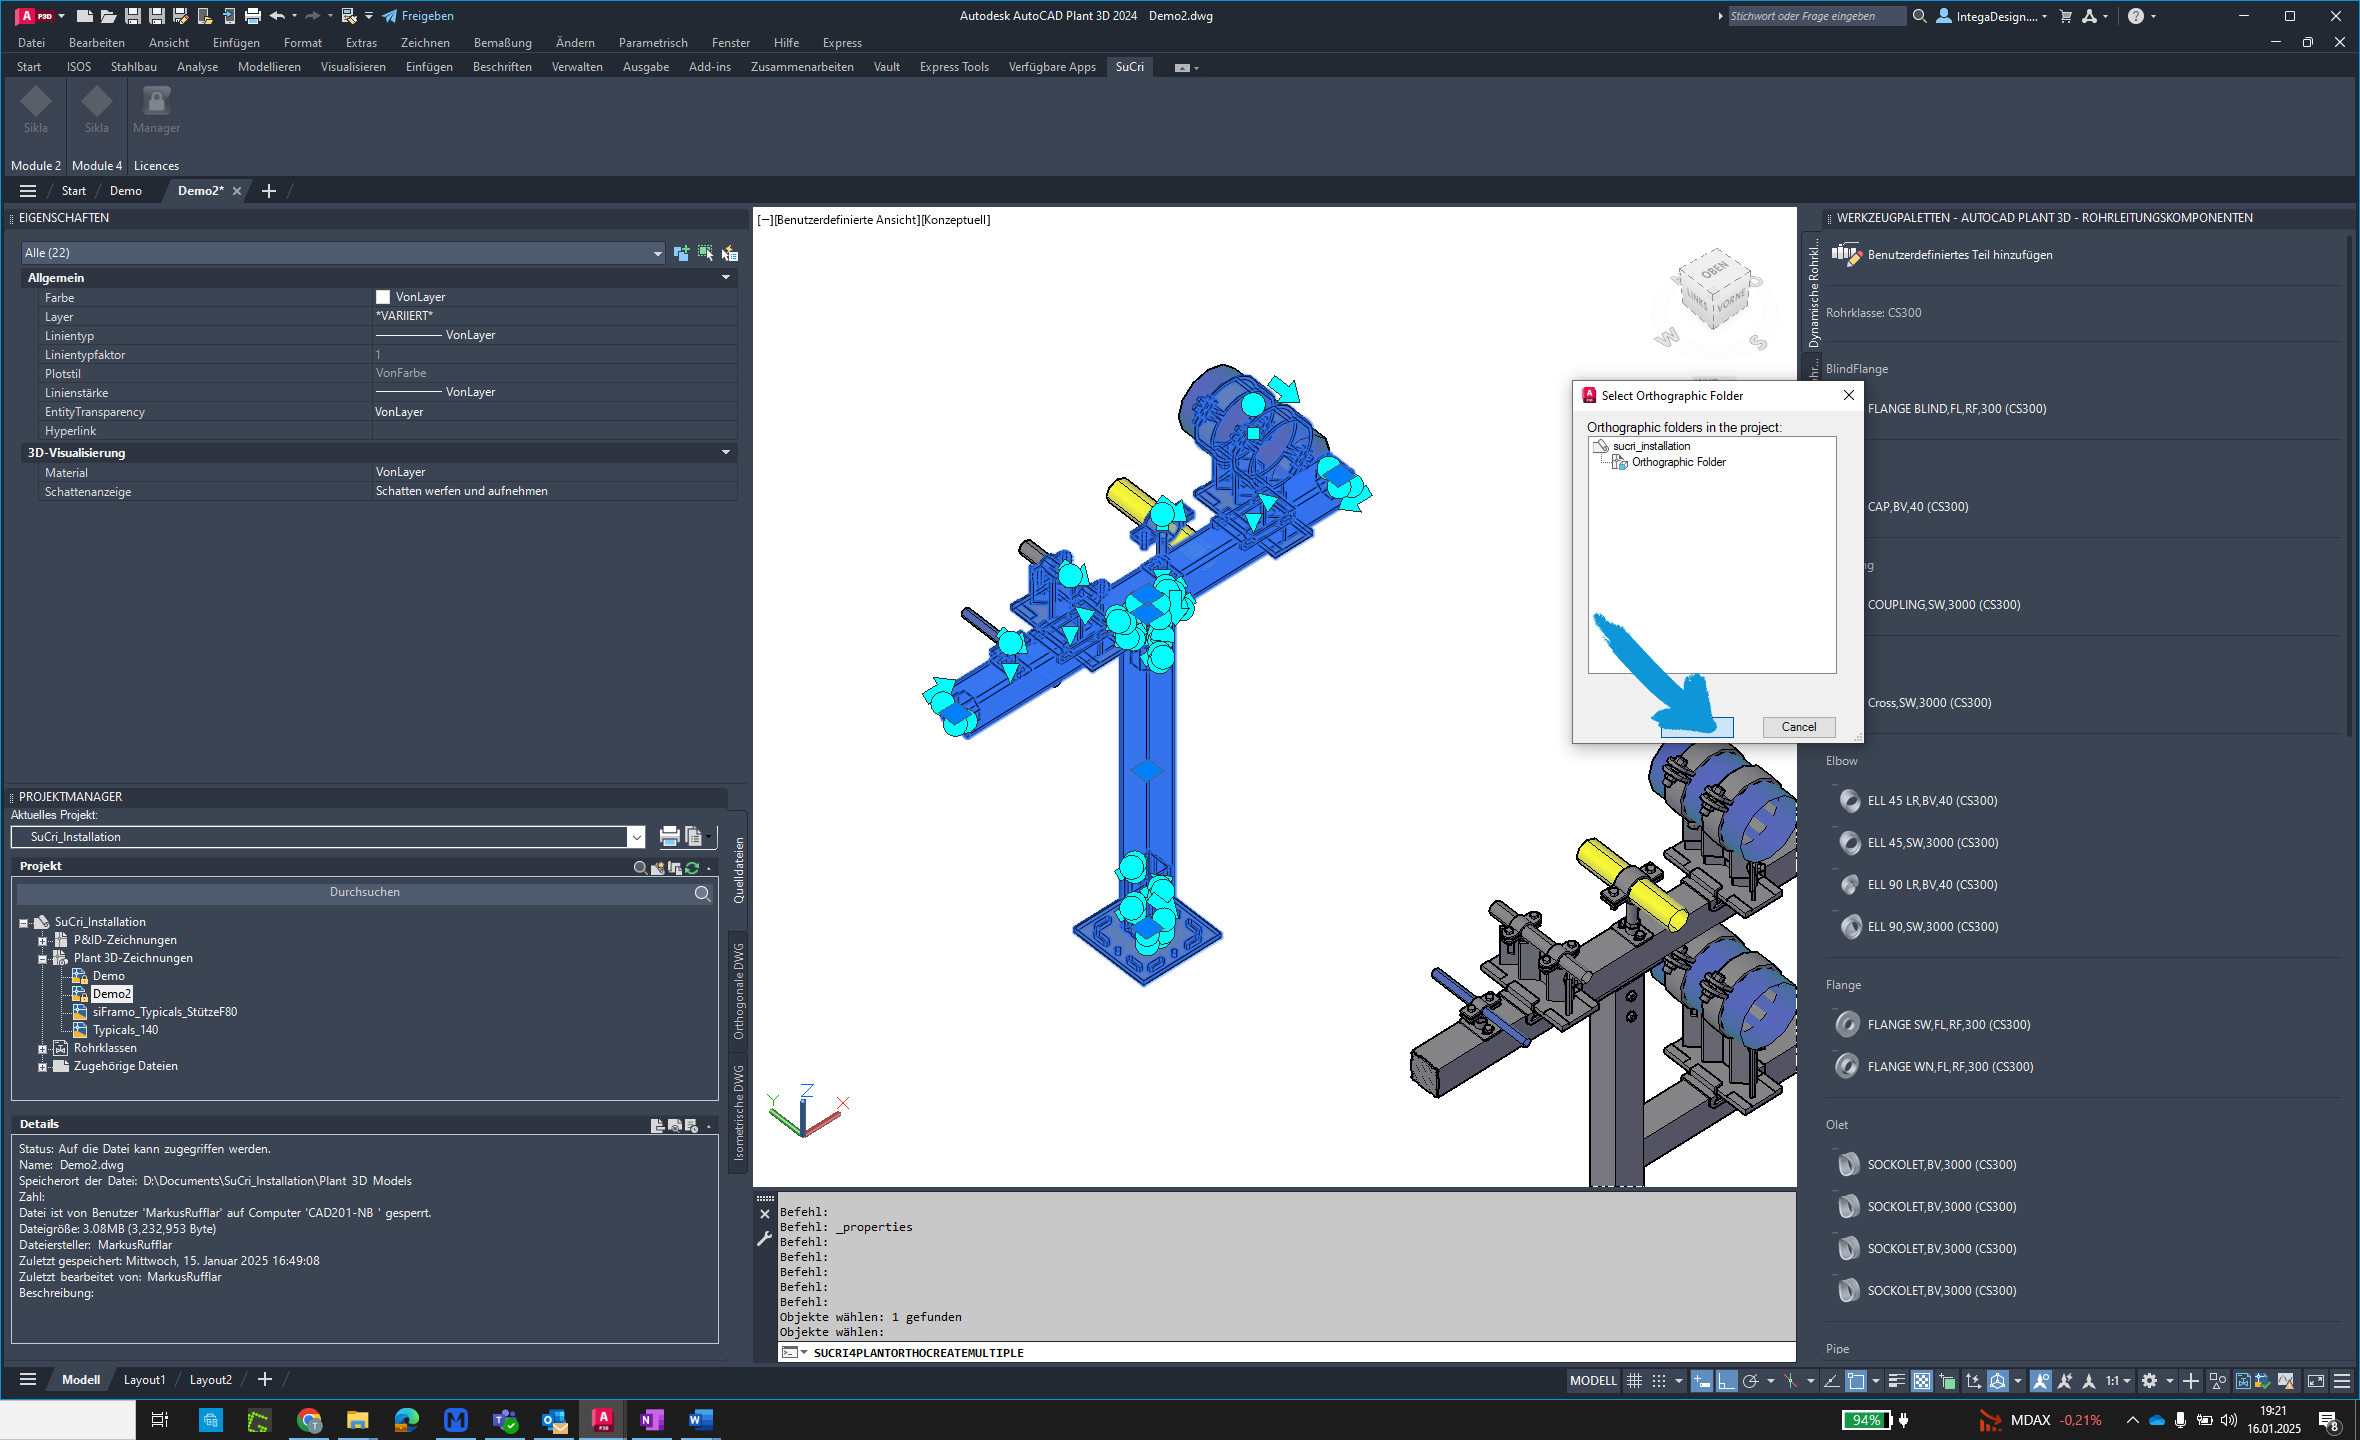
Step 4: Confirm template
Click "OK" to use the ortho template from the project configuration. Alternatively, select a folder.
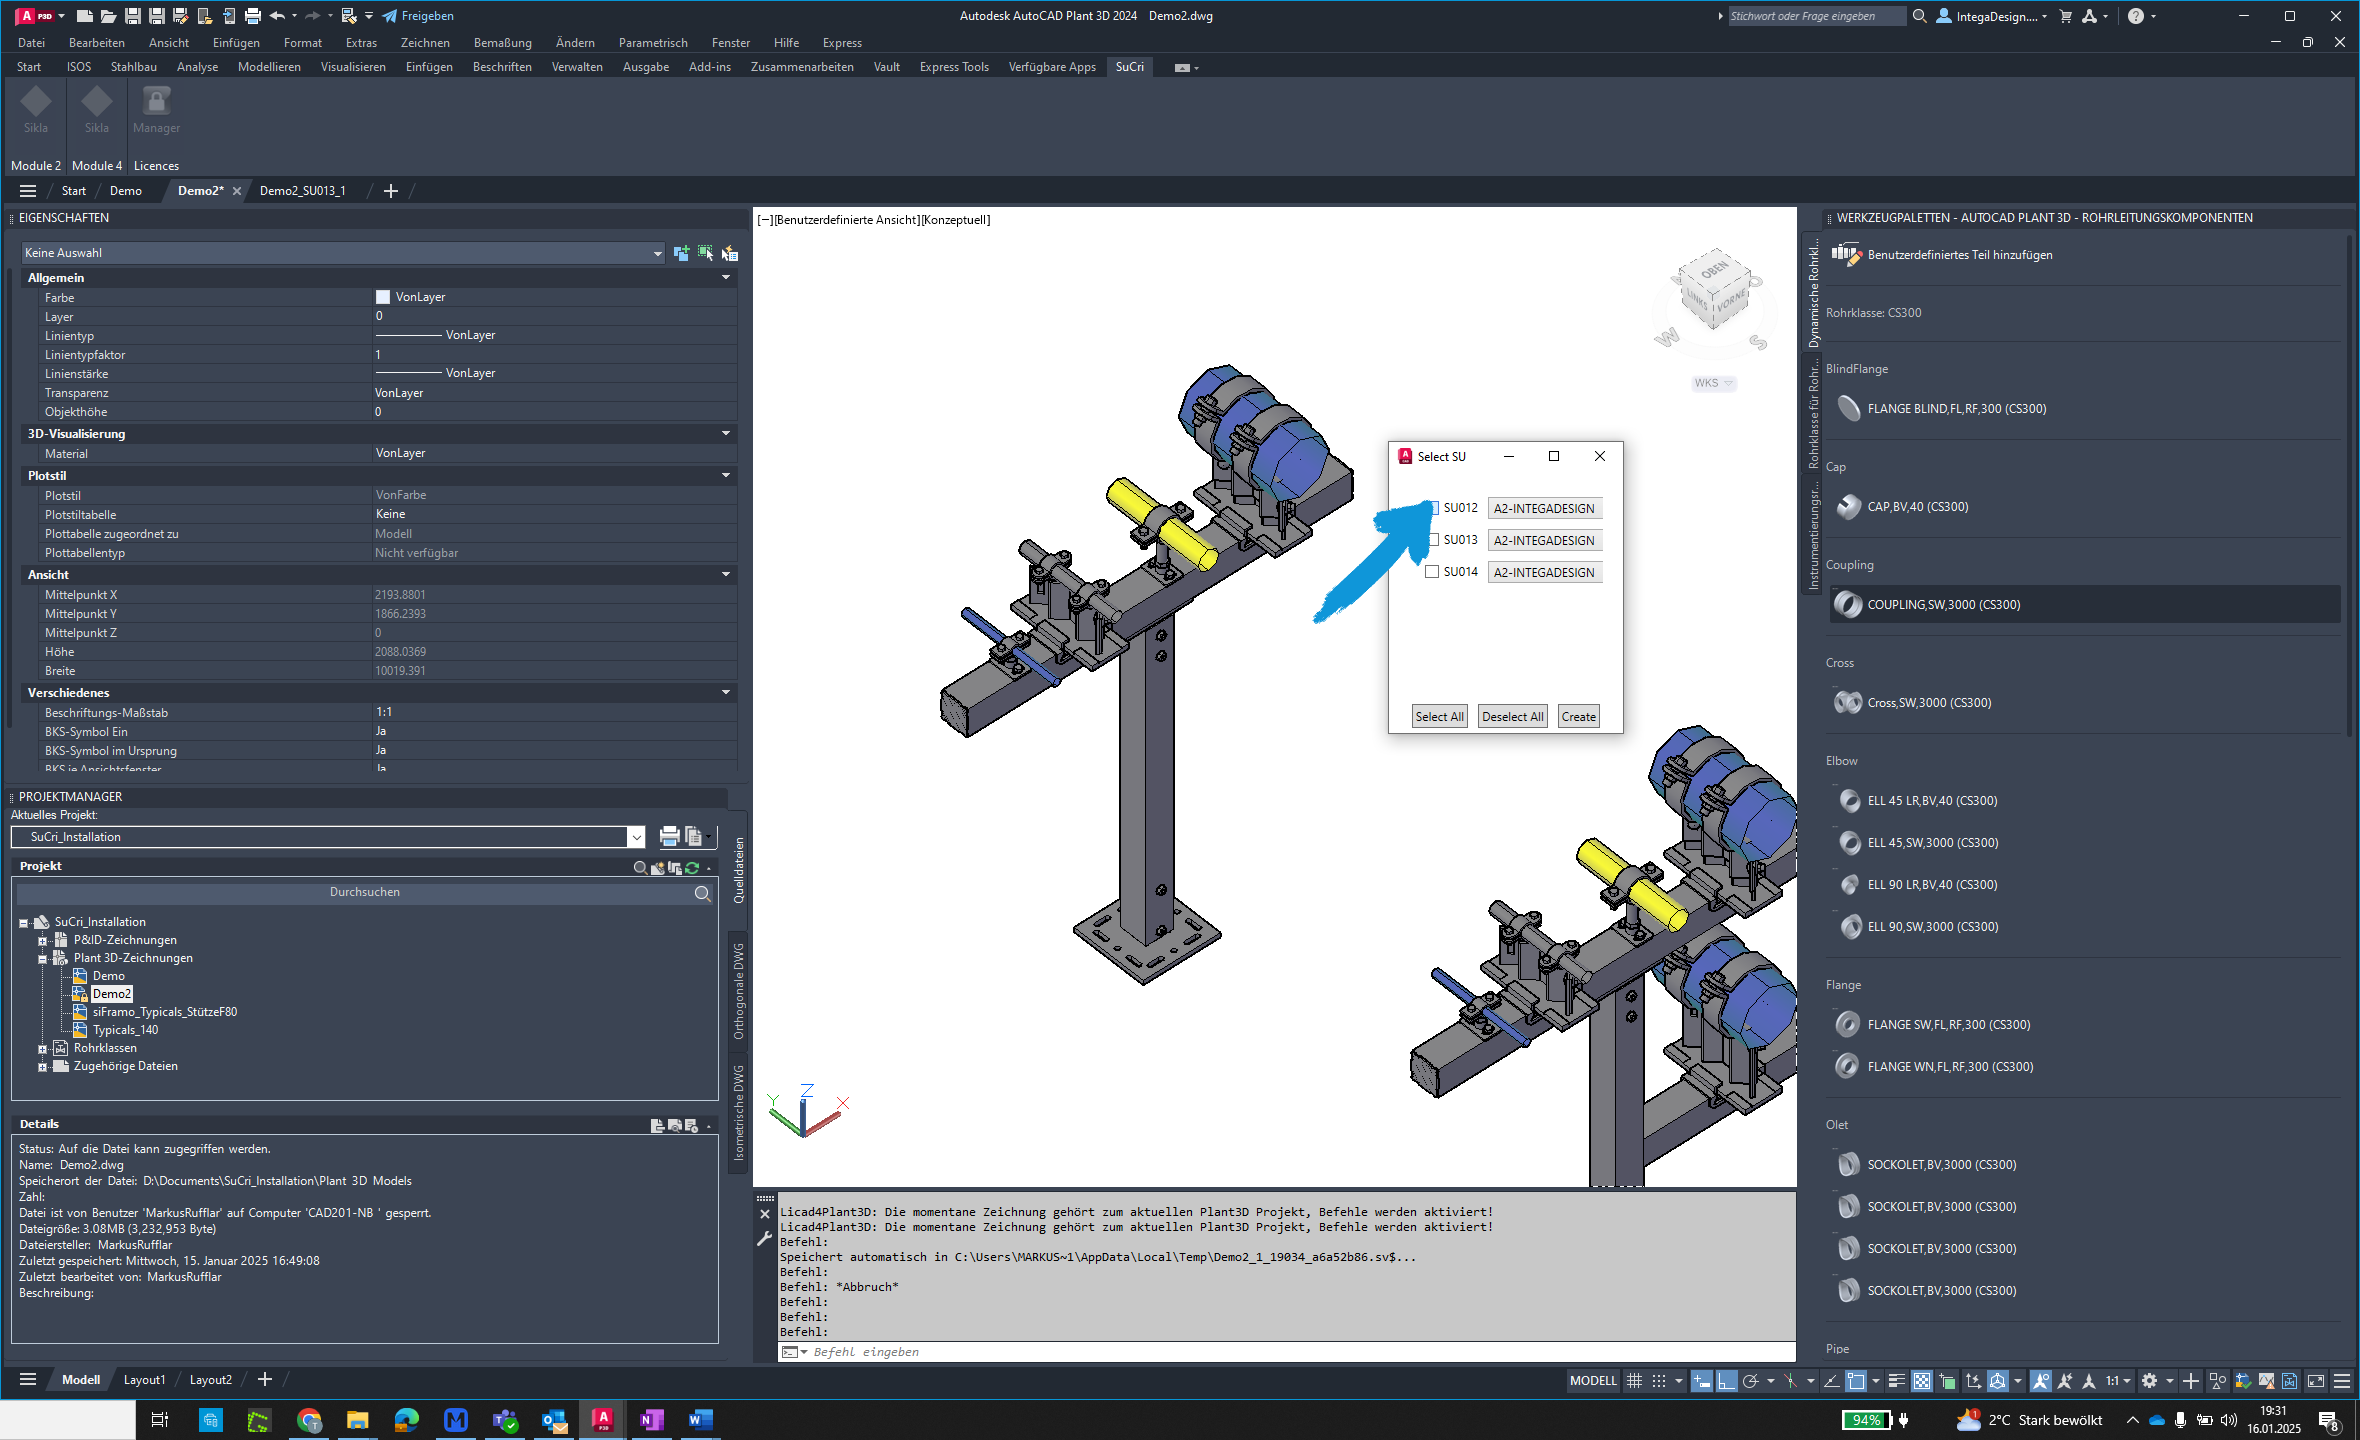
Step 5: Select assemblies
Choose all assemblies you want to derive.
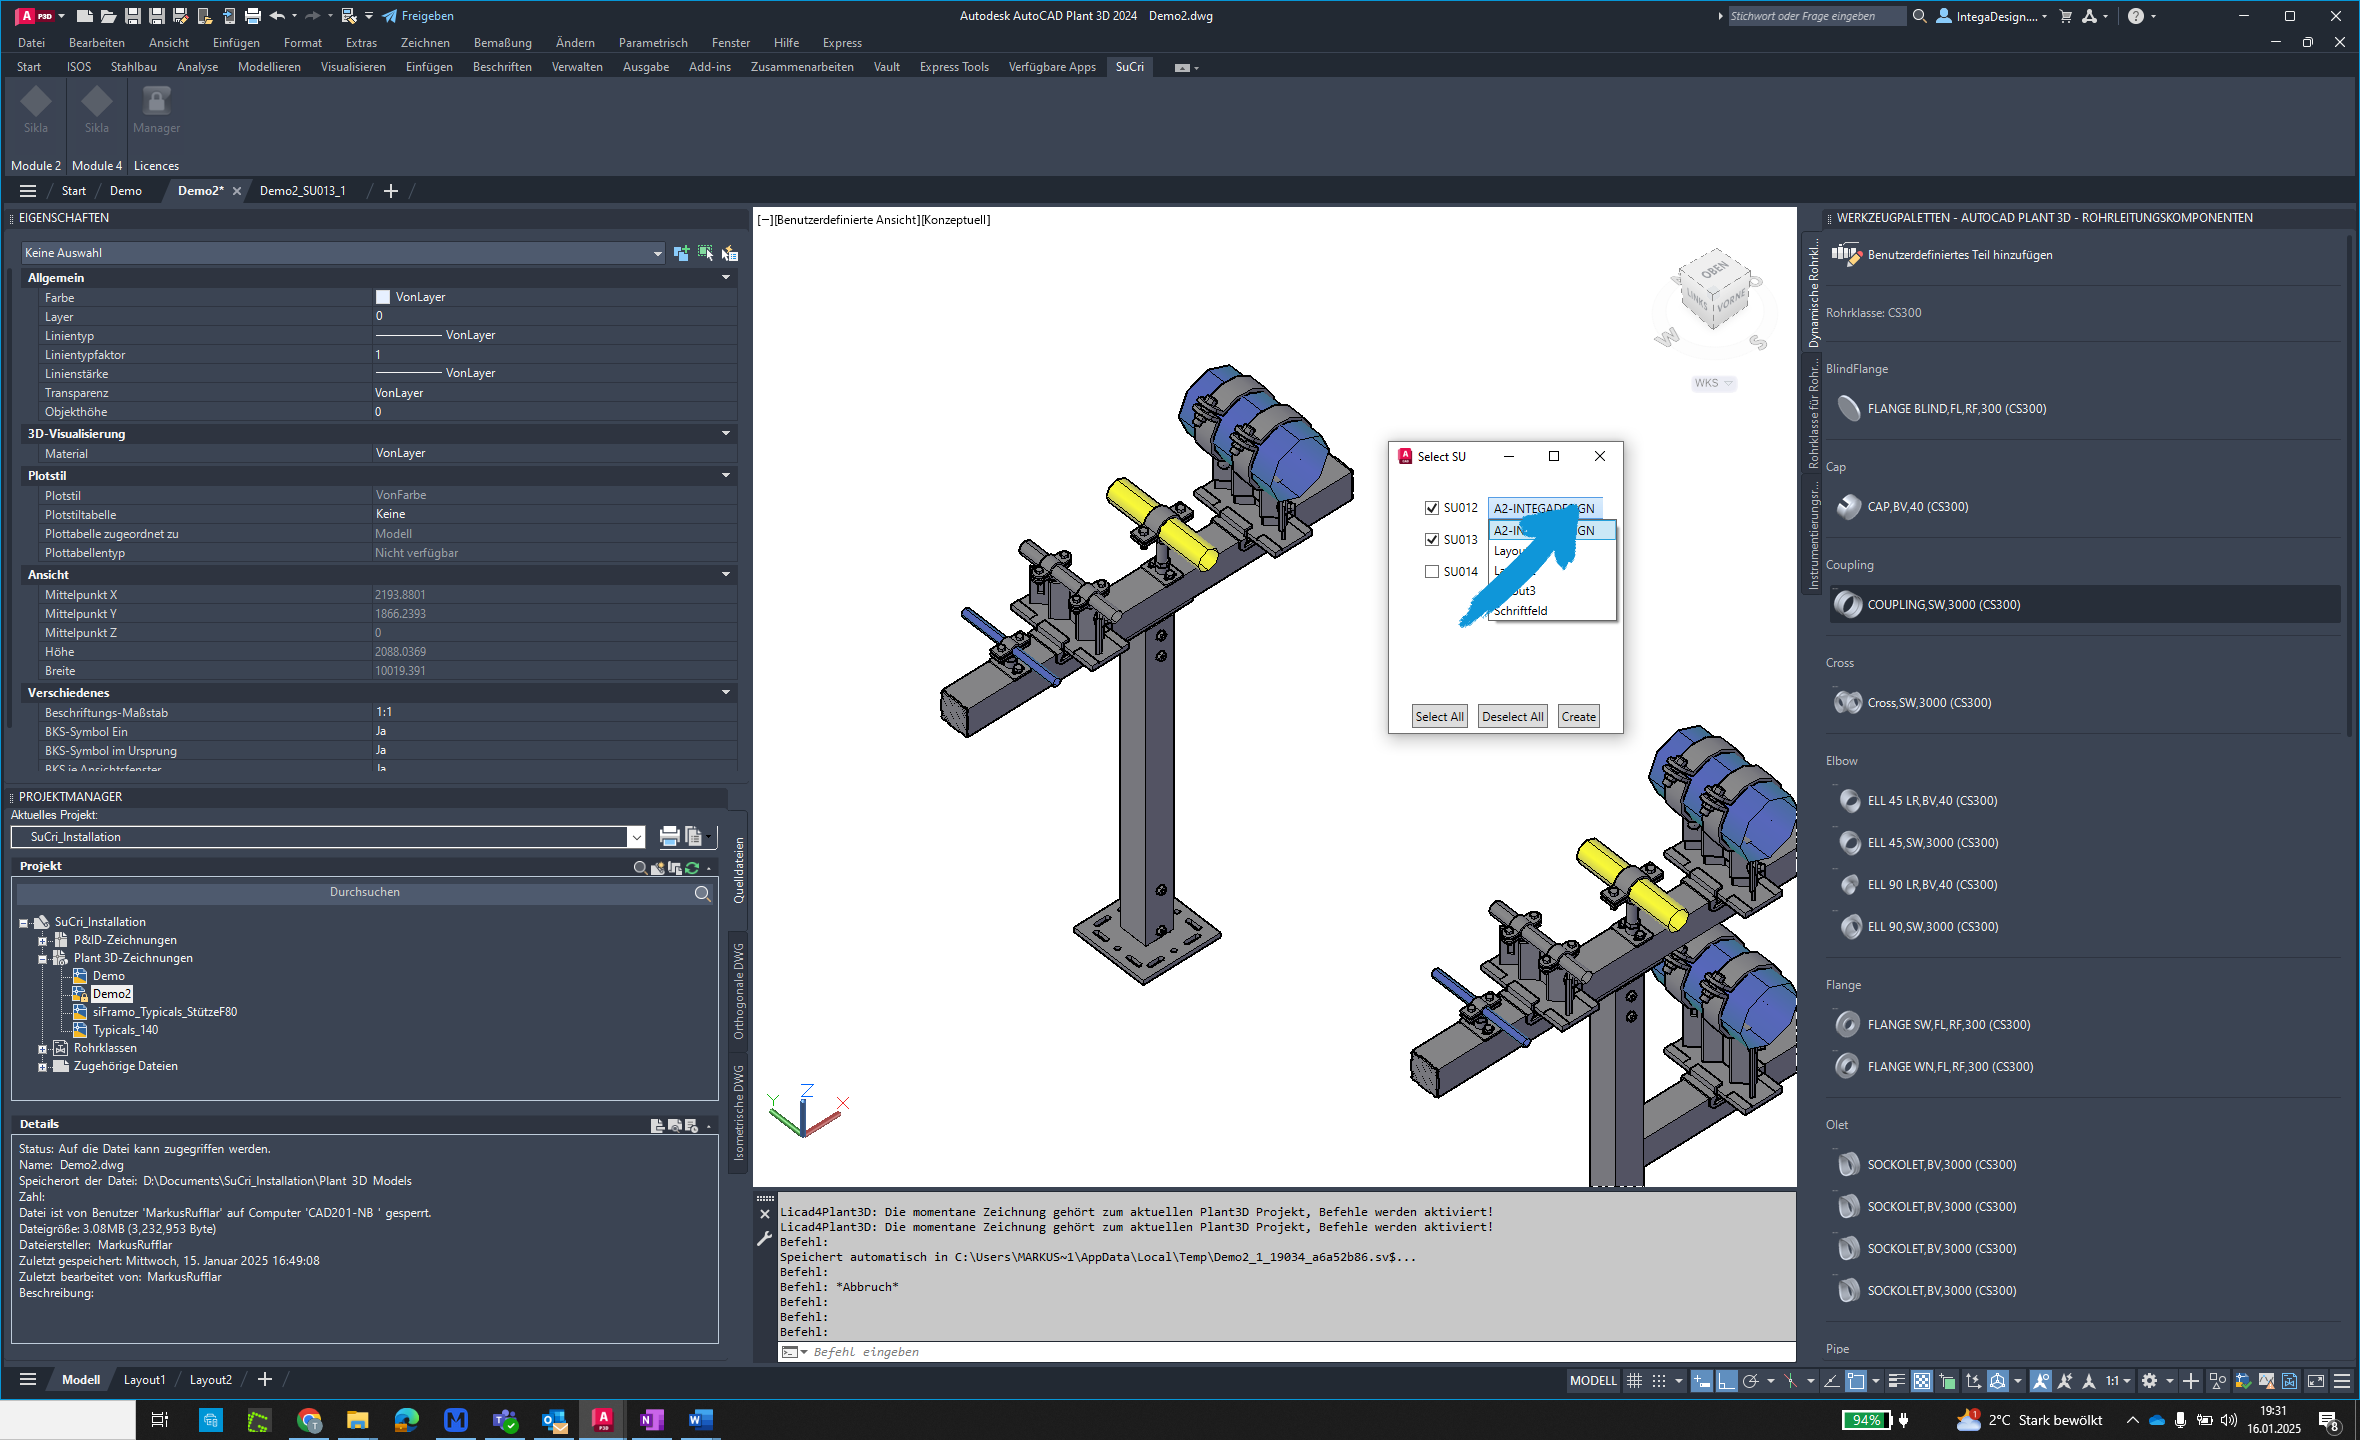
Step 6: Adjust paper area
If necessary, click the dropdown menu to use a different paper area for certain drawings.
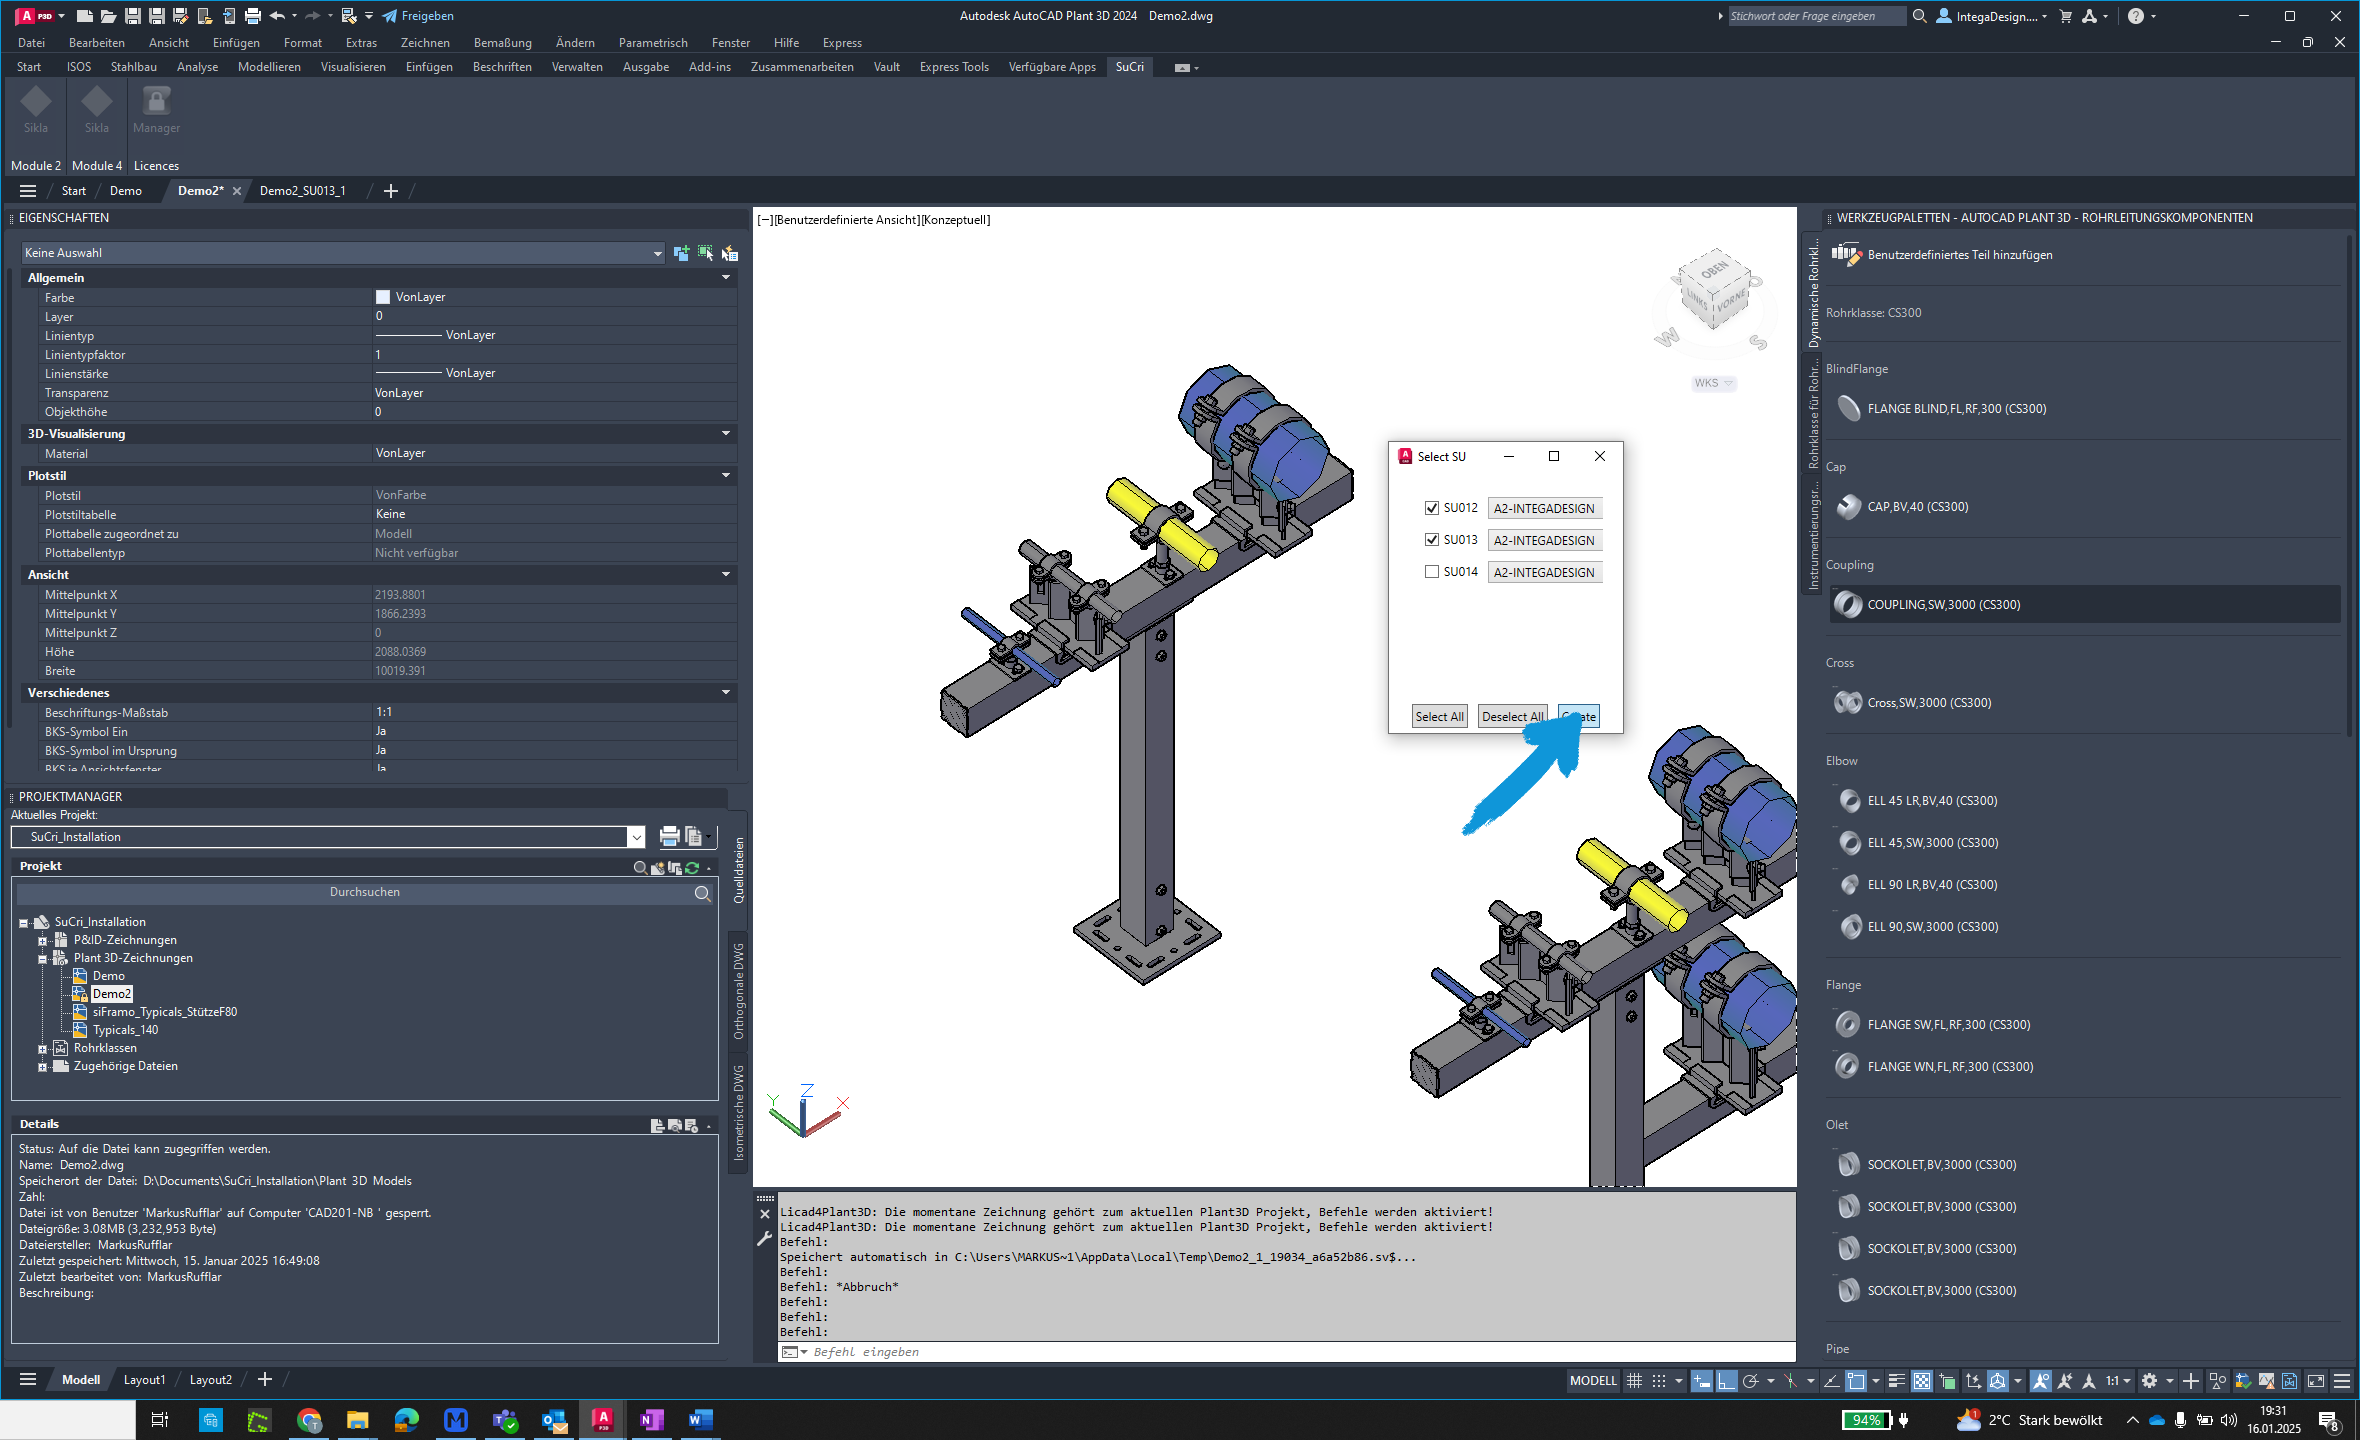
Step 7: Create drawings
Click the button labeled "Create" to generate the drawings.
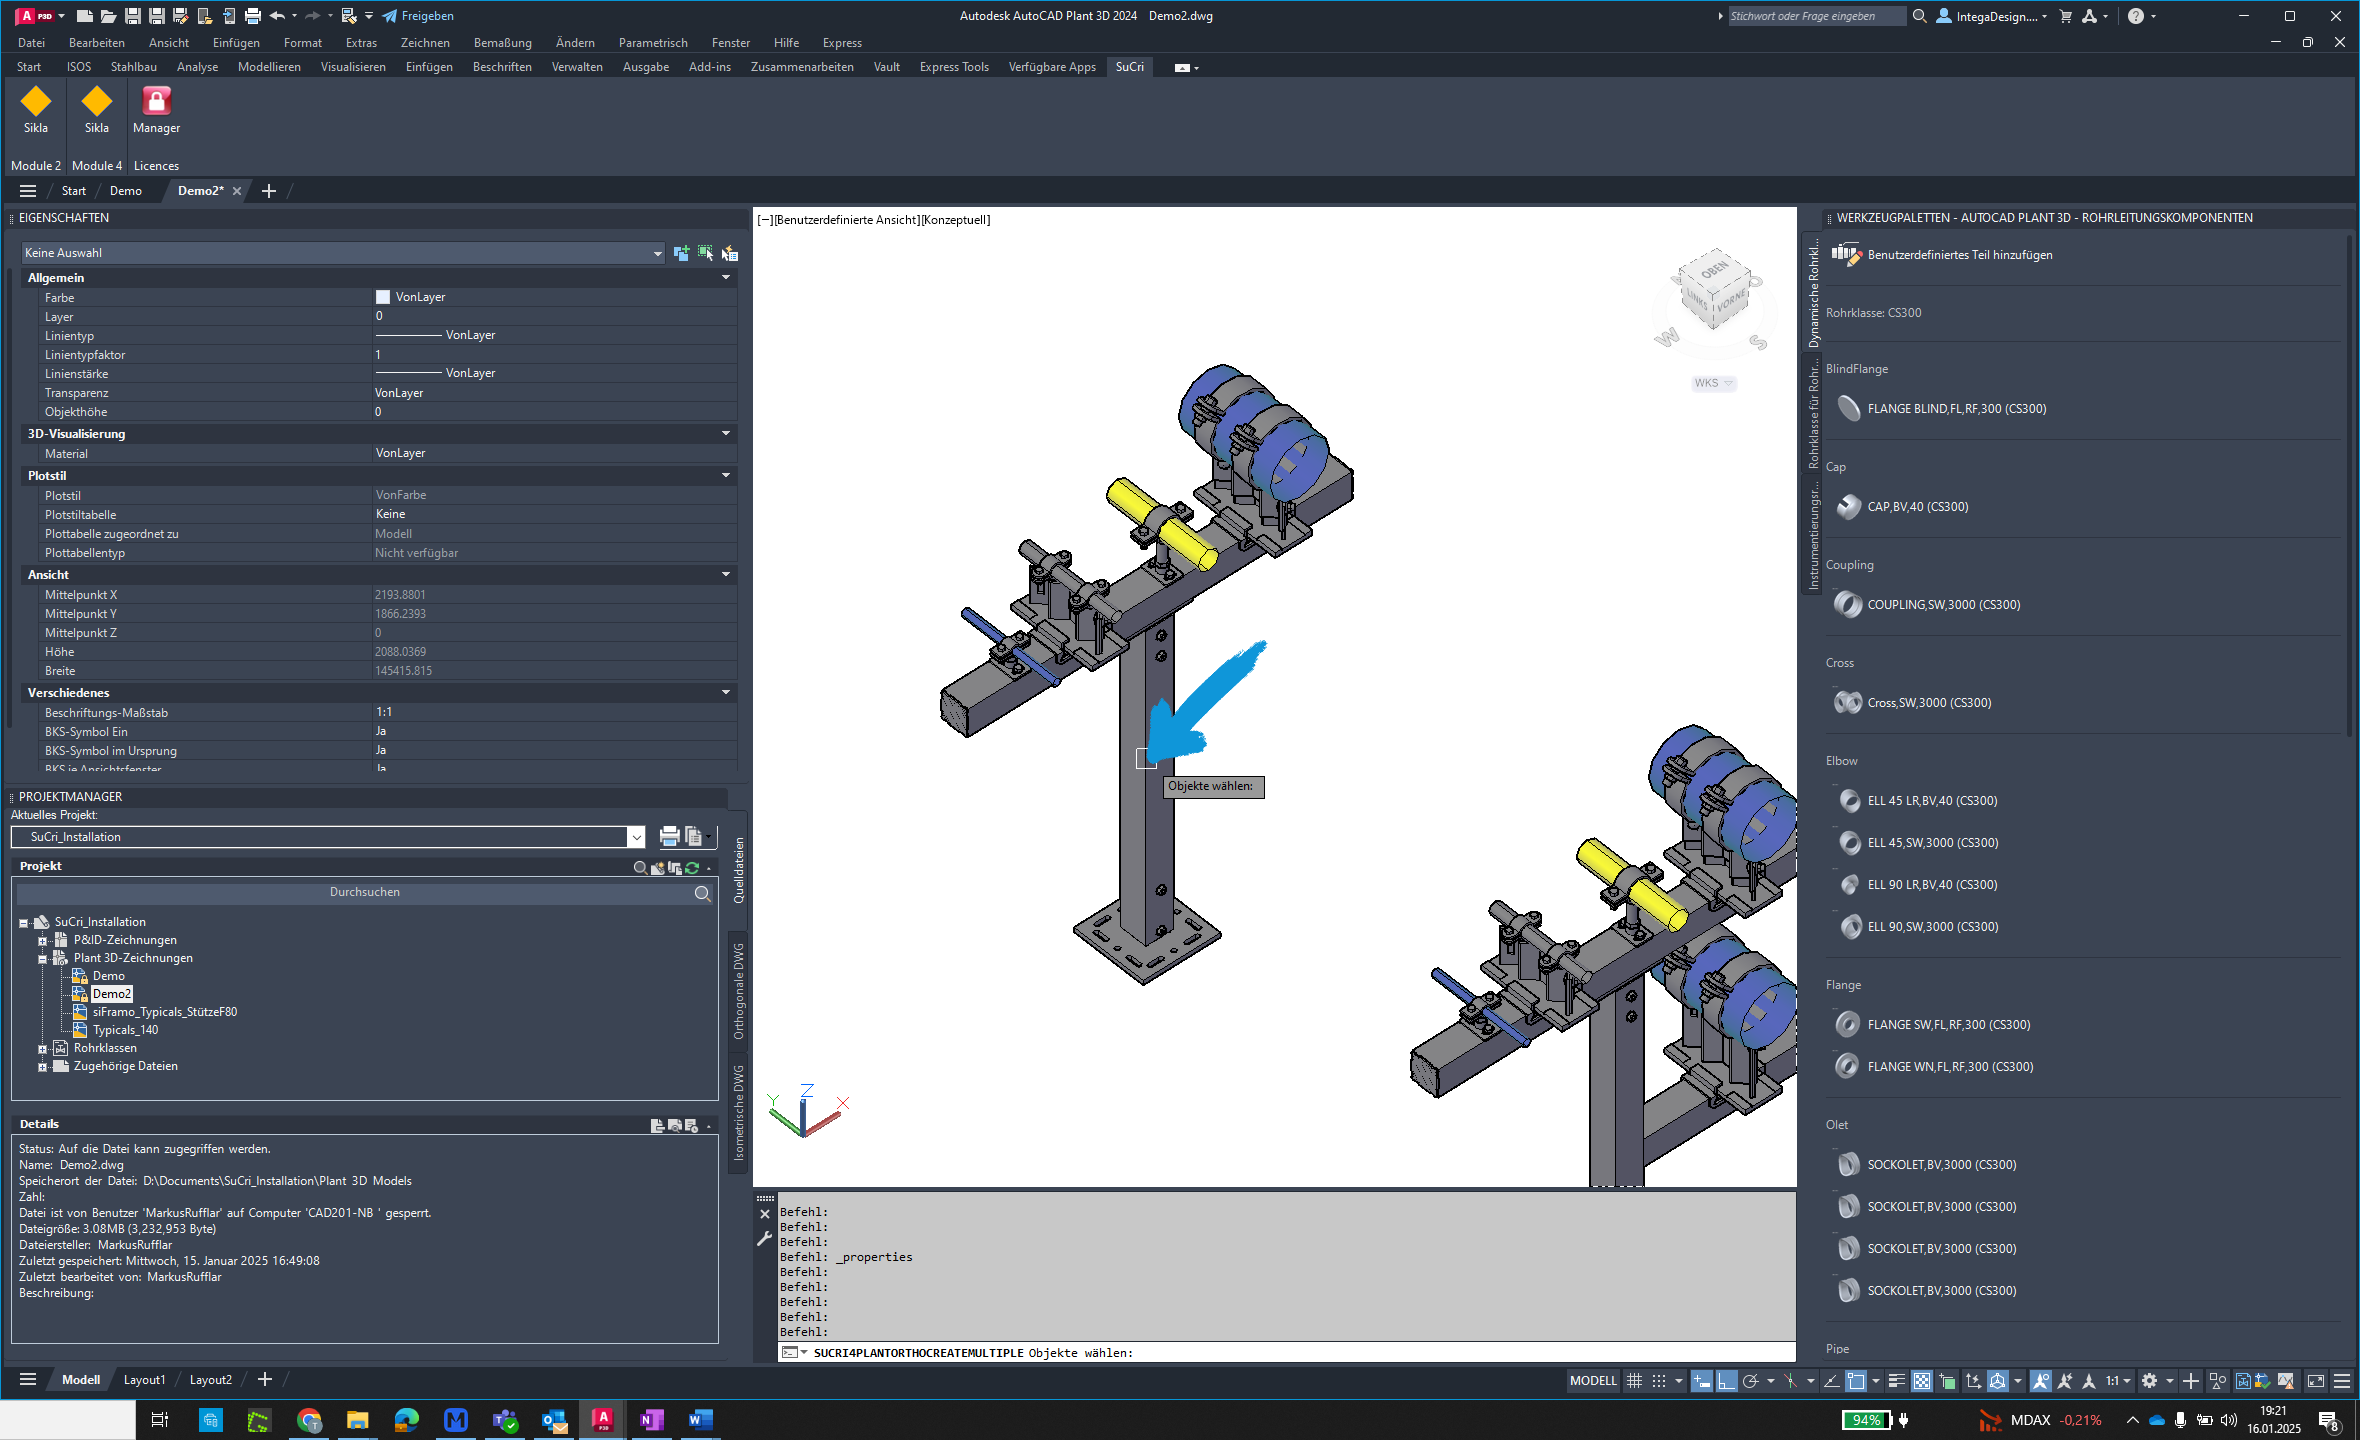
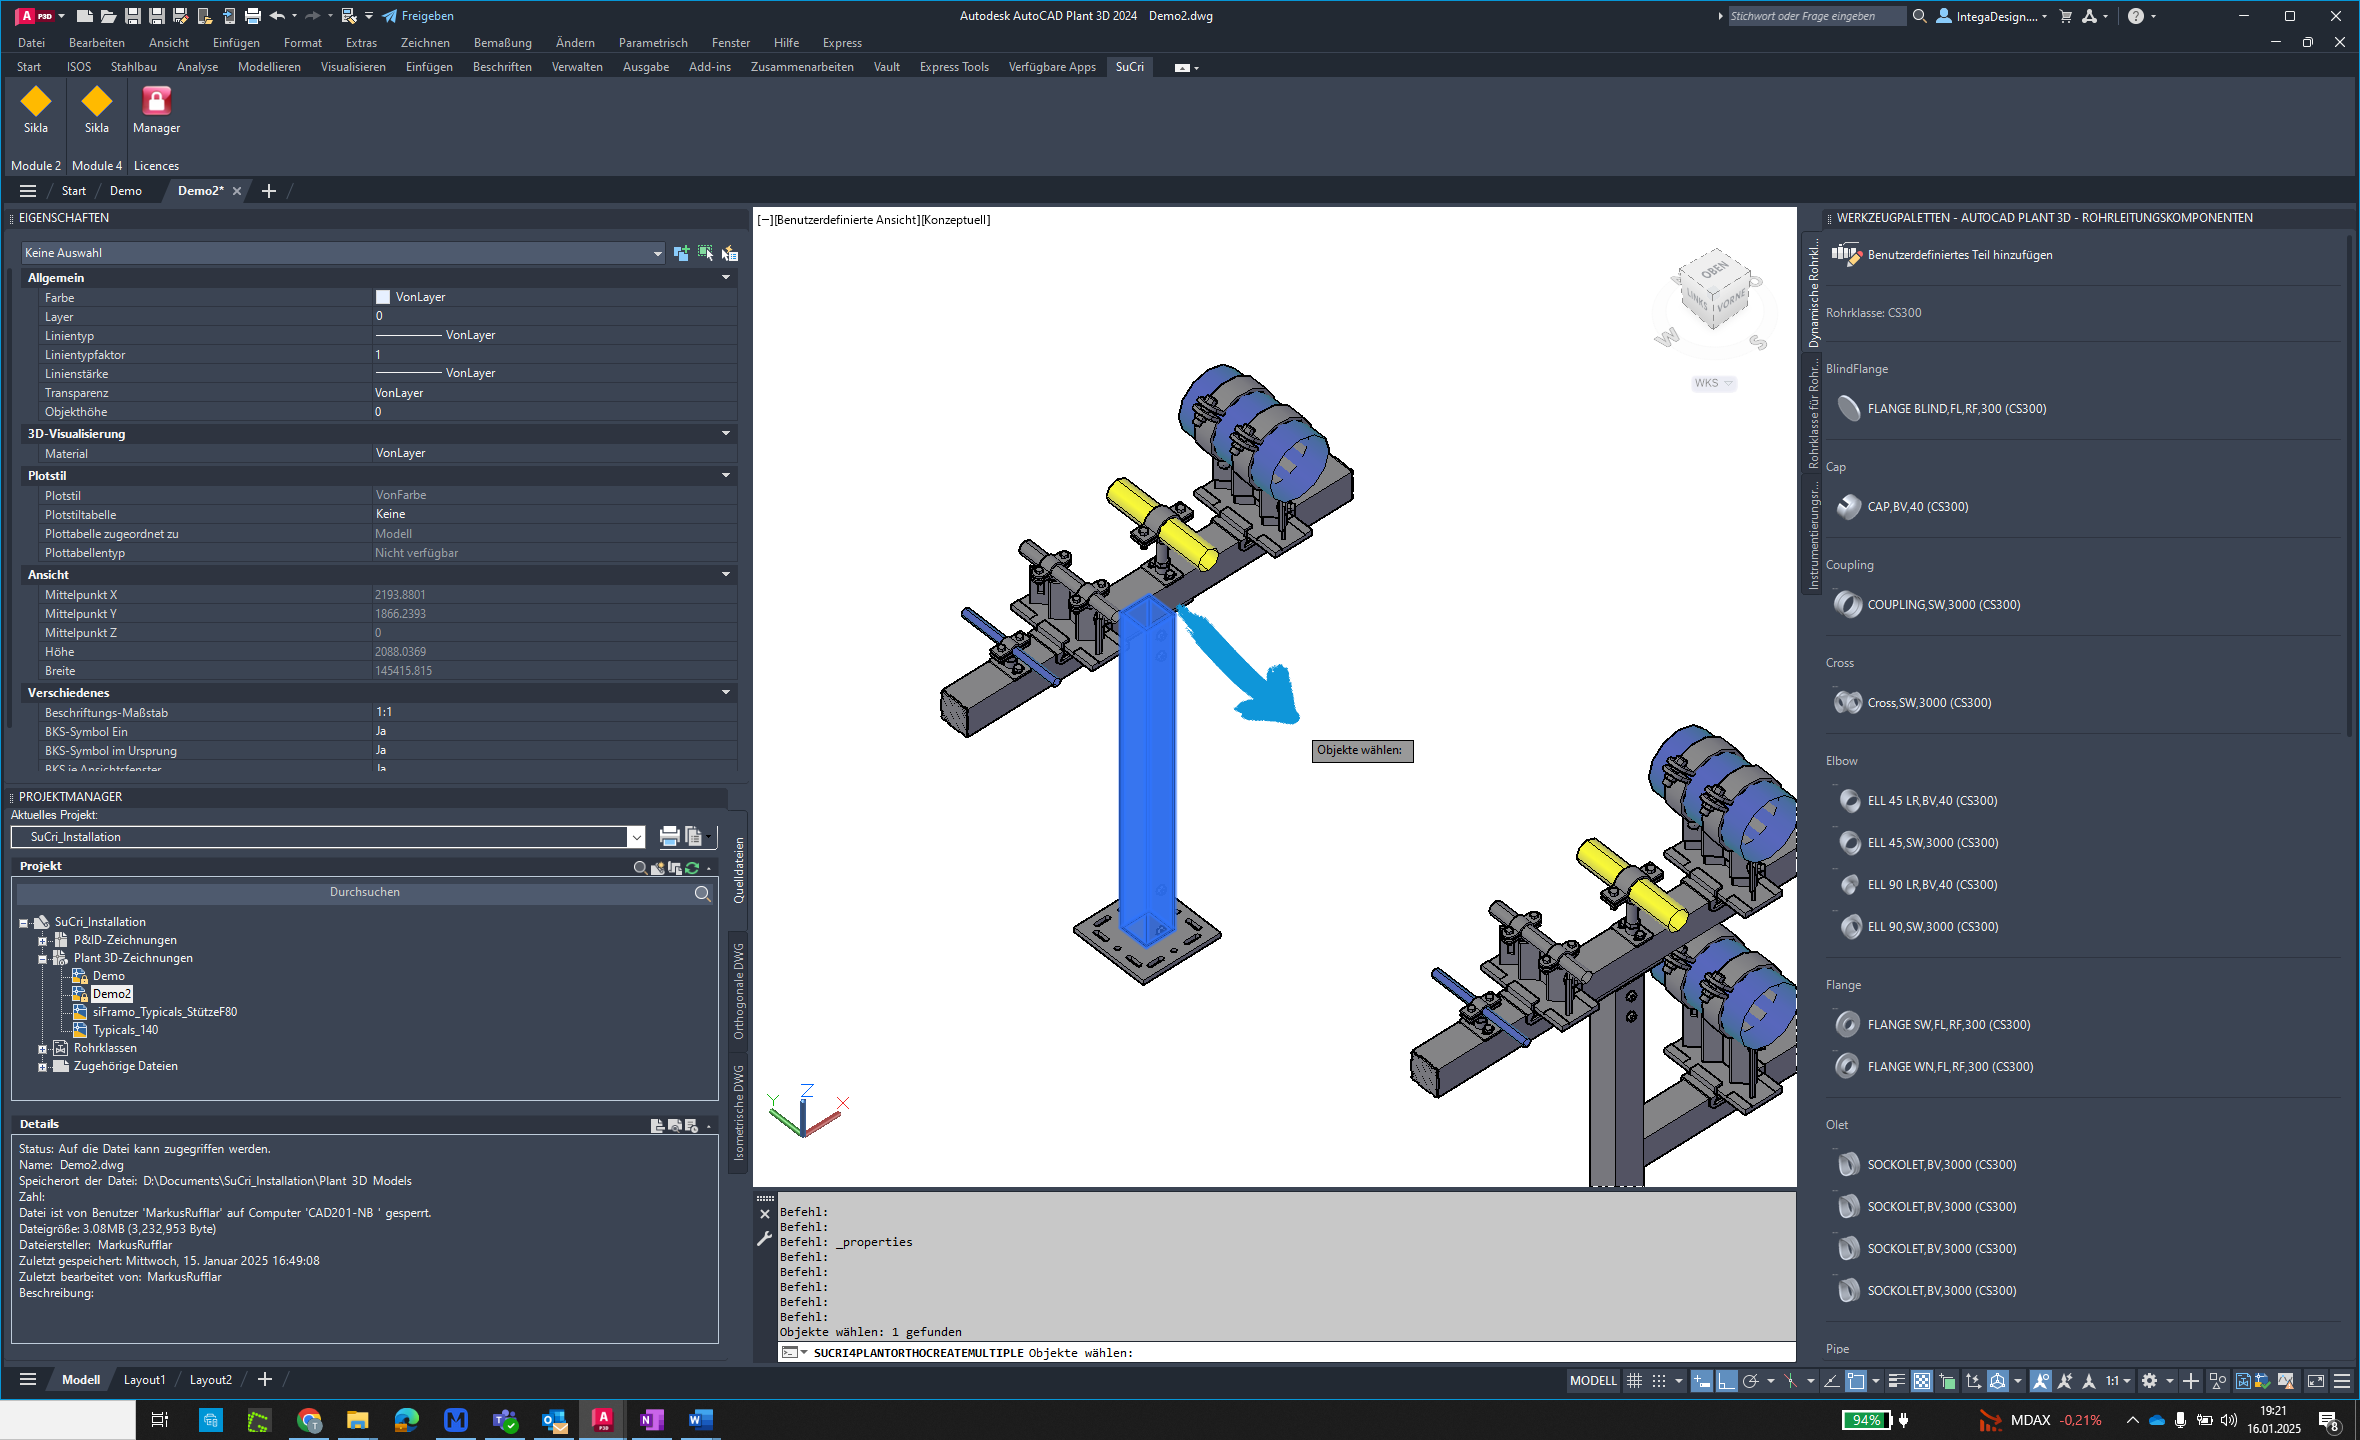
Step 8: Select components
Select a component of your assembly and confirm the selection with a right-click.
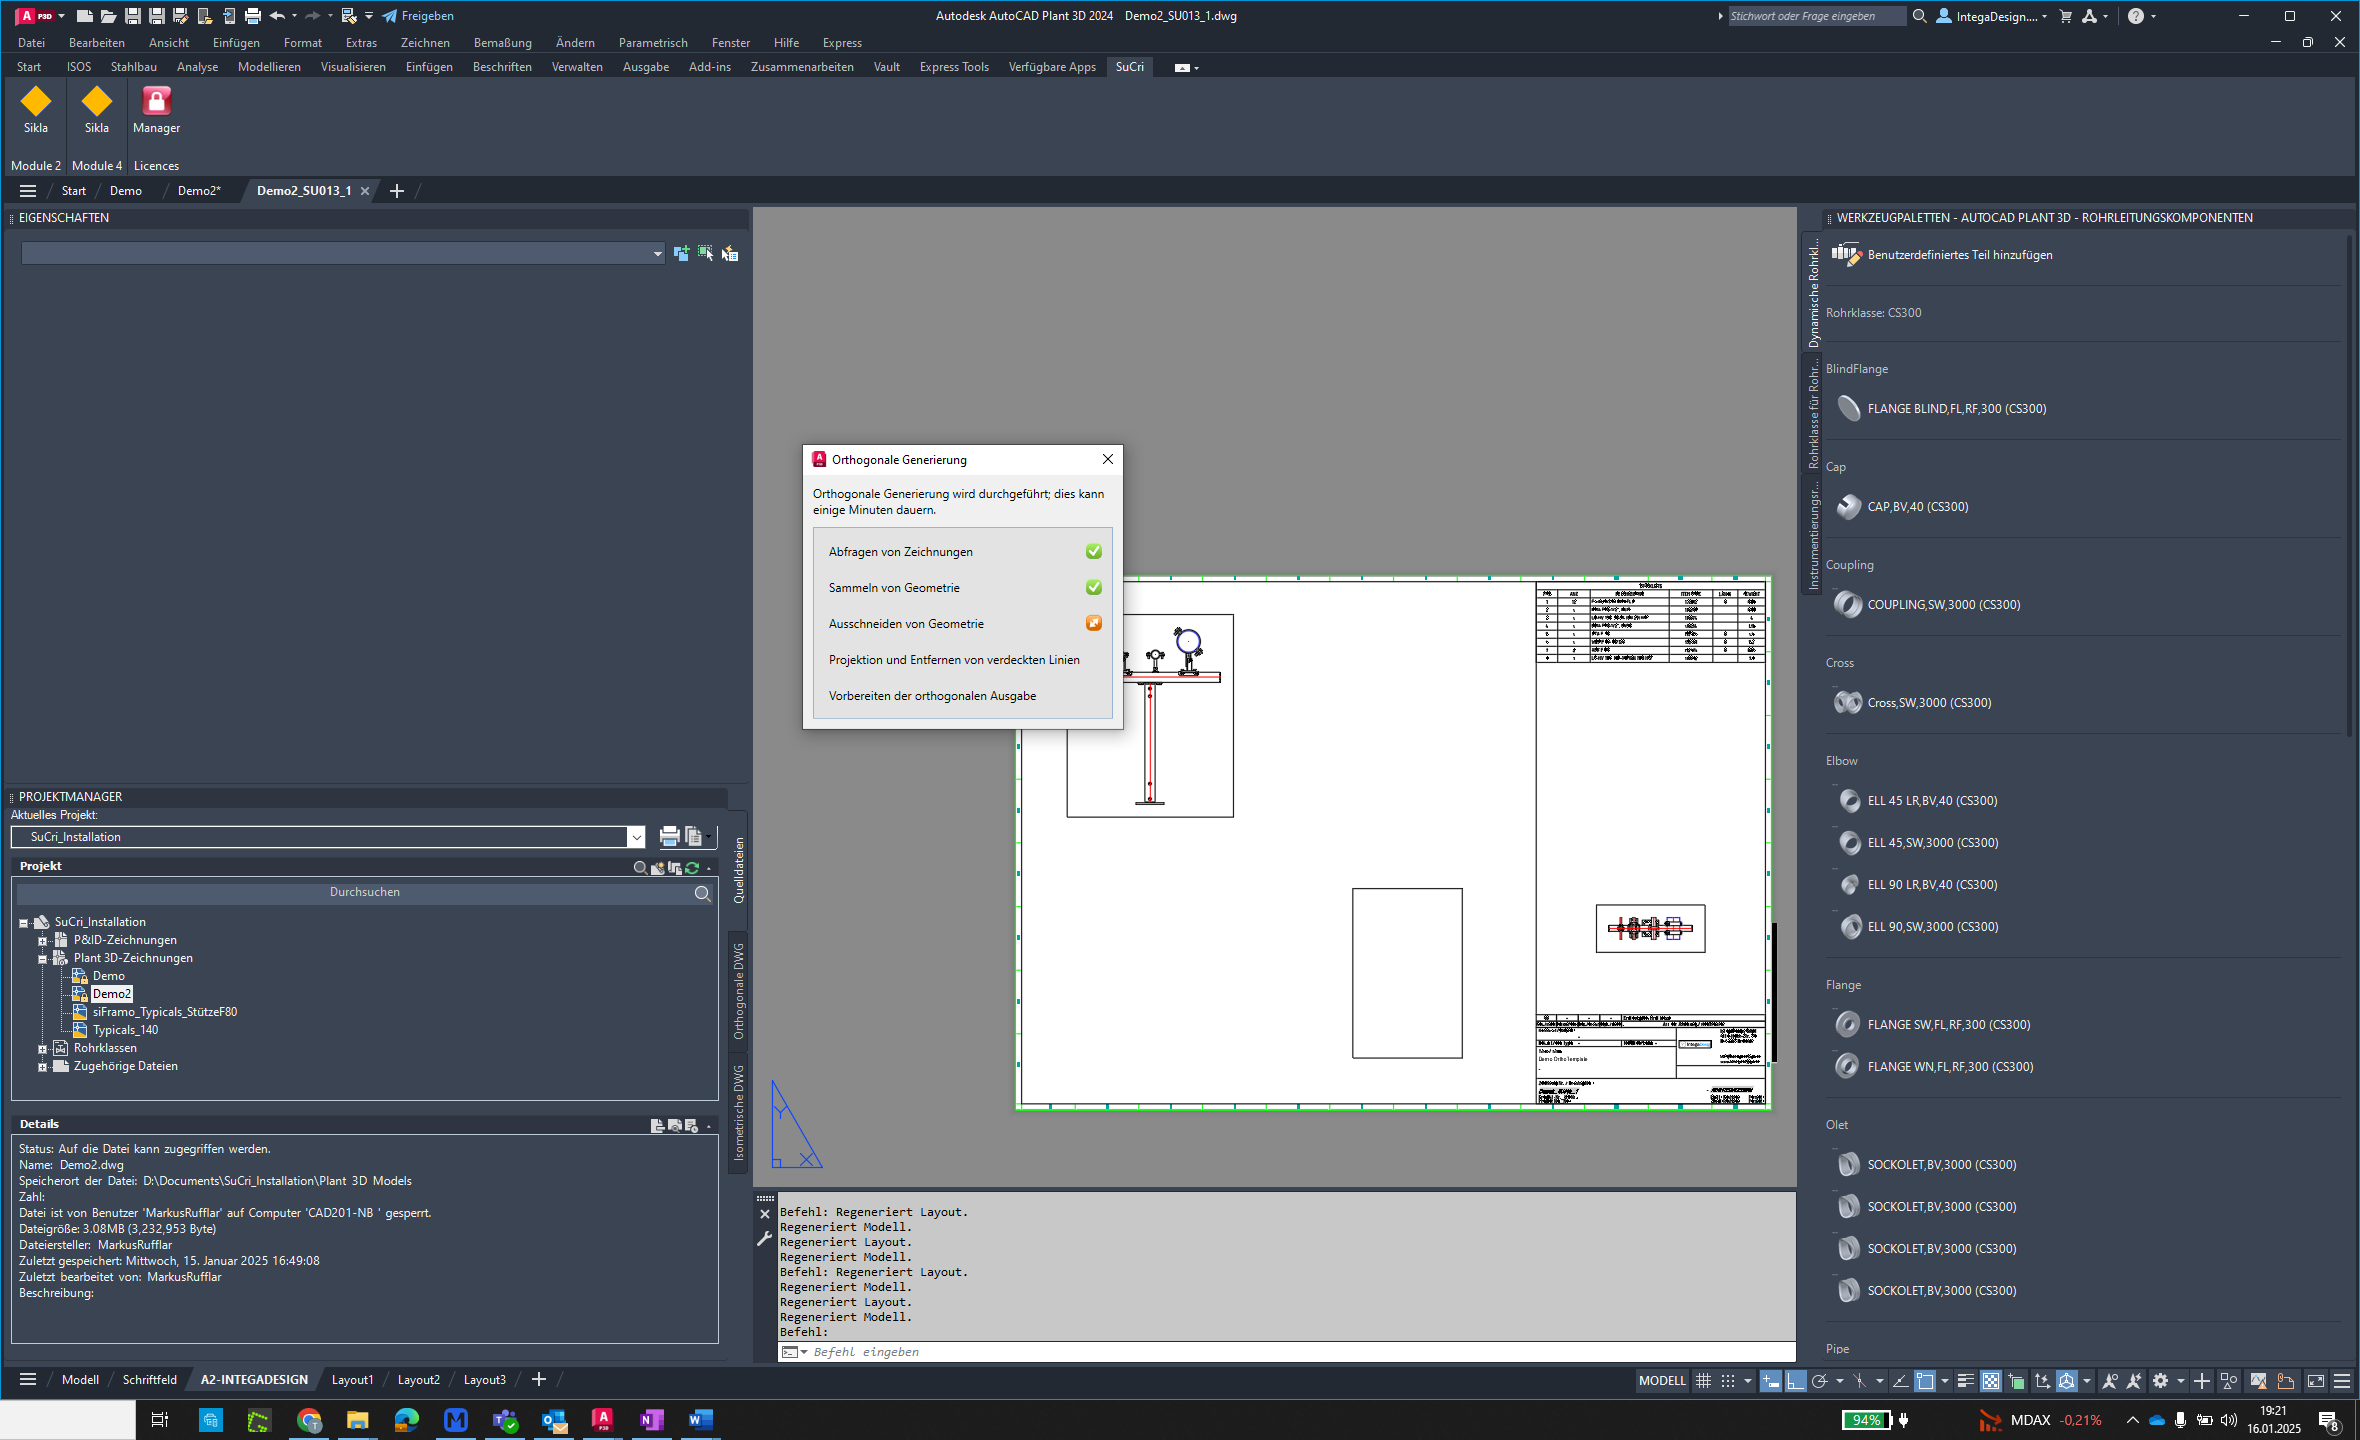
Step 9: Generate drawings
The drawings will now be generated automatically.
Step 10: Verify success
Check if the drawings were successfully created.