The 'Manufacturer-Specific Steel Structure Catalogs' function allows users to select and place manufacturer-specific steel structure profiles in SuCri for AutoCAD Plant3D.
Video Tutorial
tbc
Plant3D Command
PlantSteelSelectShape
Step-by-Step Guide
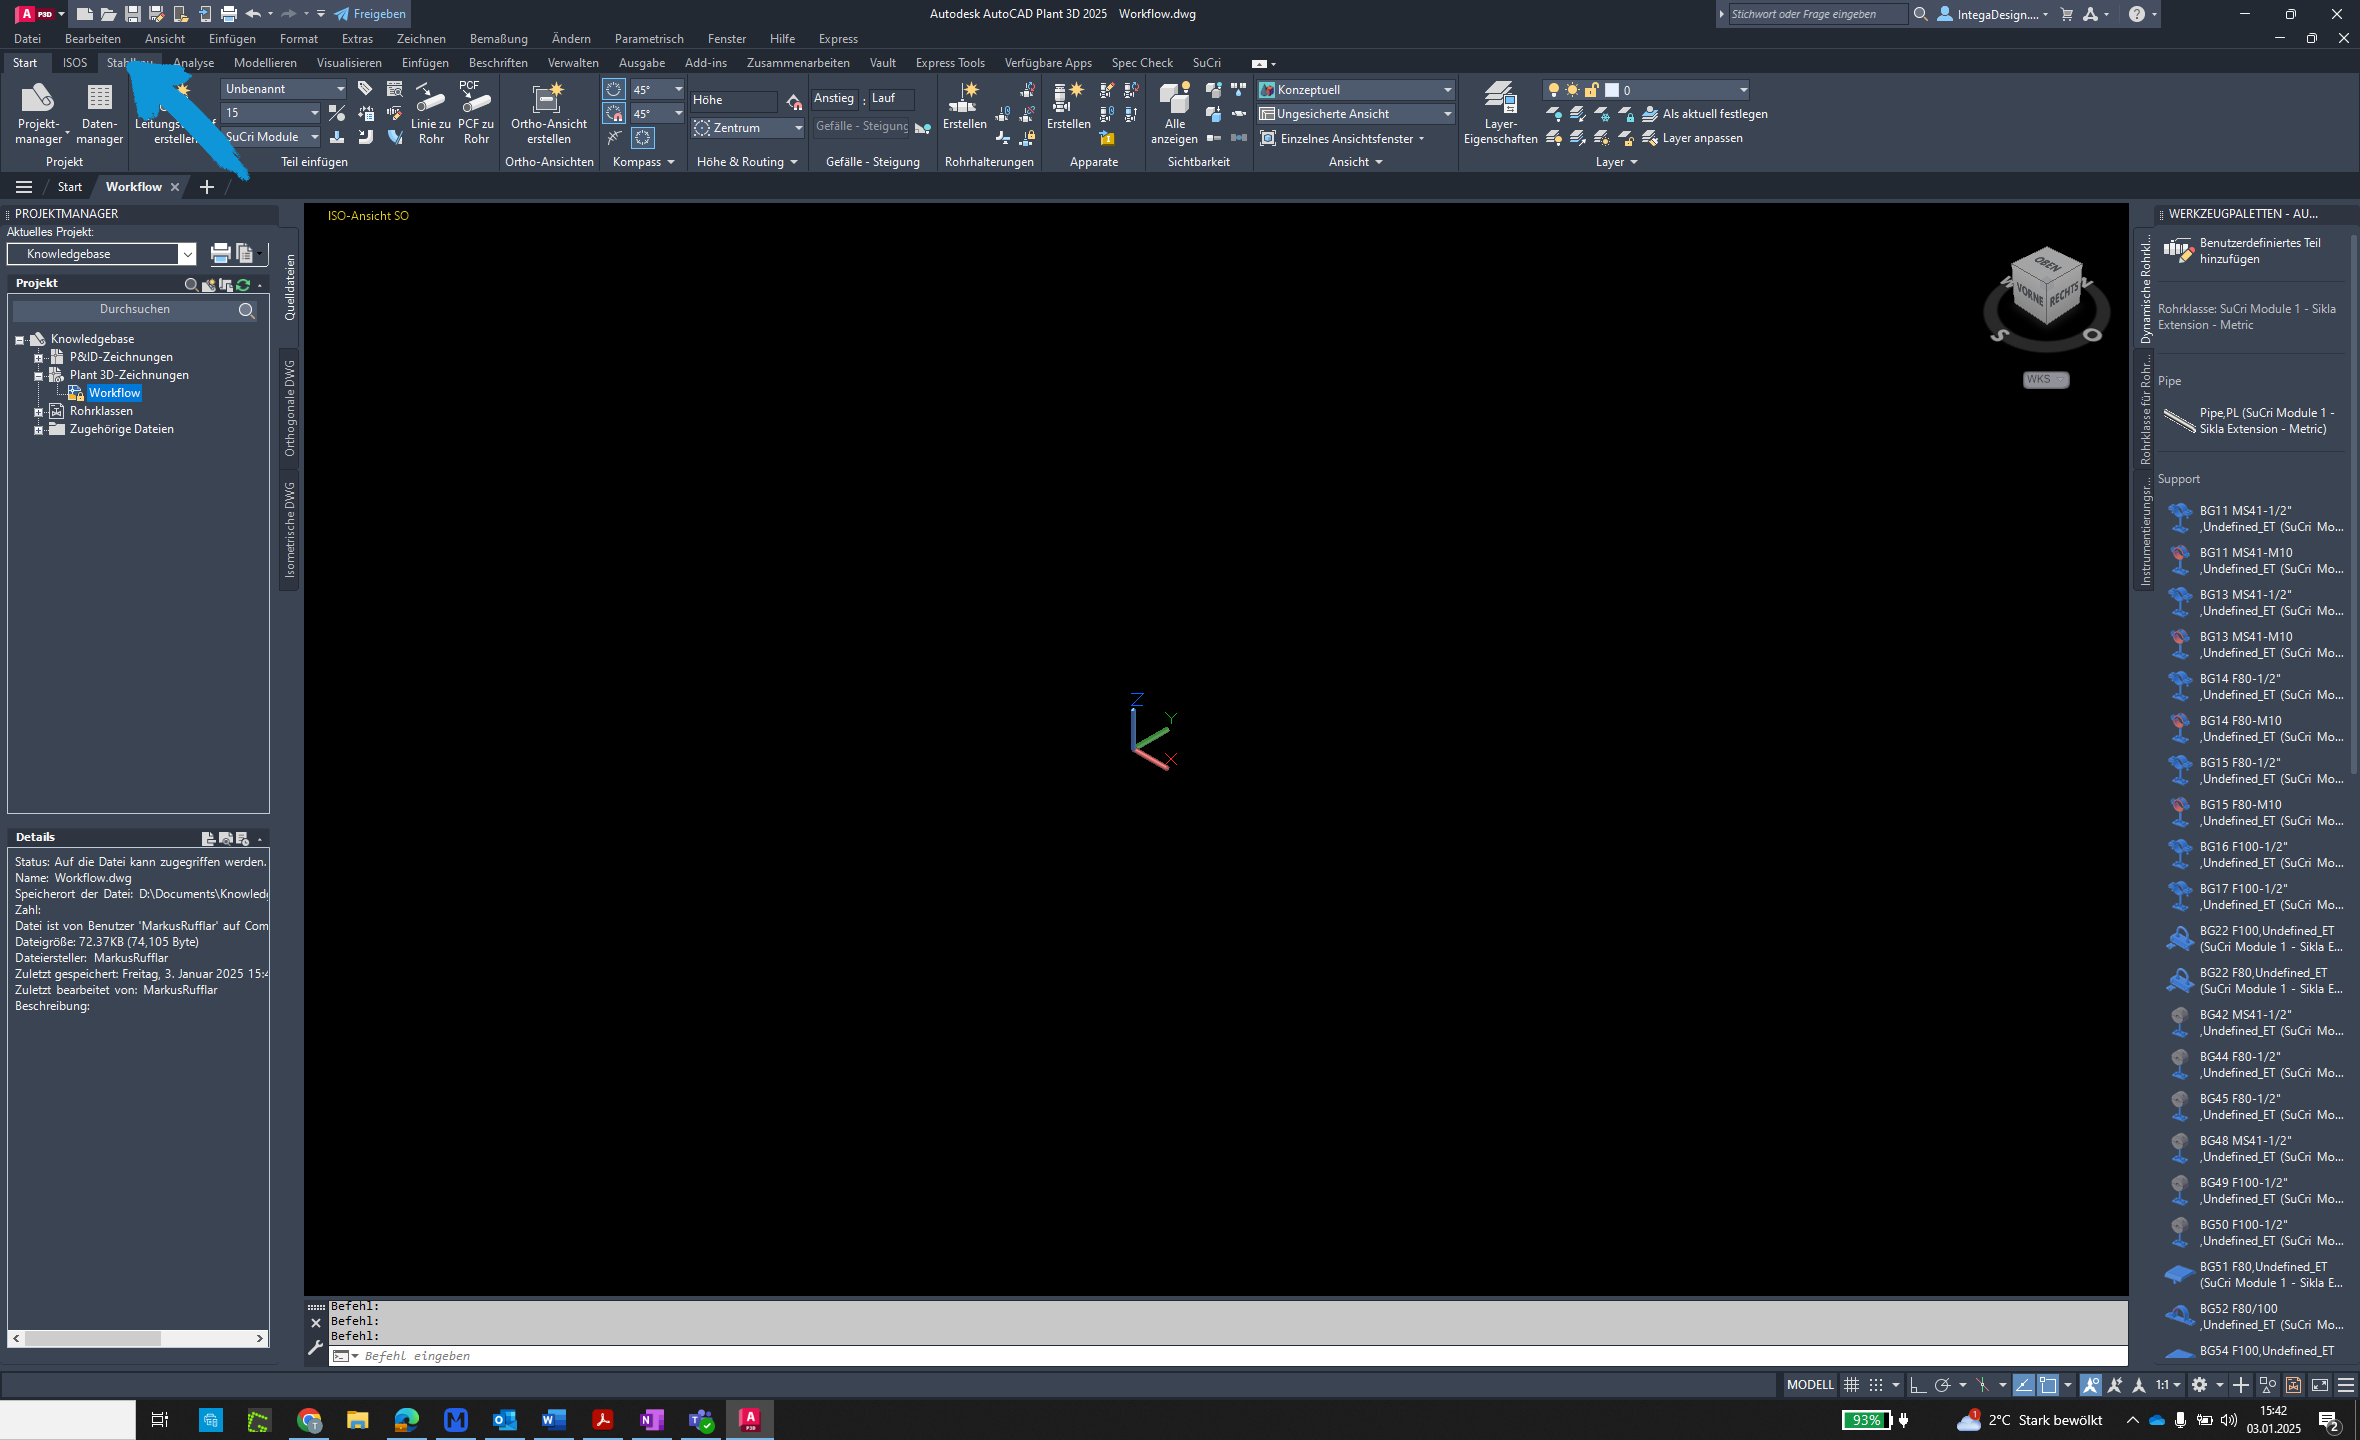
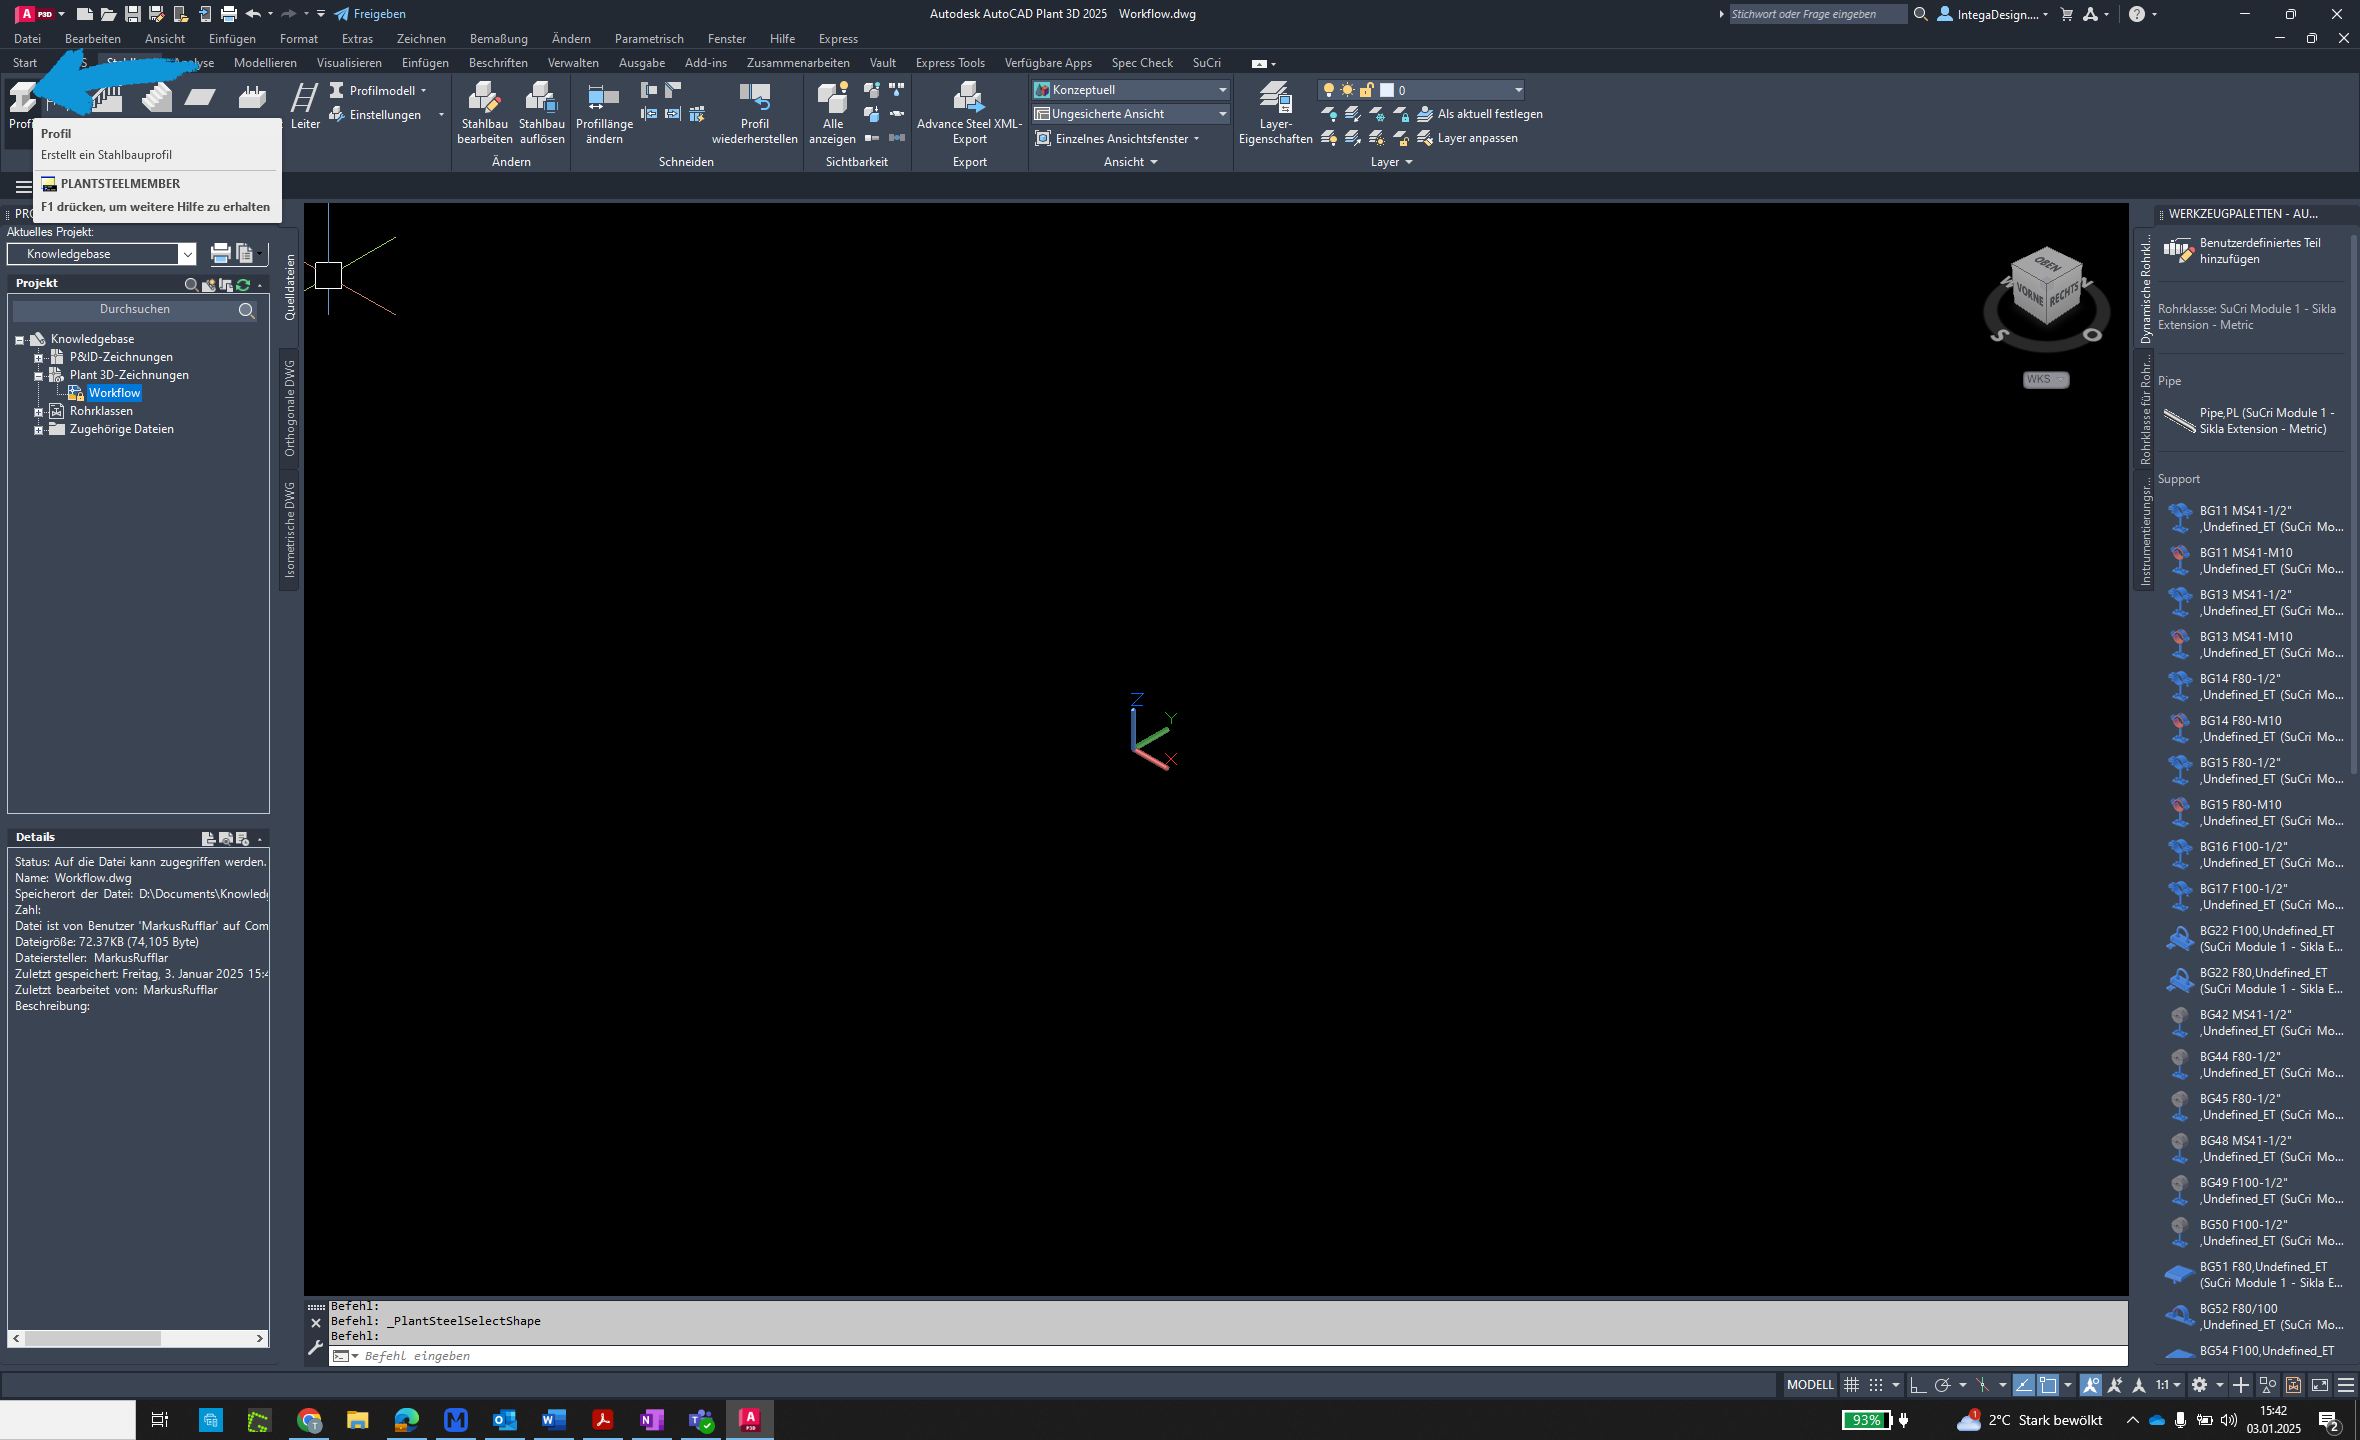
Step 1: Open Steel Structures
Click on the Steel Structures section in AutoCAD Plant3D to open the steel structure catalog.
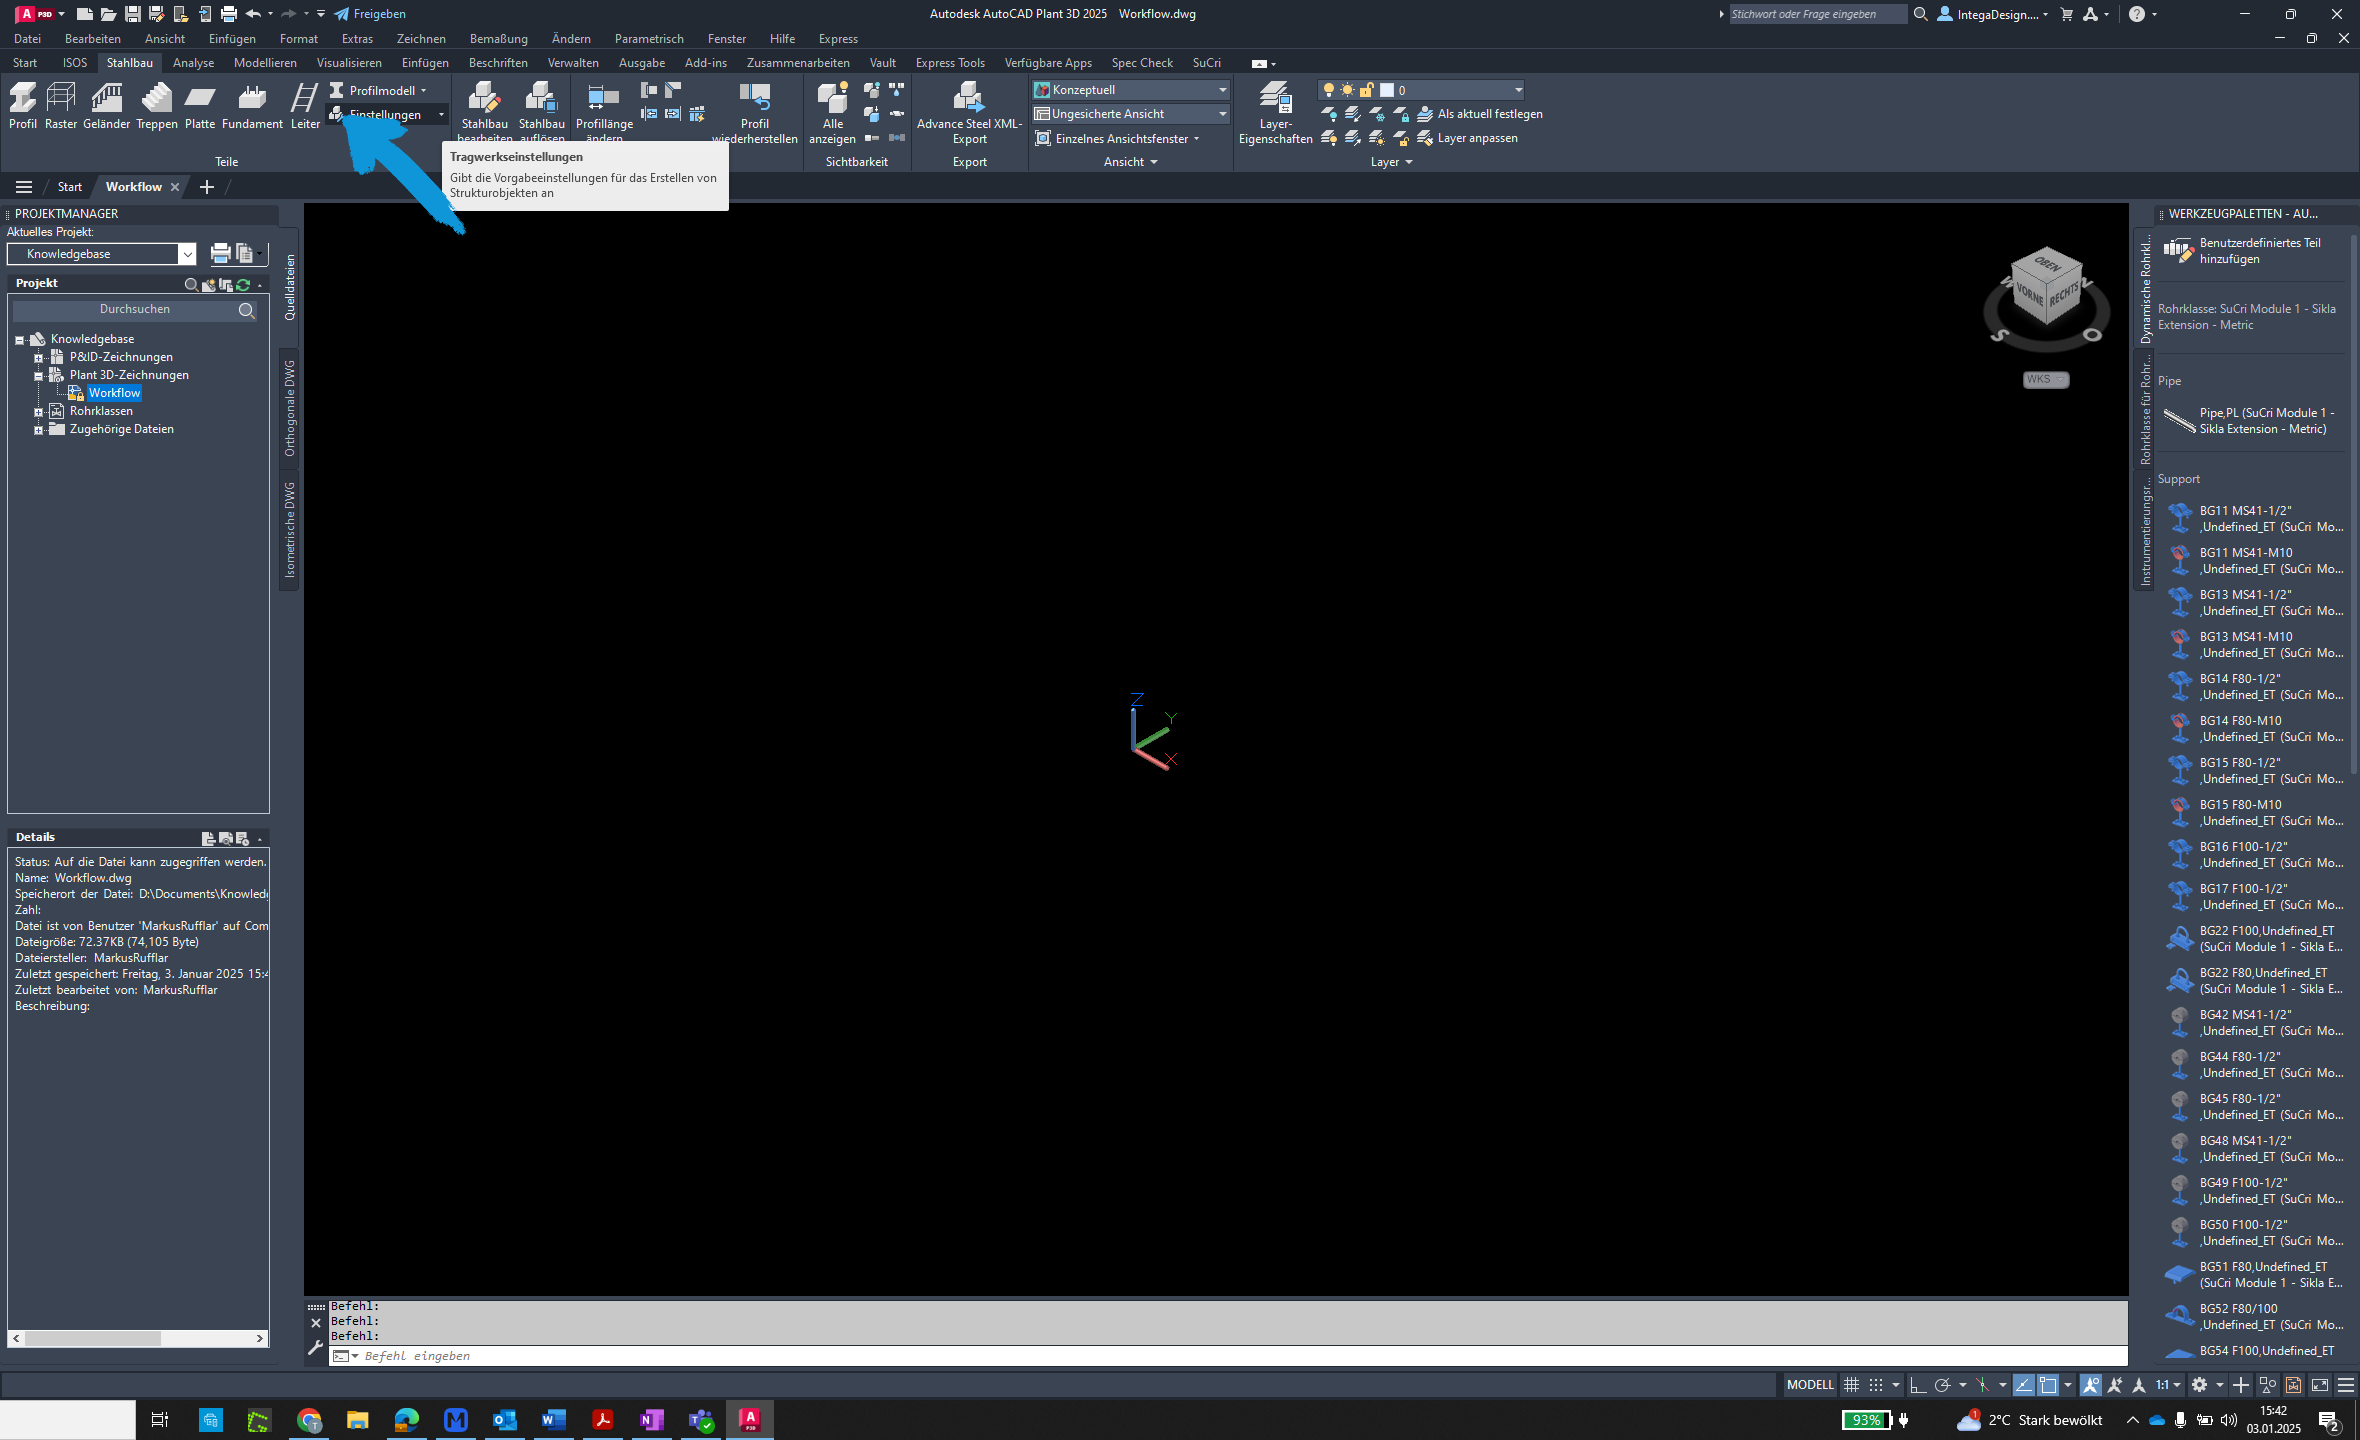
Step 2: Open Settings
Click on the Settings button to access the configuration area.
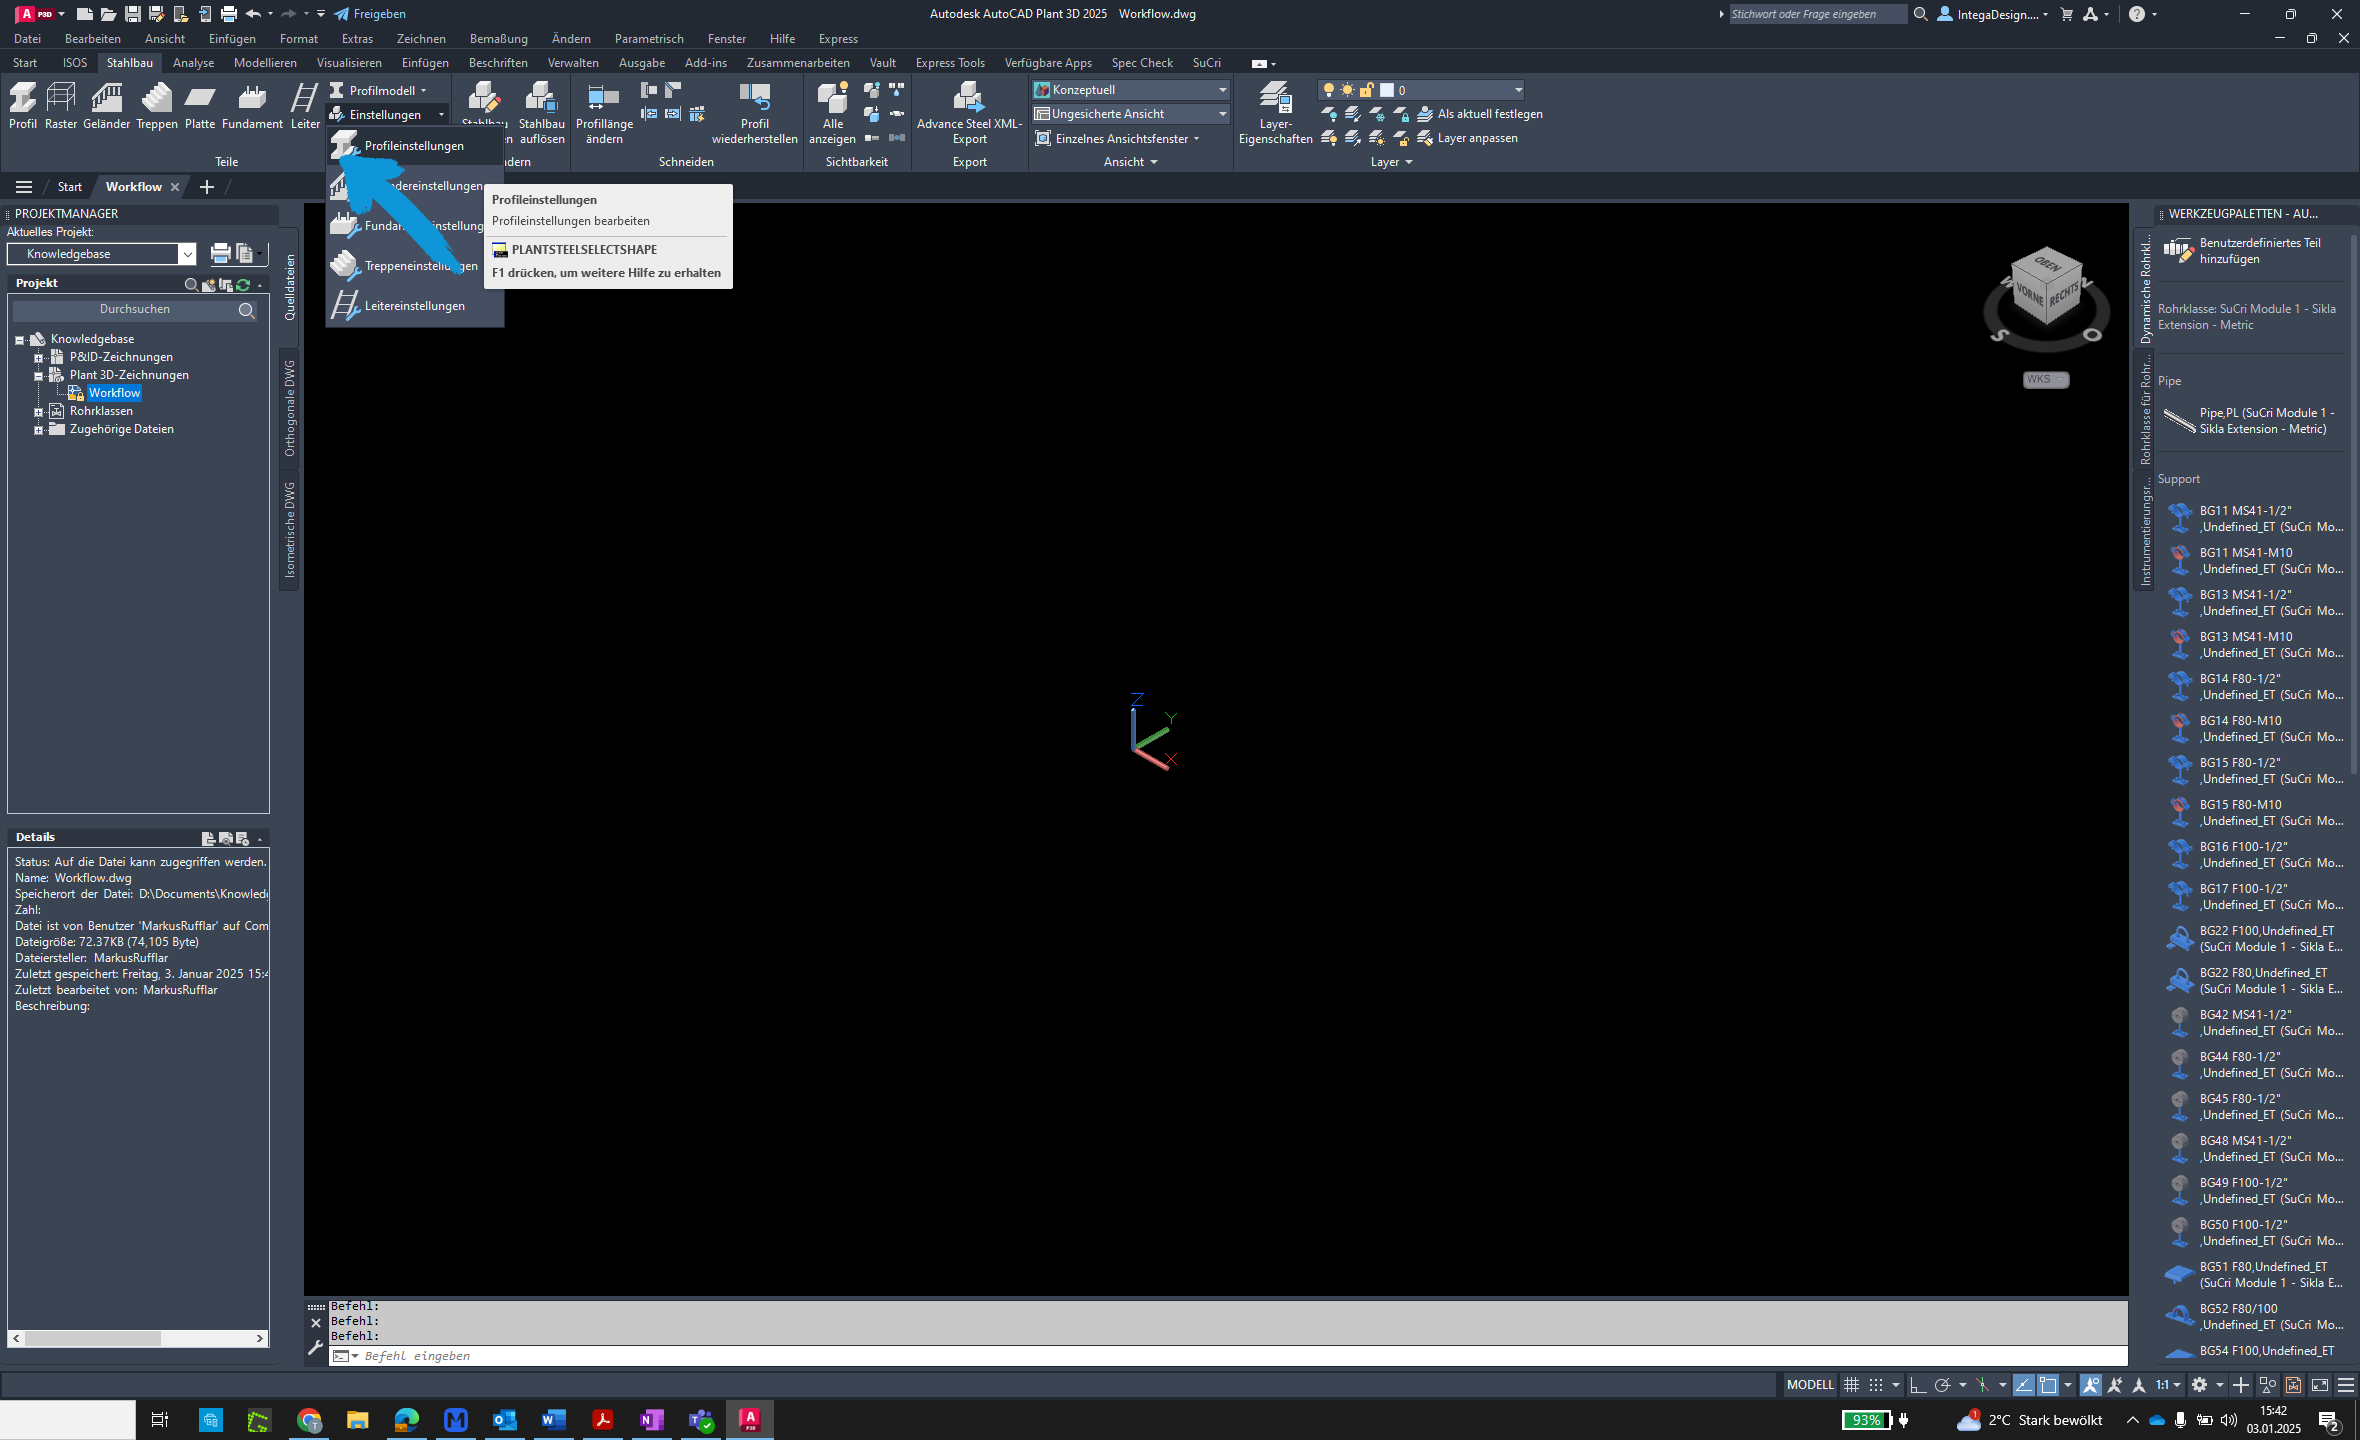
Step 3: Select Profile Settings
Click on Profile Settings to manage manufacturer-specific profiles.
Step 4: Open Catalog
Click the Open button to load the manufacturer-specific catalog.

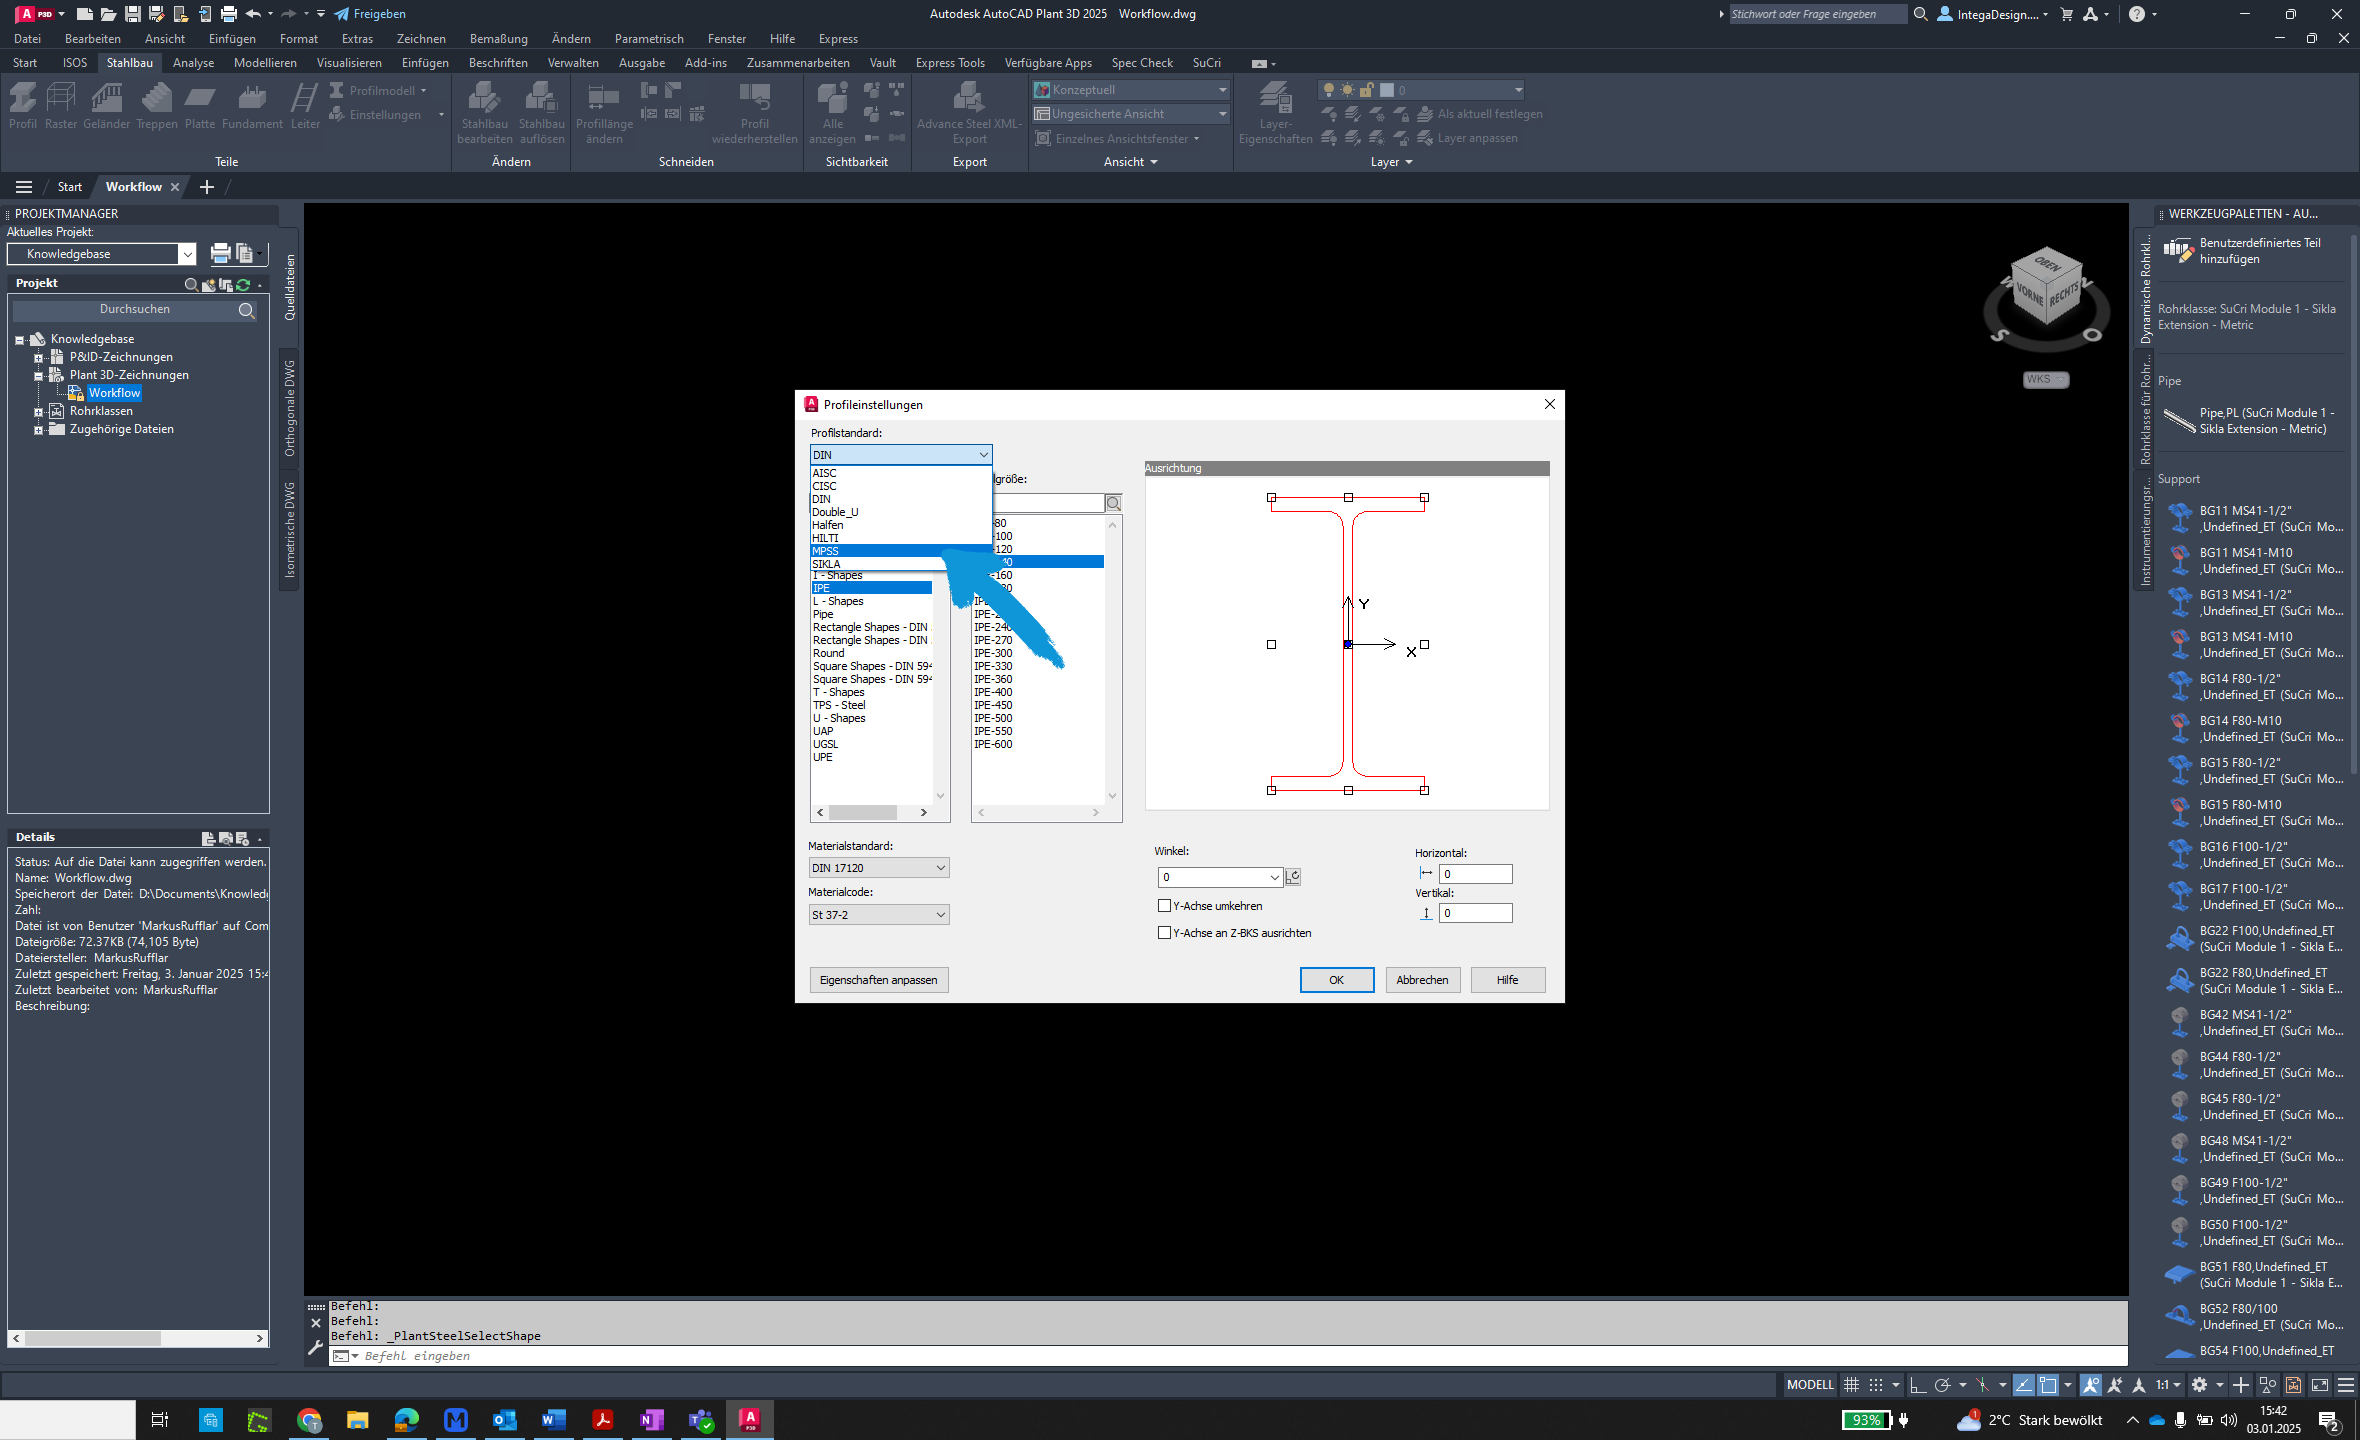
Step 5: Select Manufacturer
Choose a manufacturer from the list, e.g., MPSS.
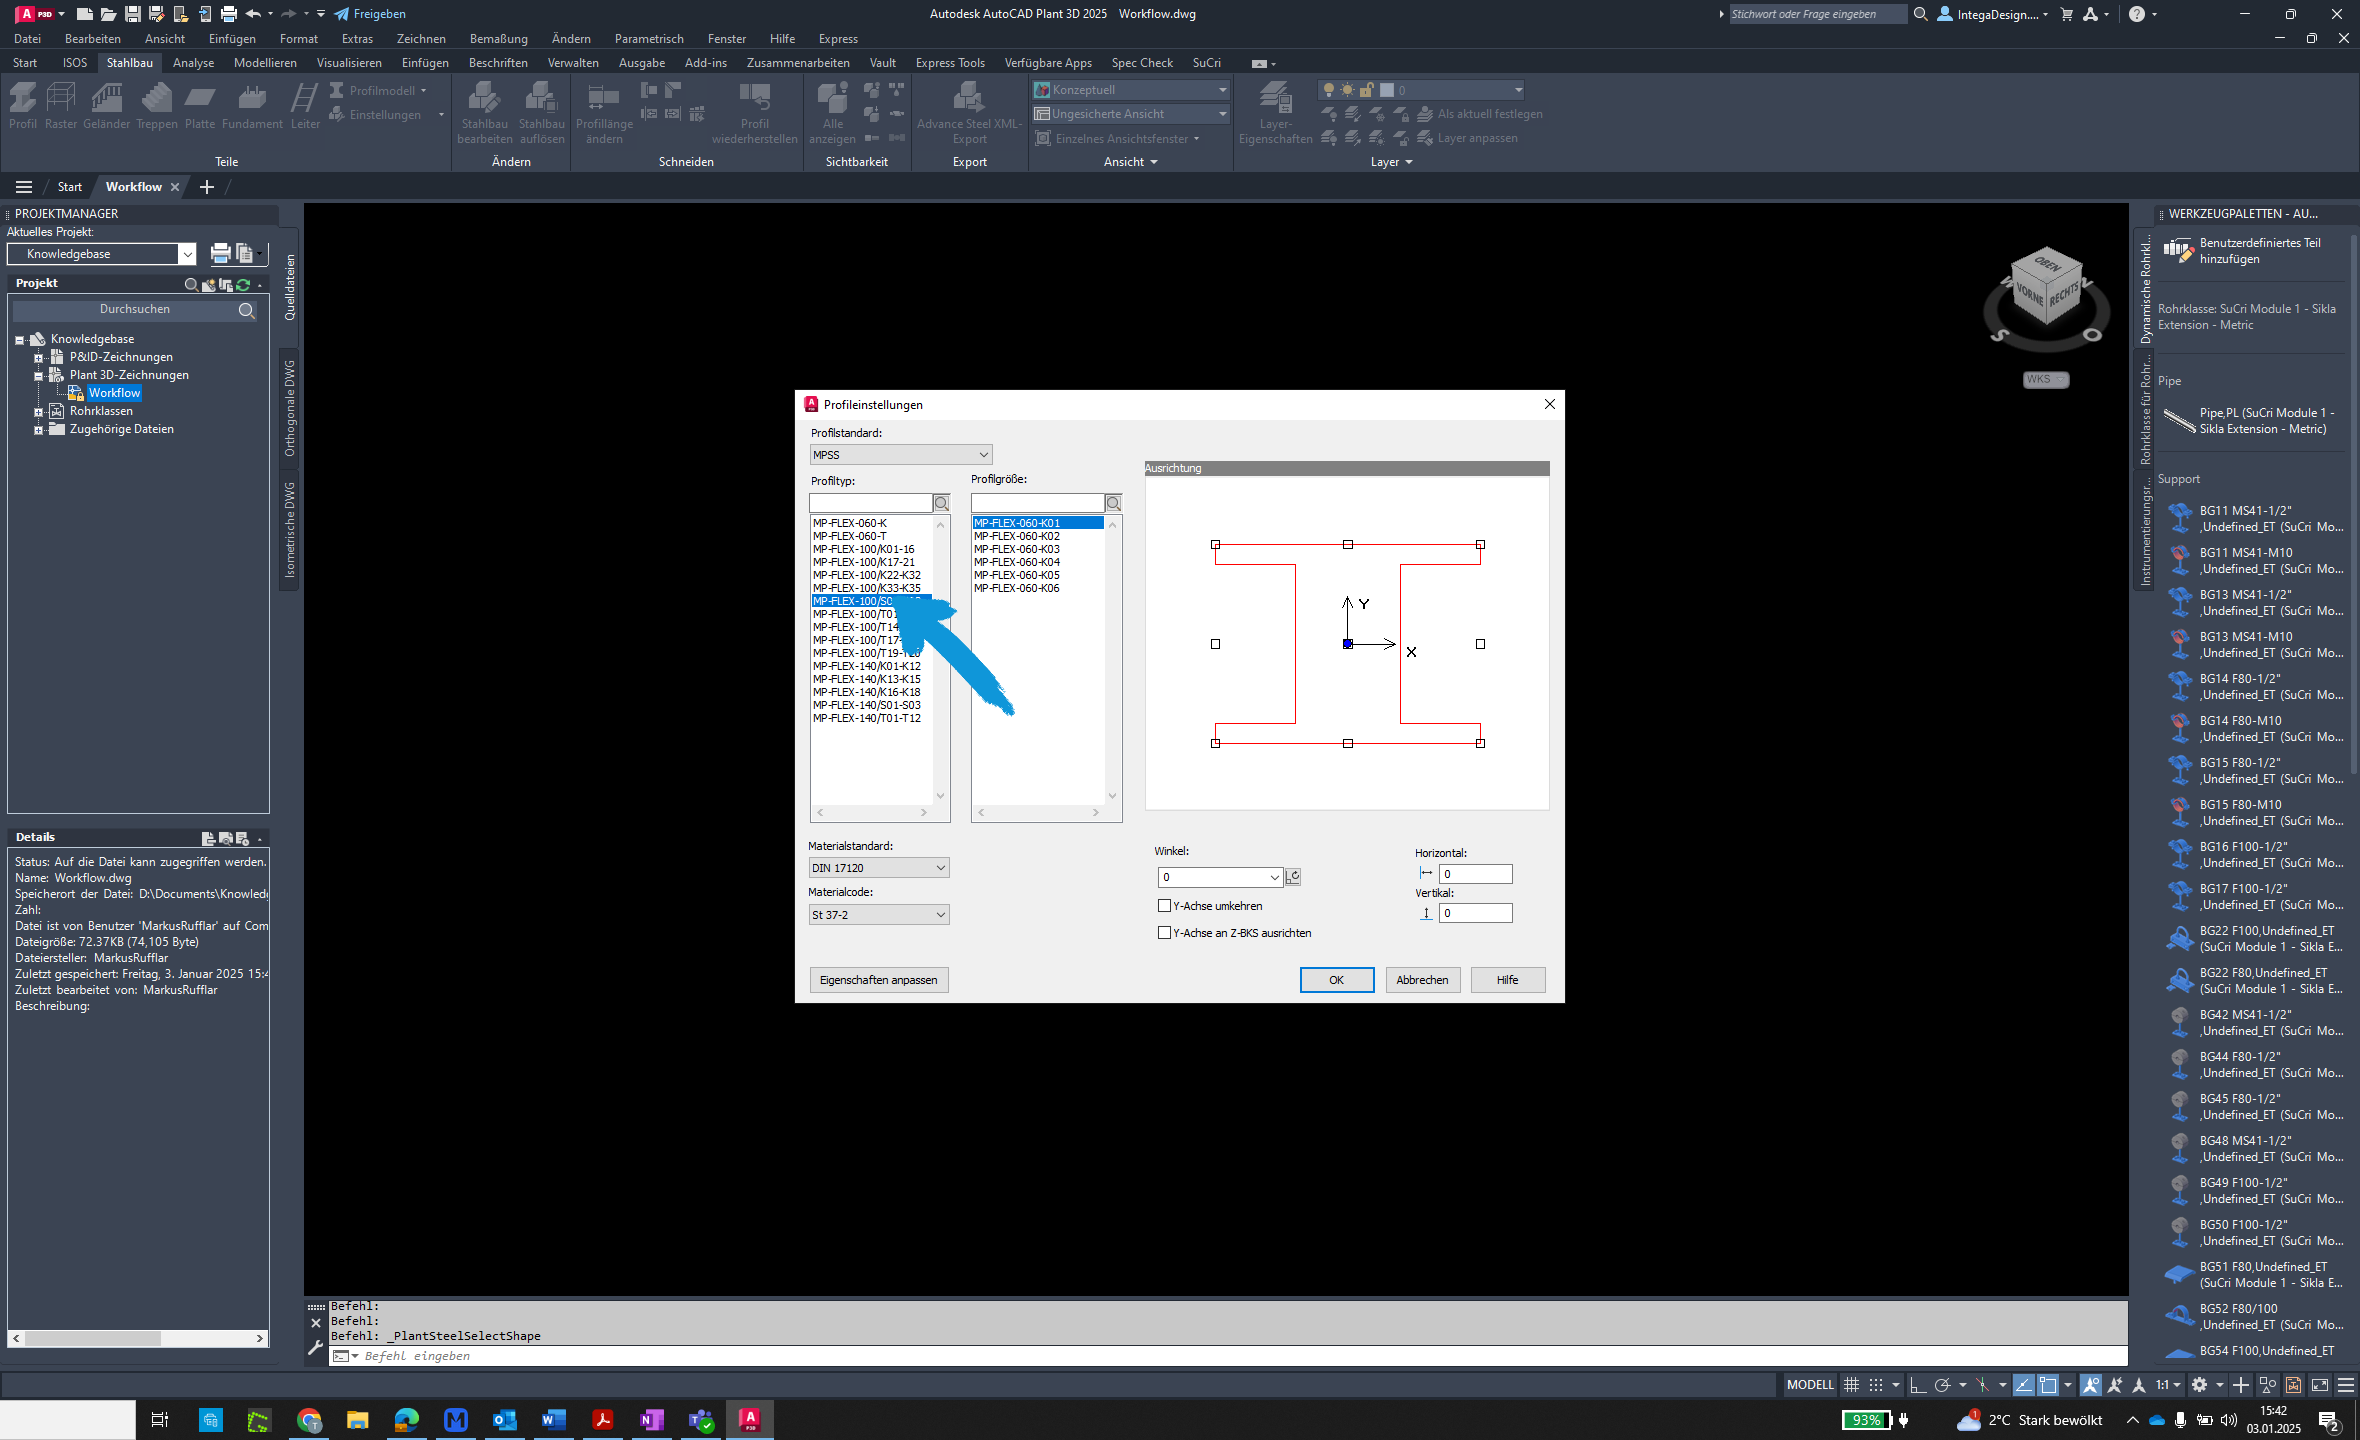
Step 6: Choose Profile Type
Select a specific profile, e.g., MP-FLEX-100/S01-S03.
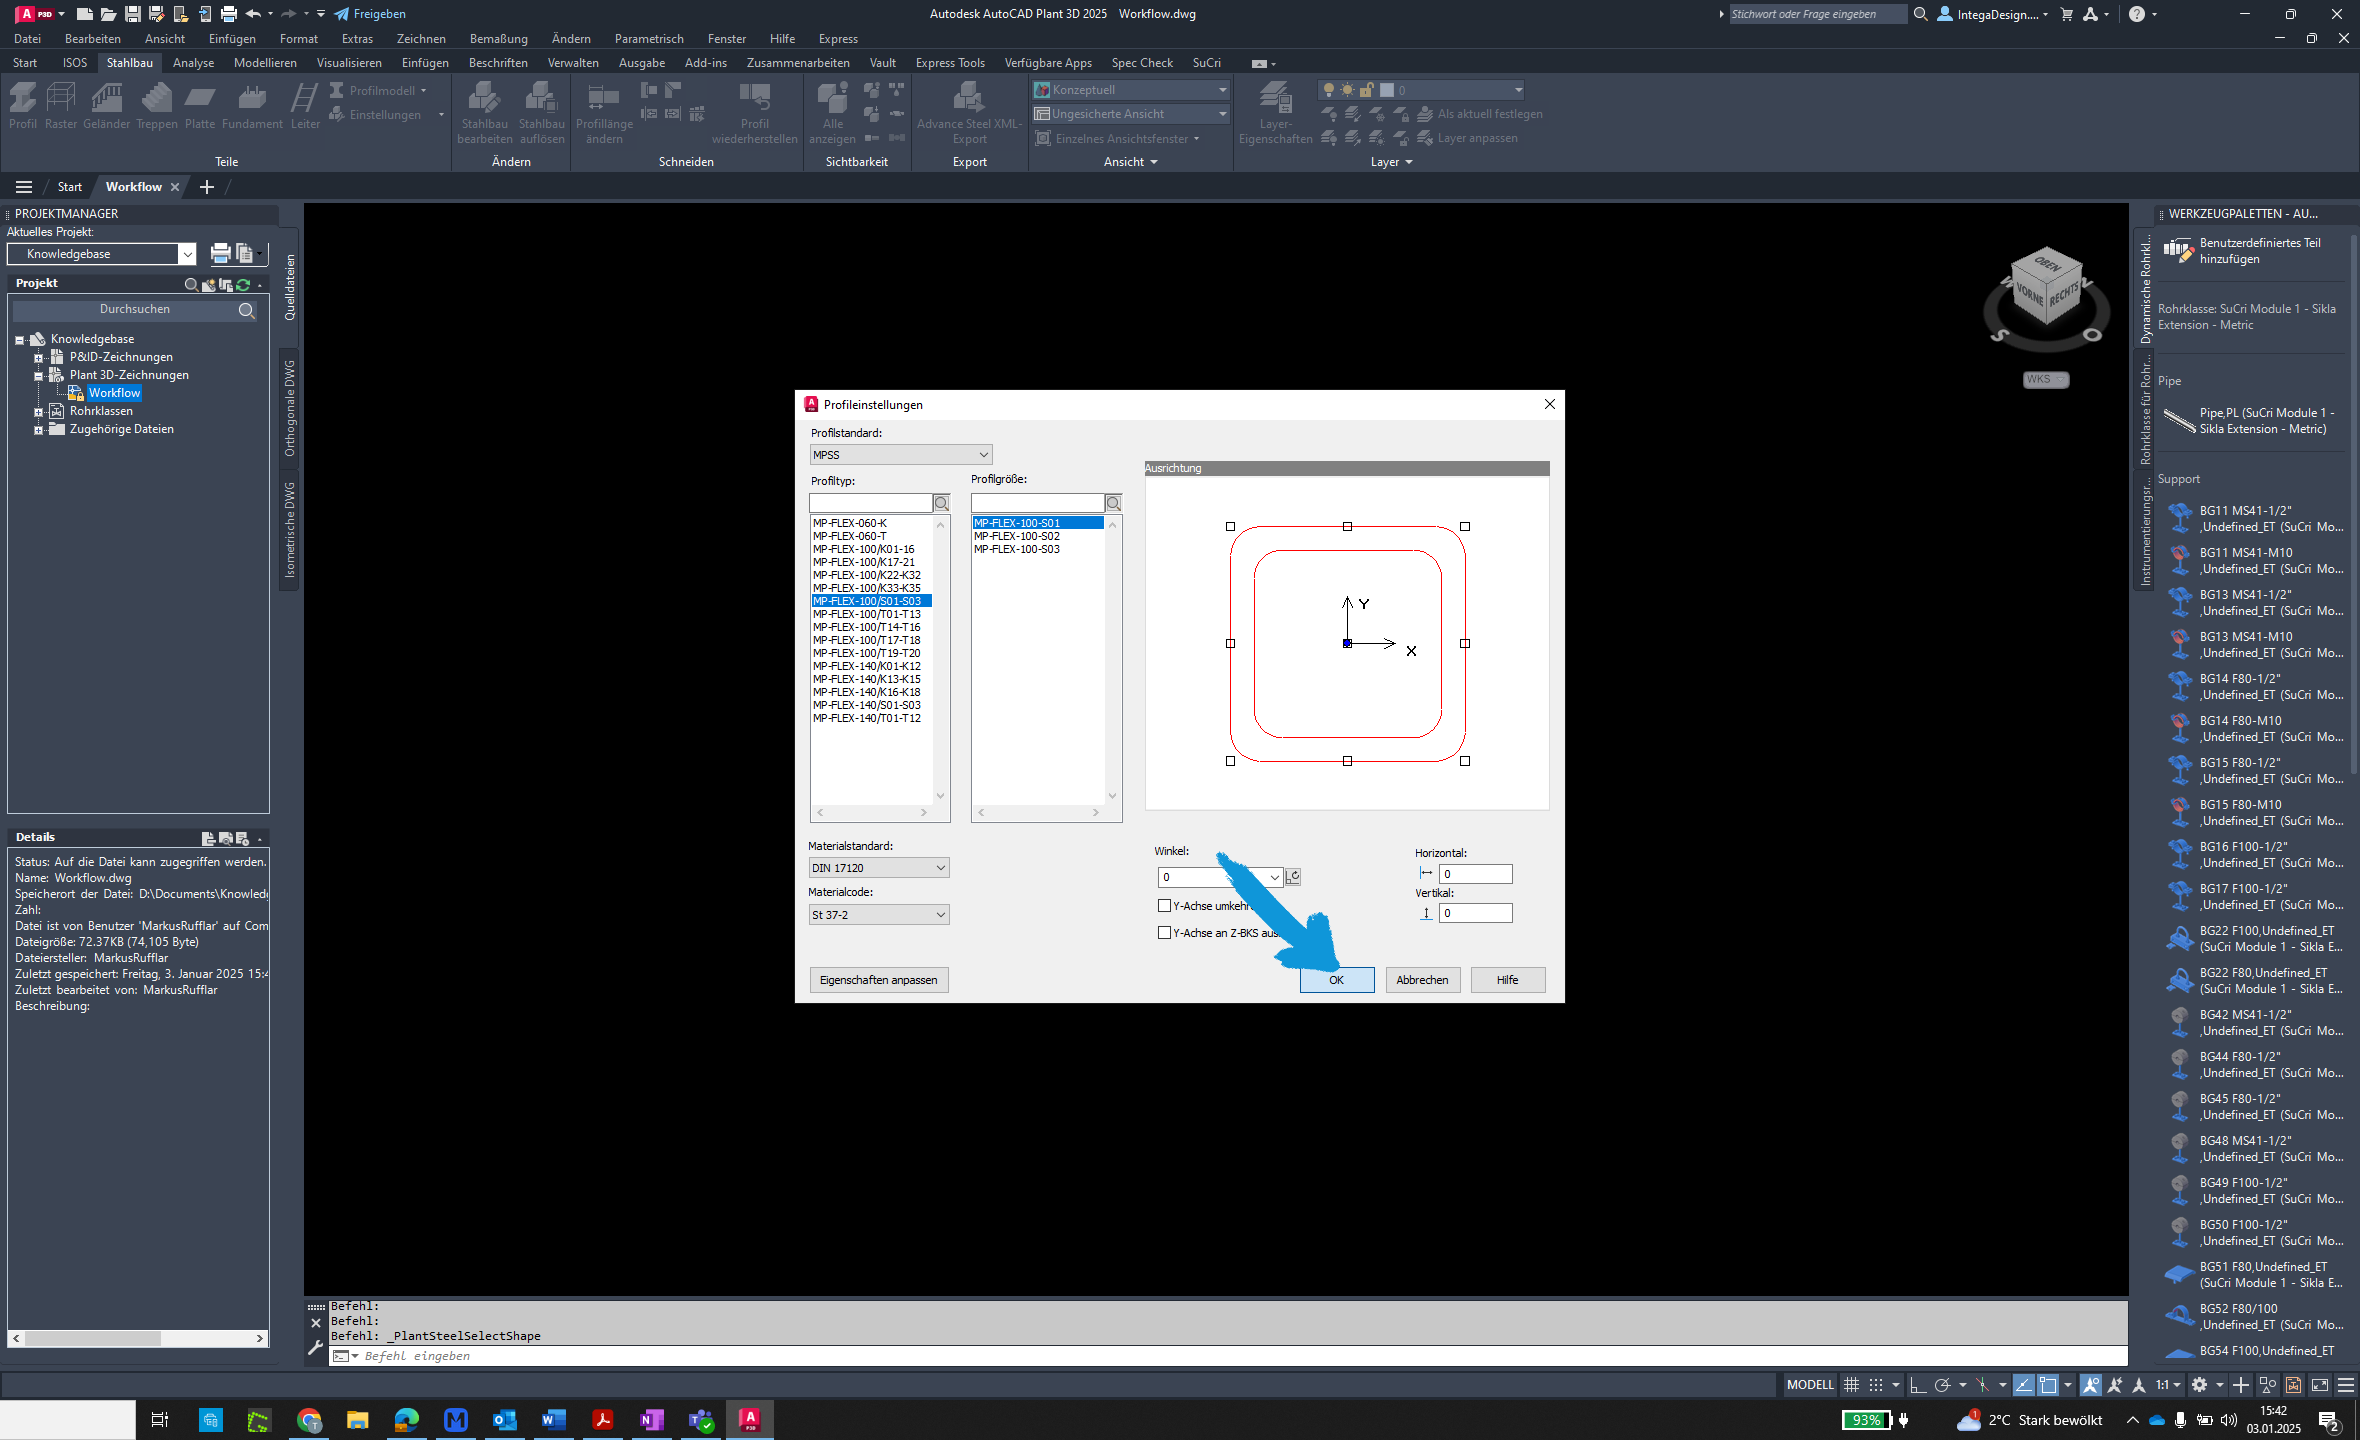
Step 7: Confirm Selection
Click on OK to save the selection.
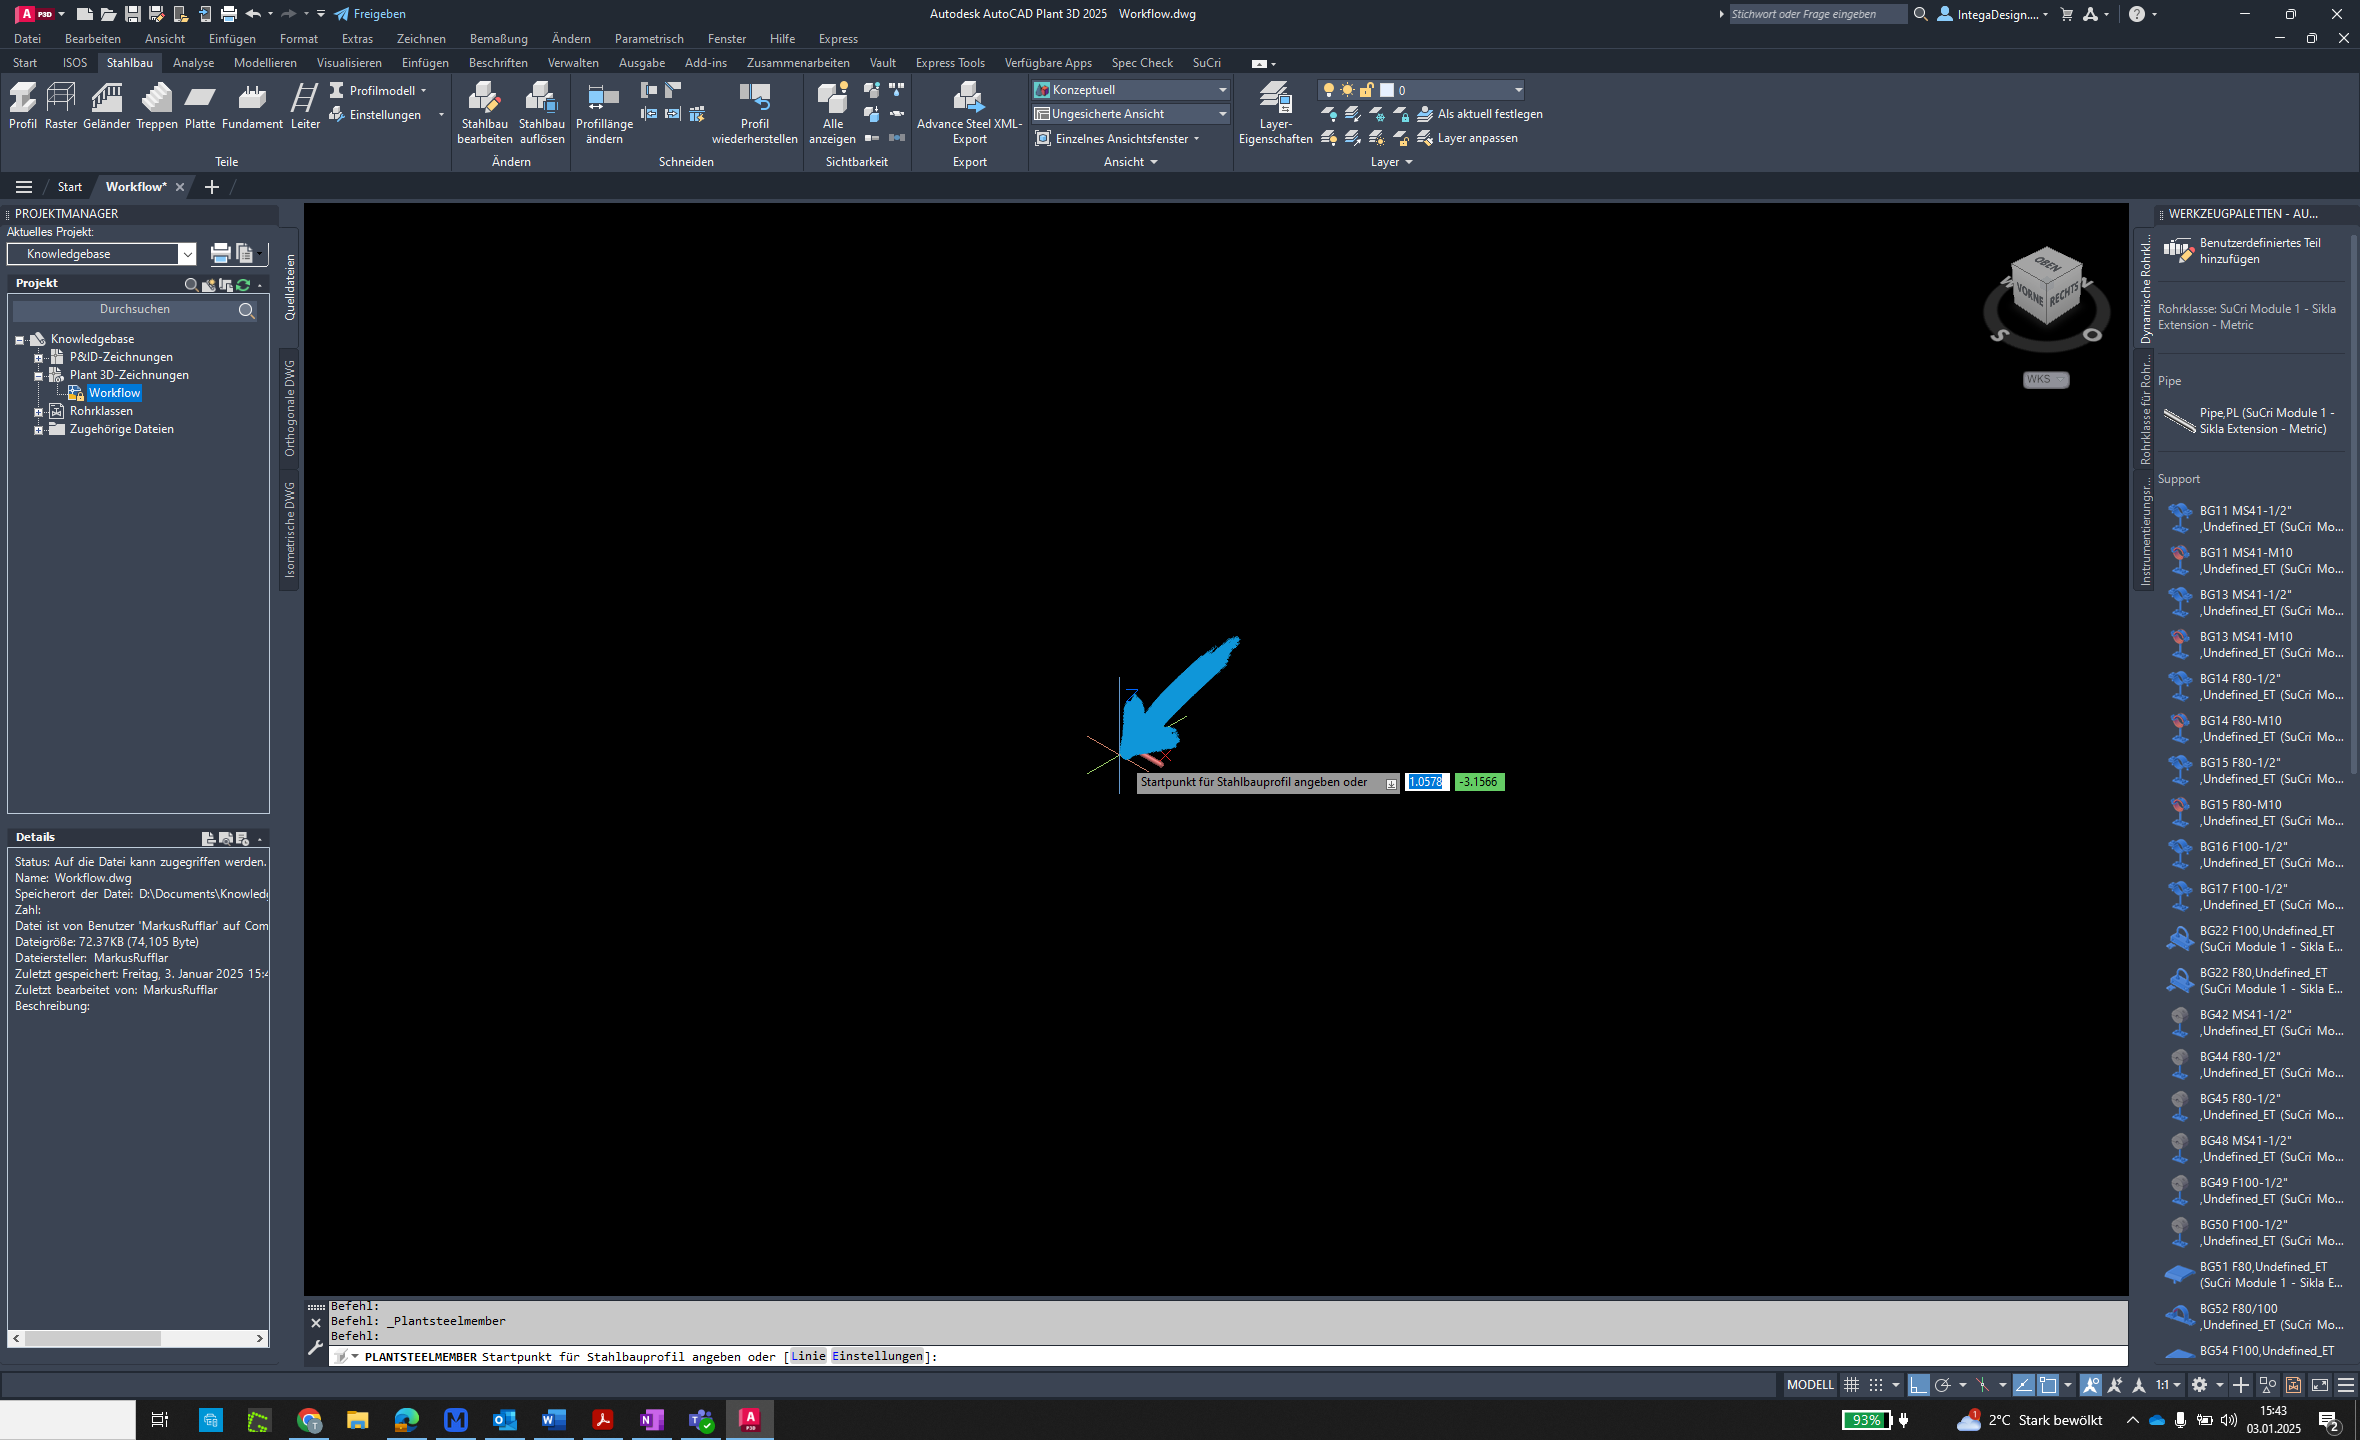
Step 8: Start Placement
Click again to place the selected profile.
Step 9: Adjust Position
Move your mouse to adjust the position and click again.
Step 10: Align Profile
Align the profile by performing another click.
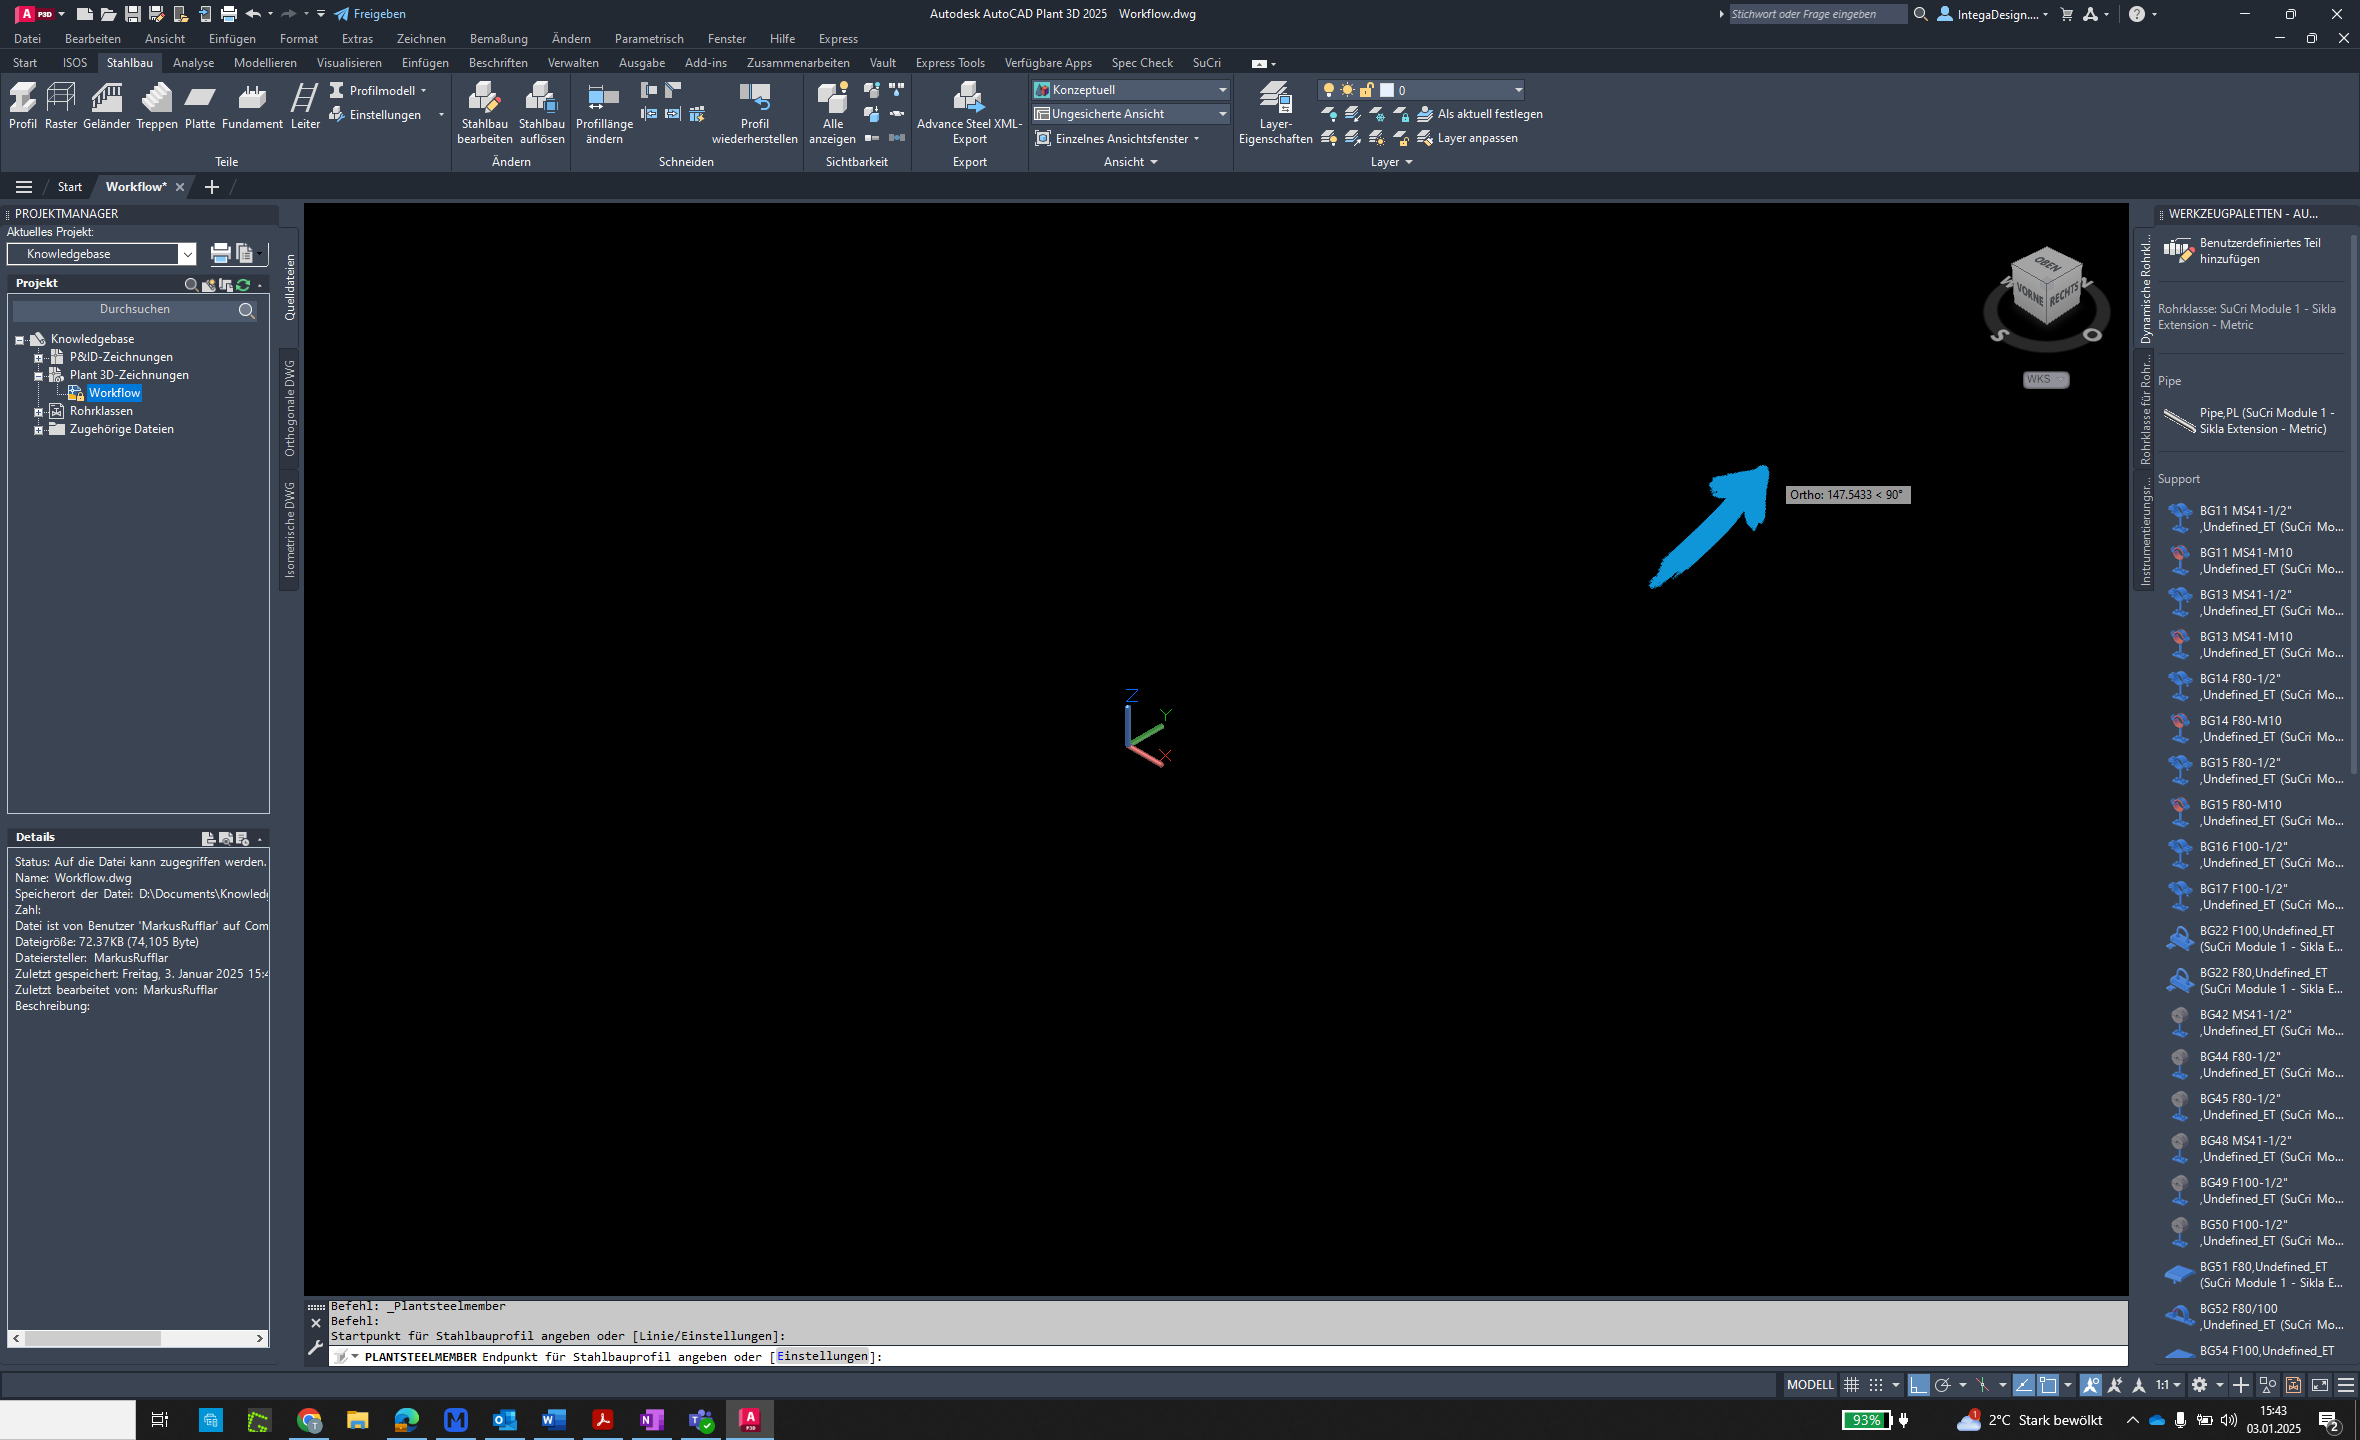
Step 11: Confirm with Right-Click
Perform a double right-click to confirm the placement.
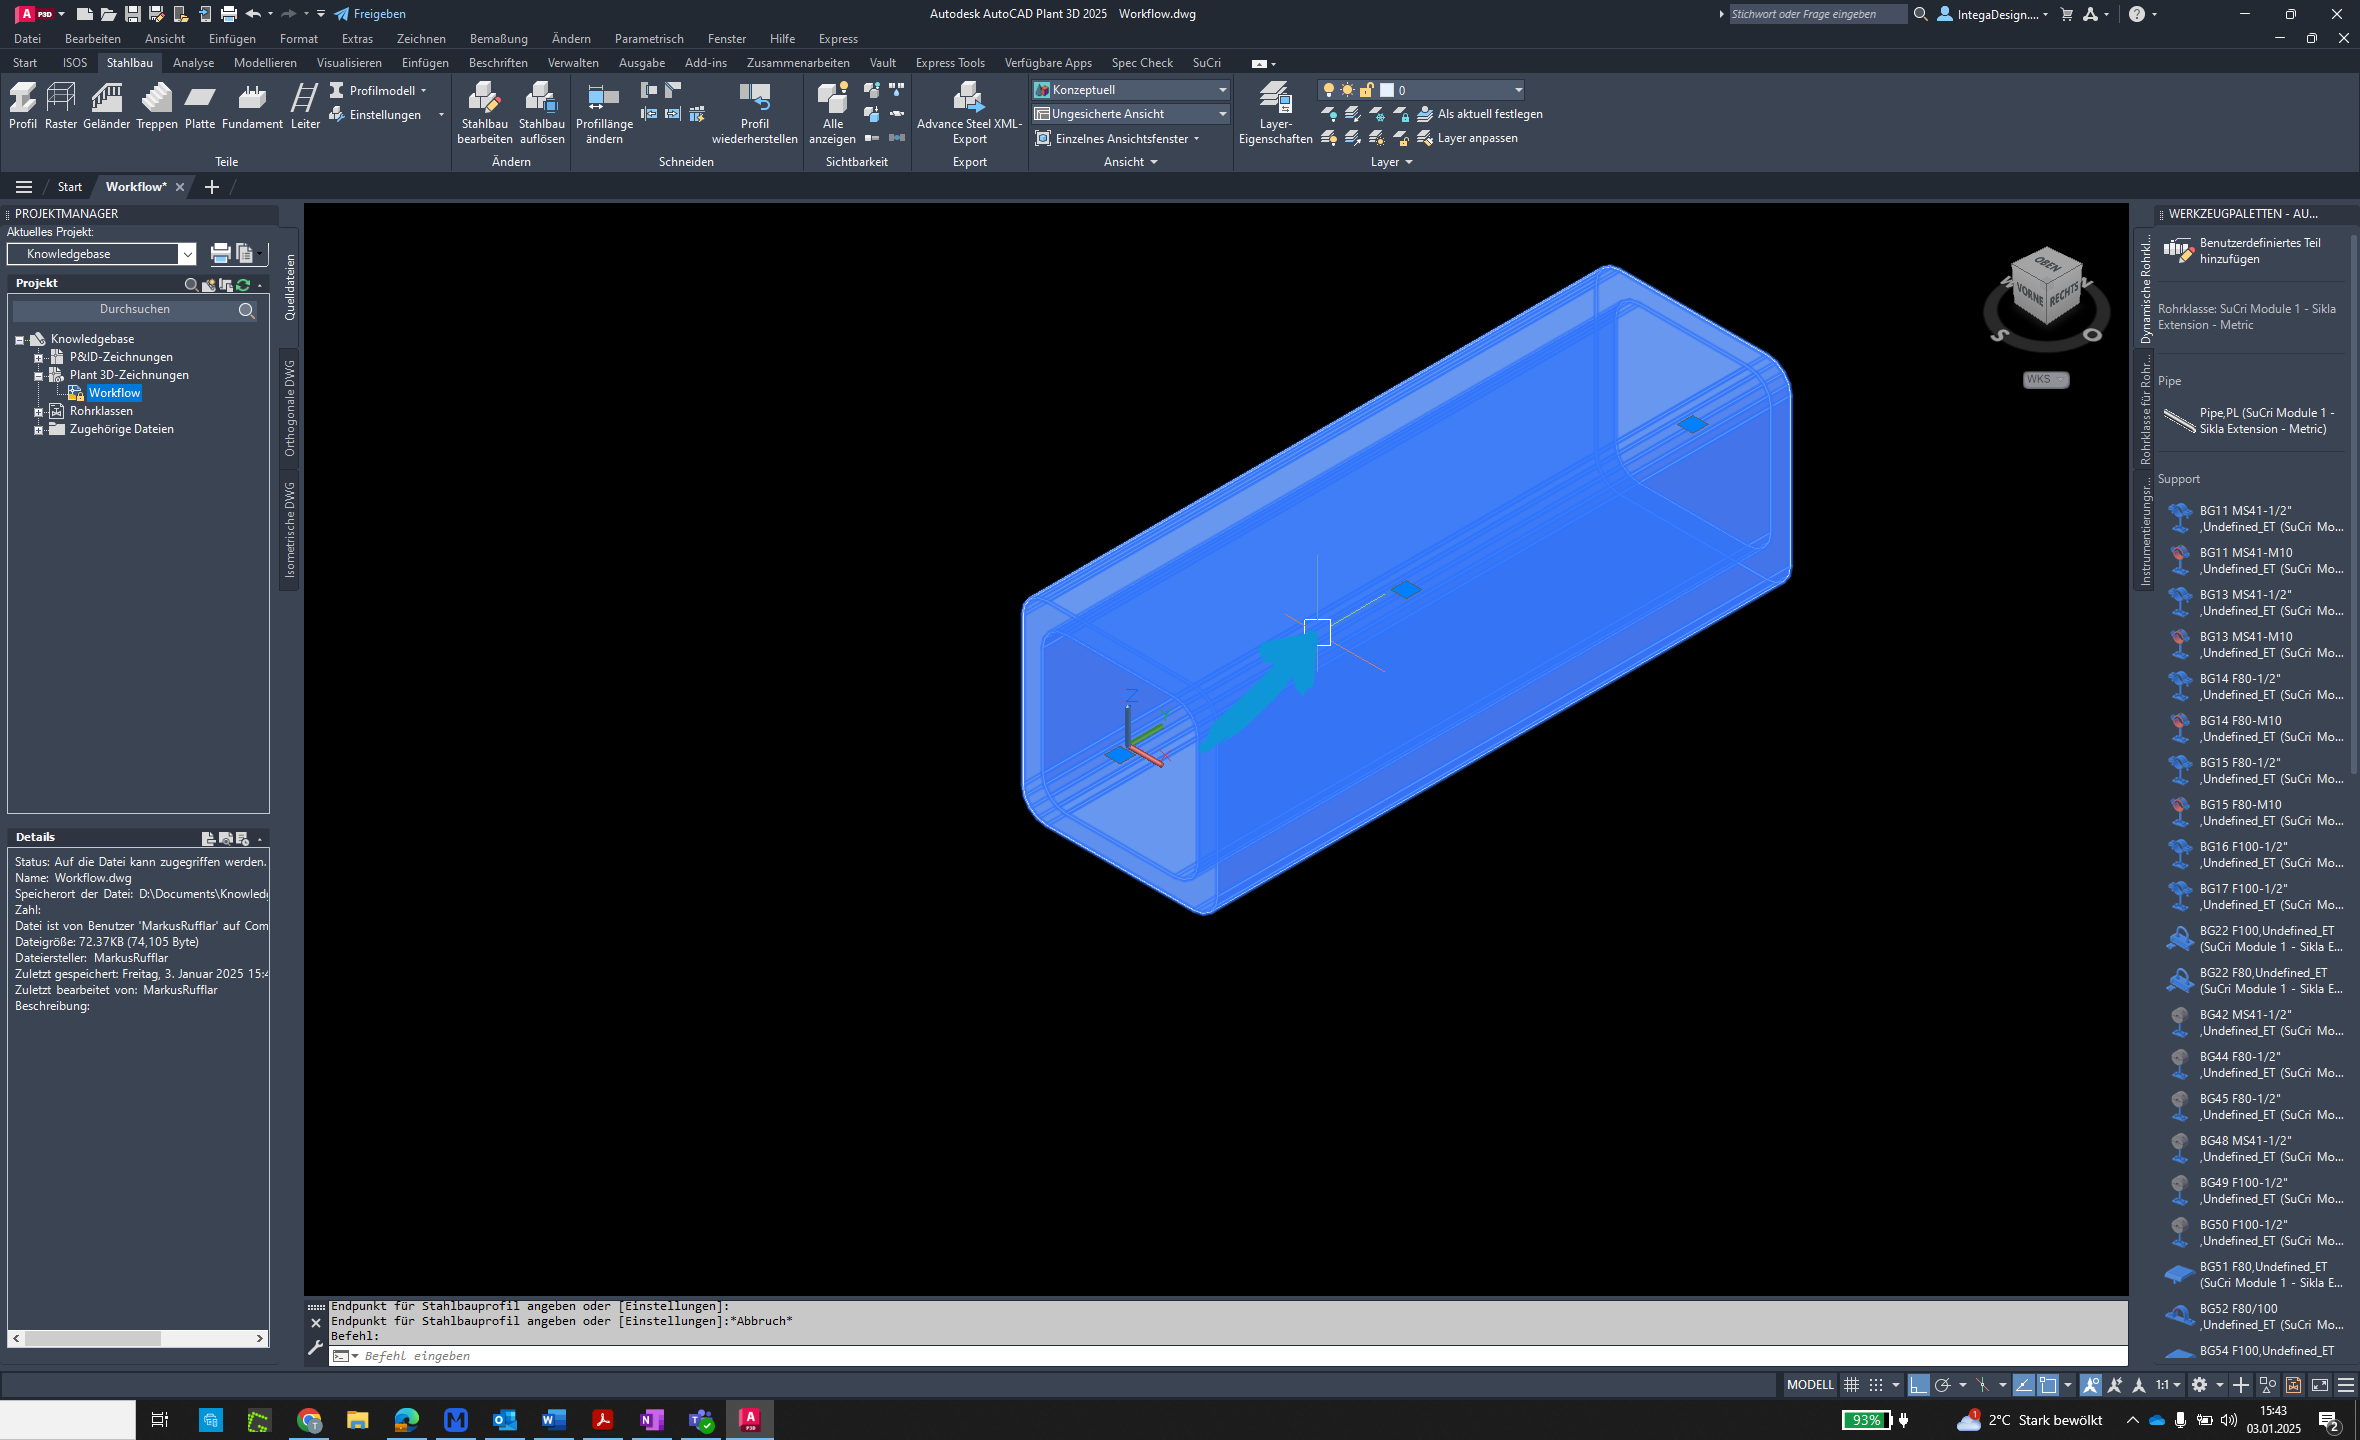
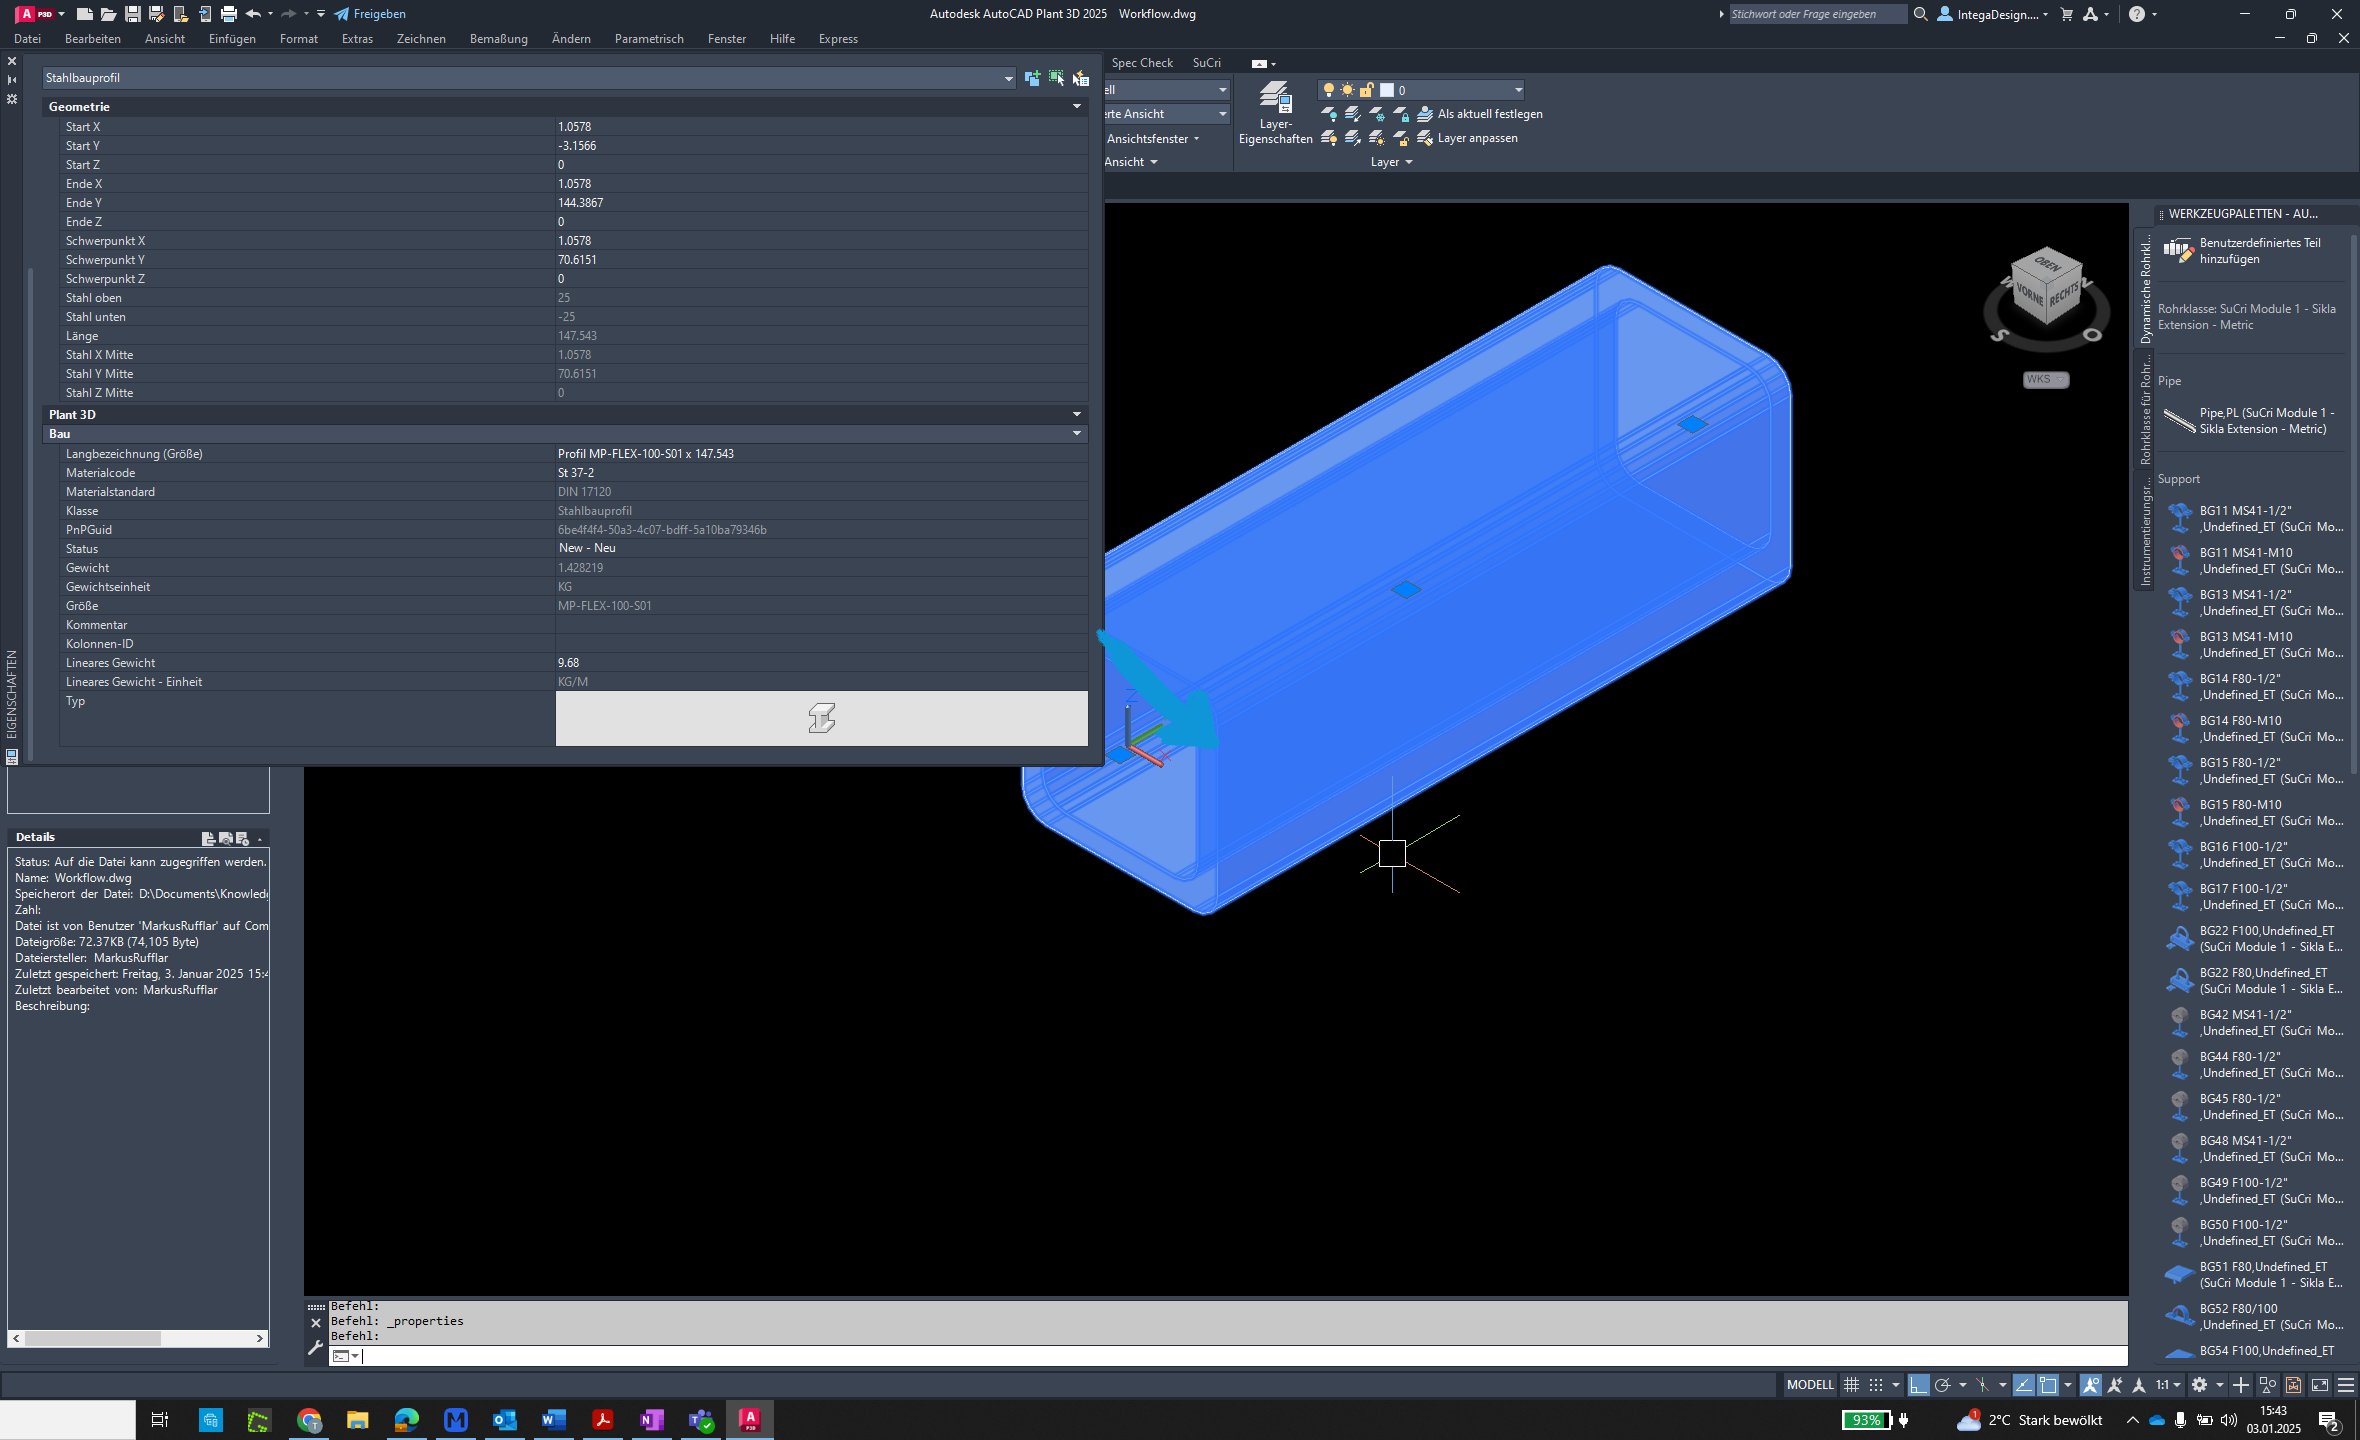
Step 12: Completion
The weights have been automatically set according to the datasheets.