The 'Set Front View' function in SuCri enables precise definition of assembly orientations.
Video Tutorial
tbc
Plant3D Command
SUCRI4SELECTFRONTVIEW
Step-by-Step Guide
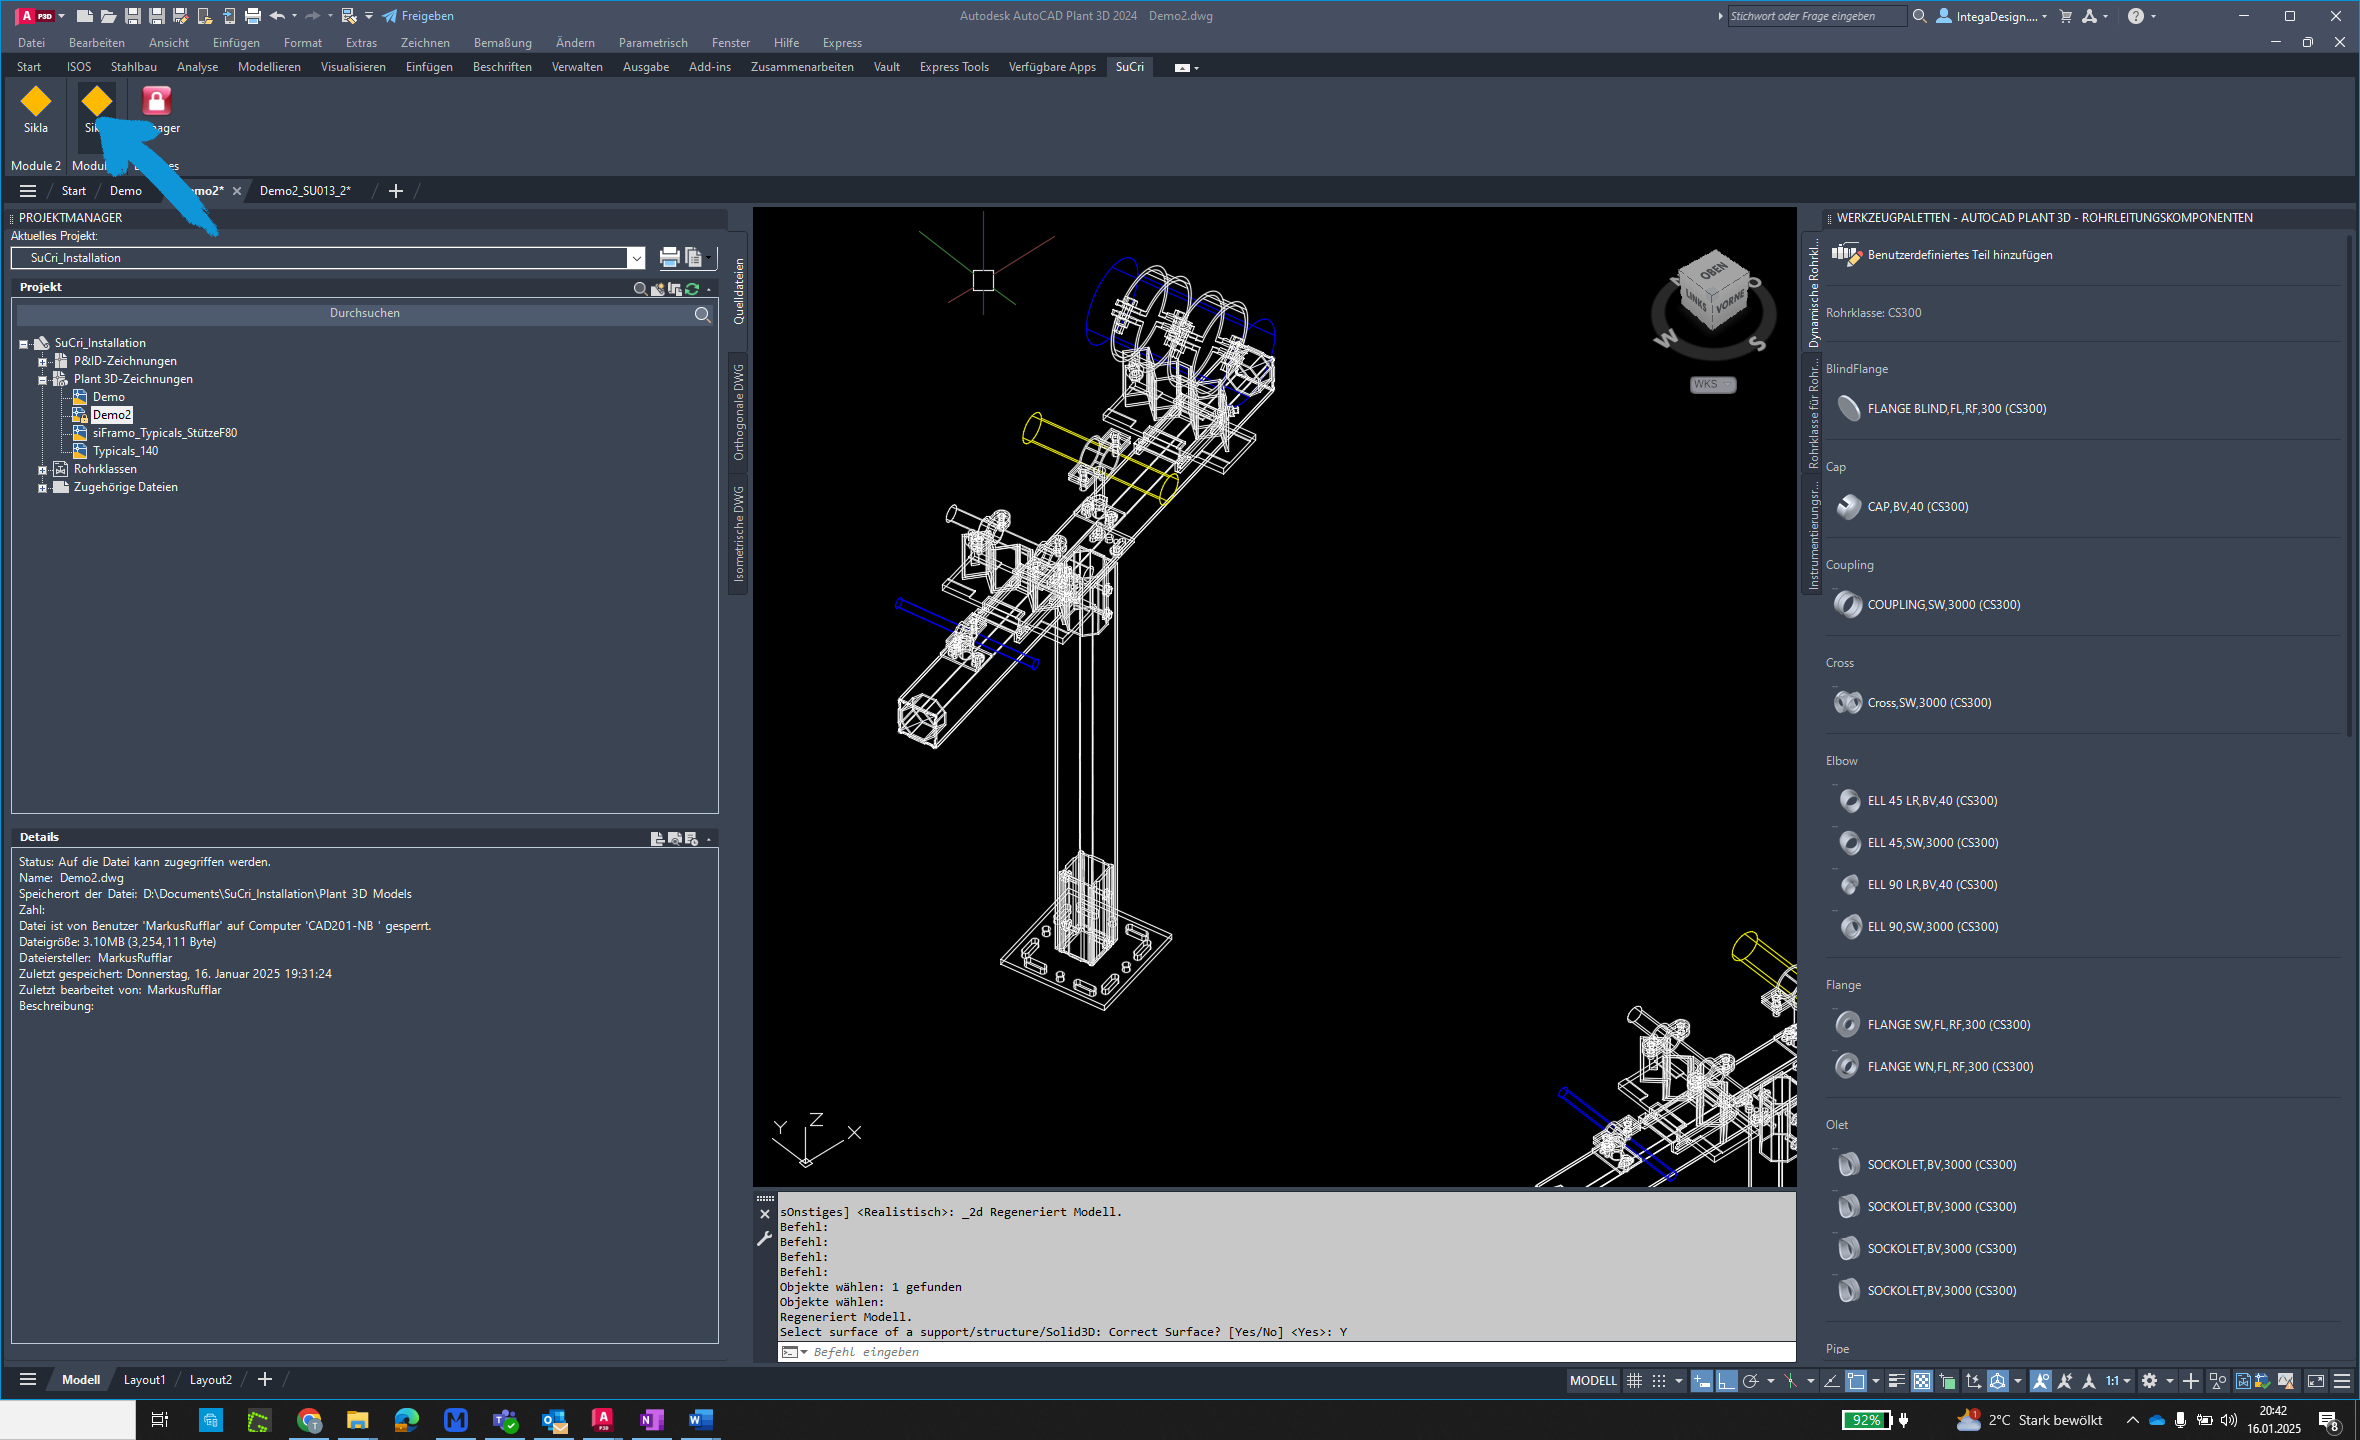
Step 1: Click Sikla Button
Locate the "Sikla" button in the toolbar and click it.
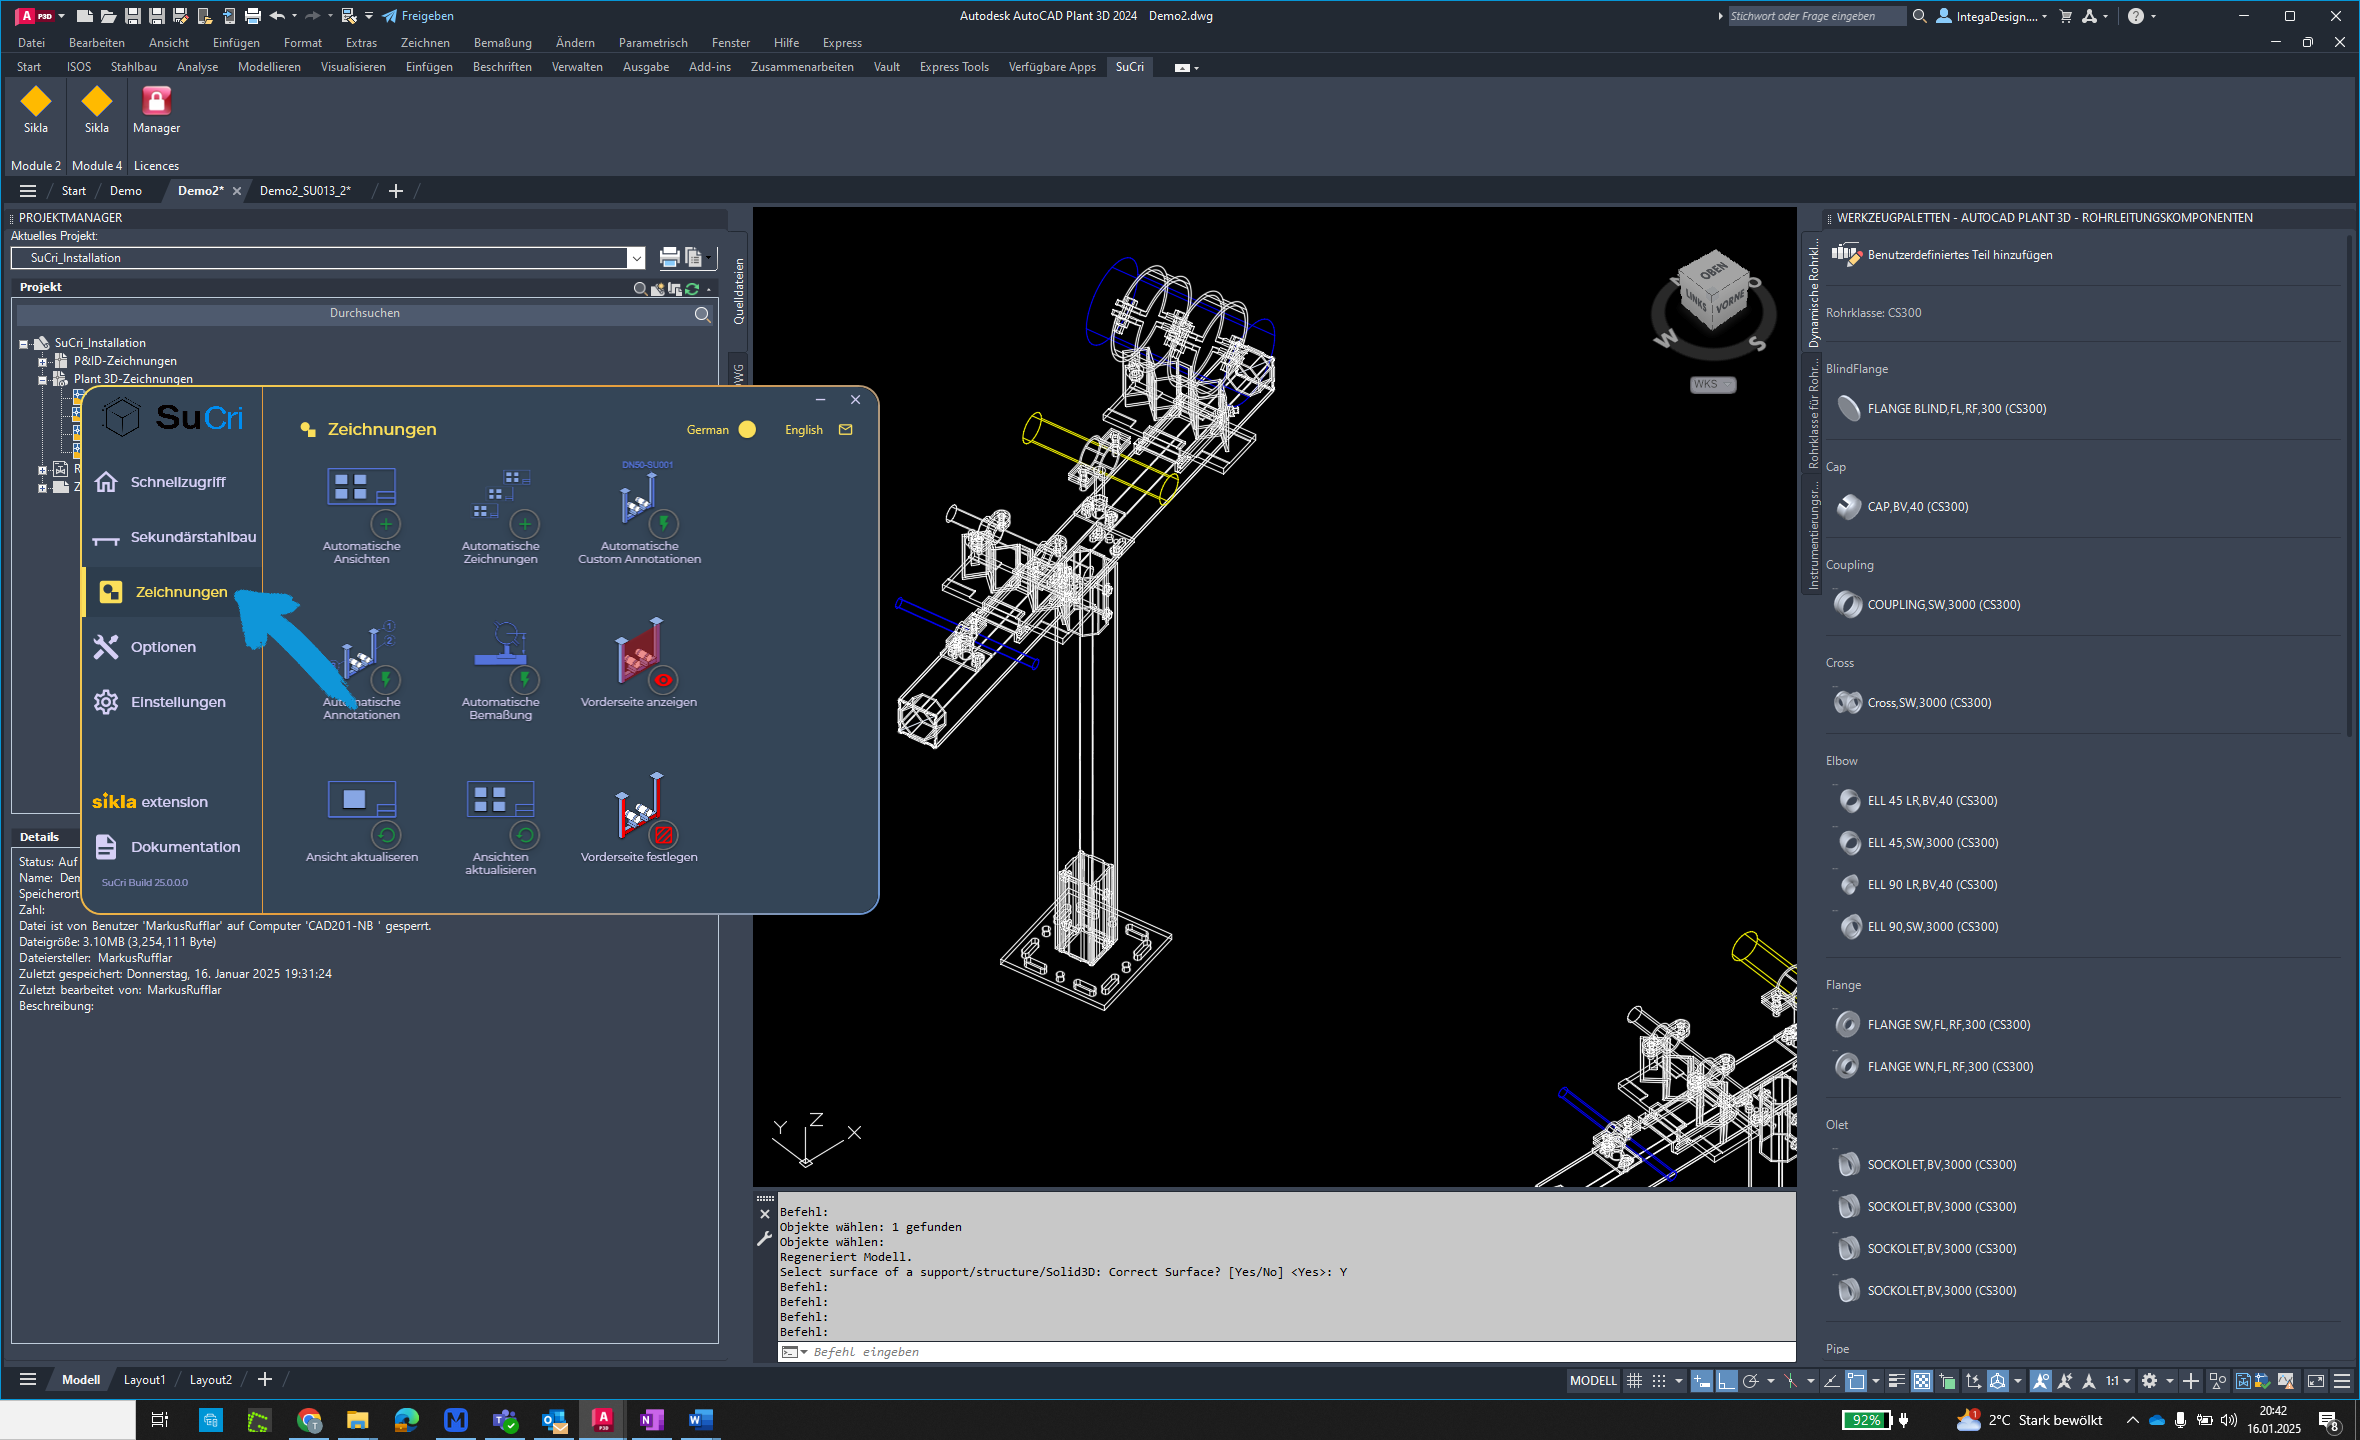
Step 2: Select Drawings
Click on "Drawings" to start the function.
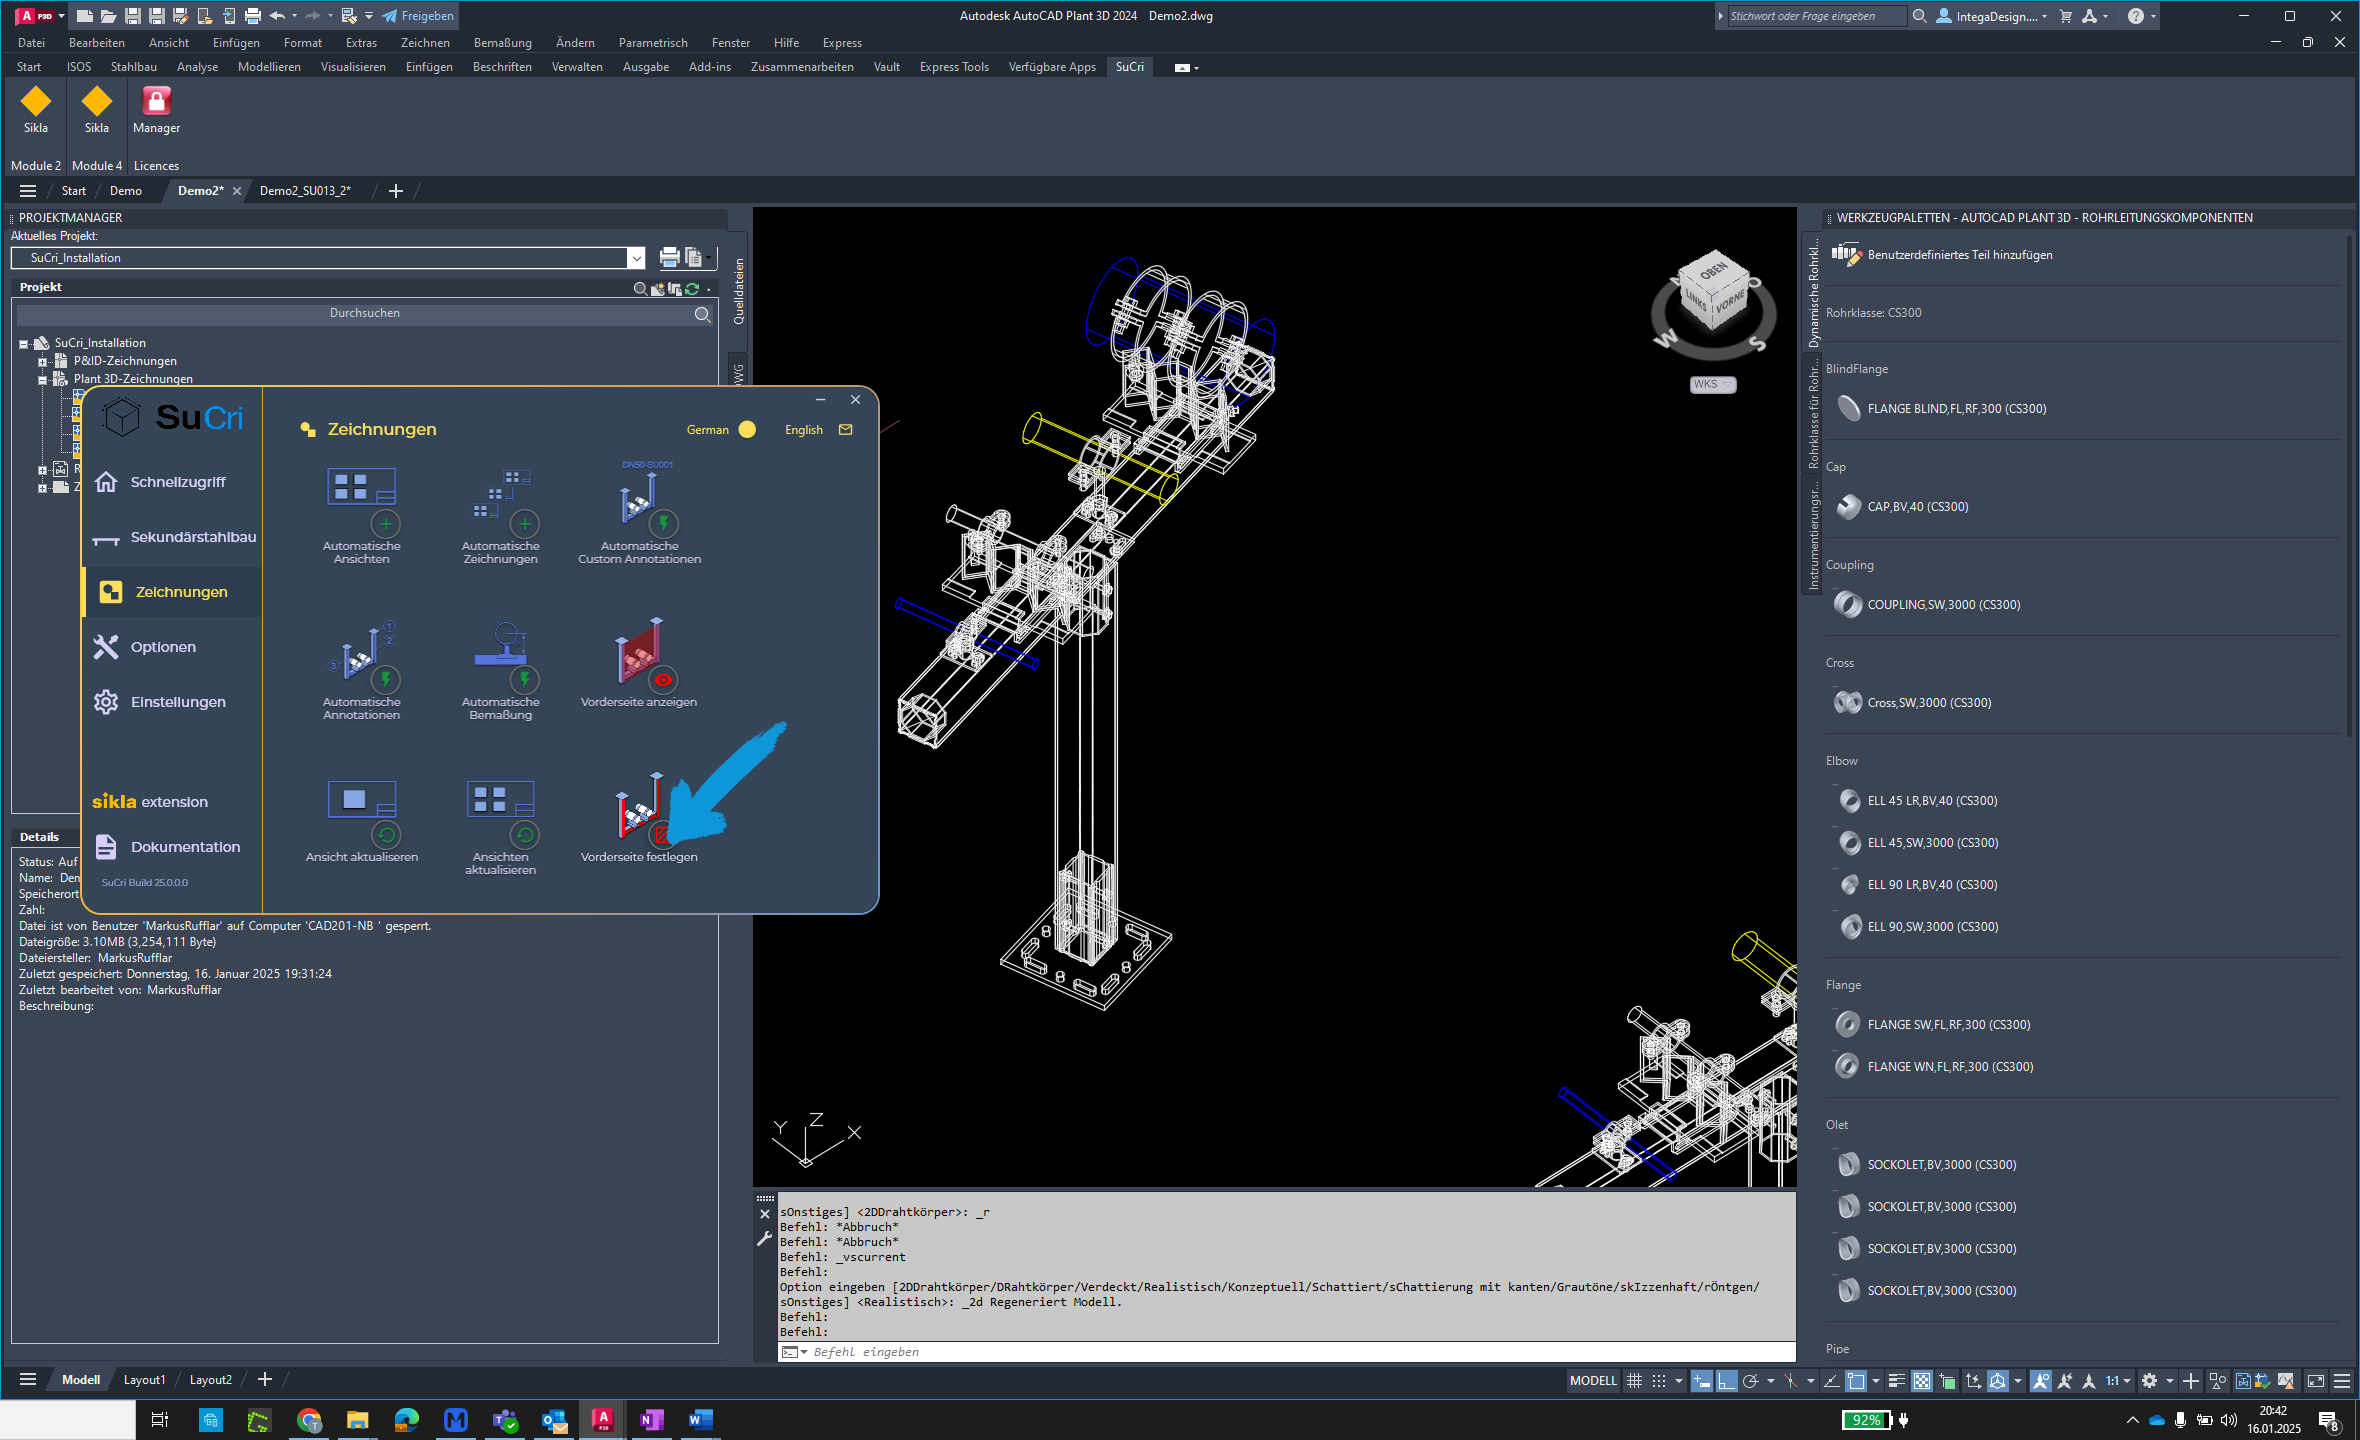
Step 3: Set Front View
Click the "Set Front View" button.
Step 4: Select Component
Select a component of your assembly and confirm the selection with a right-click.

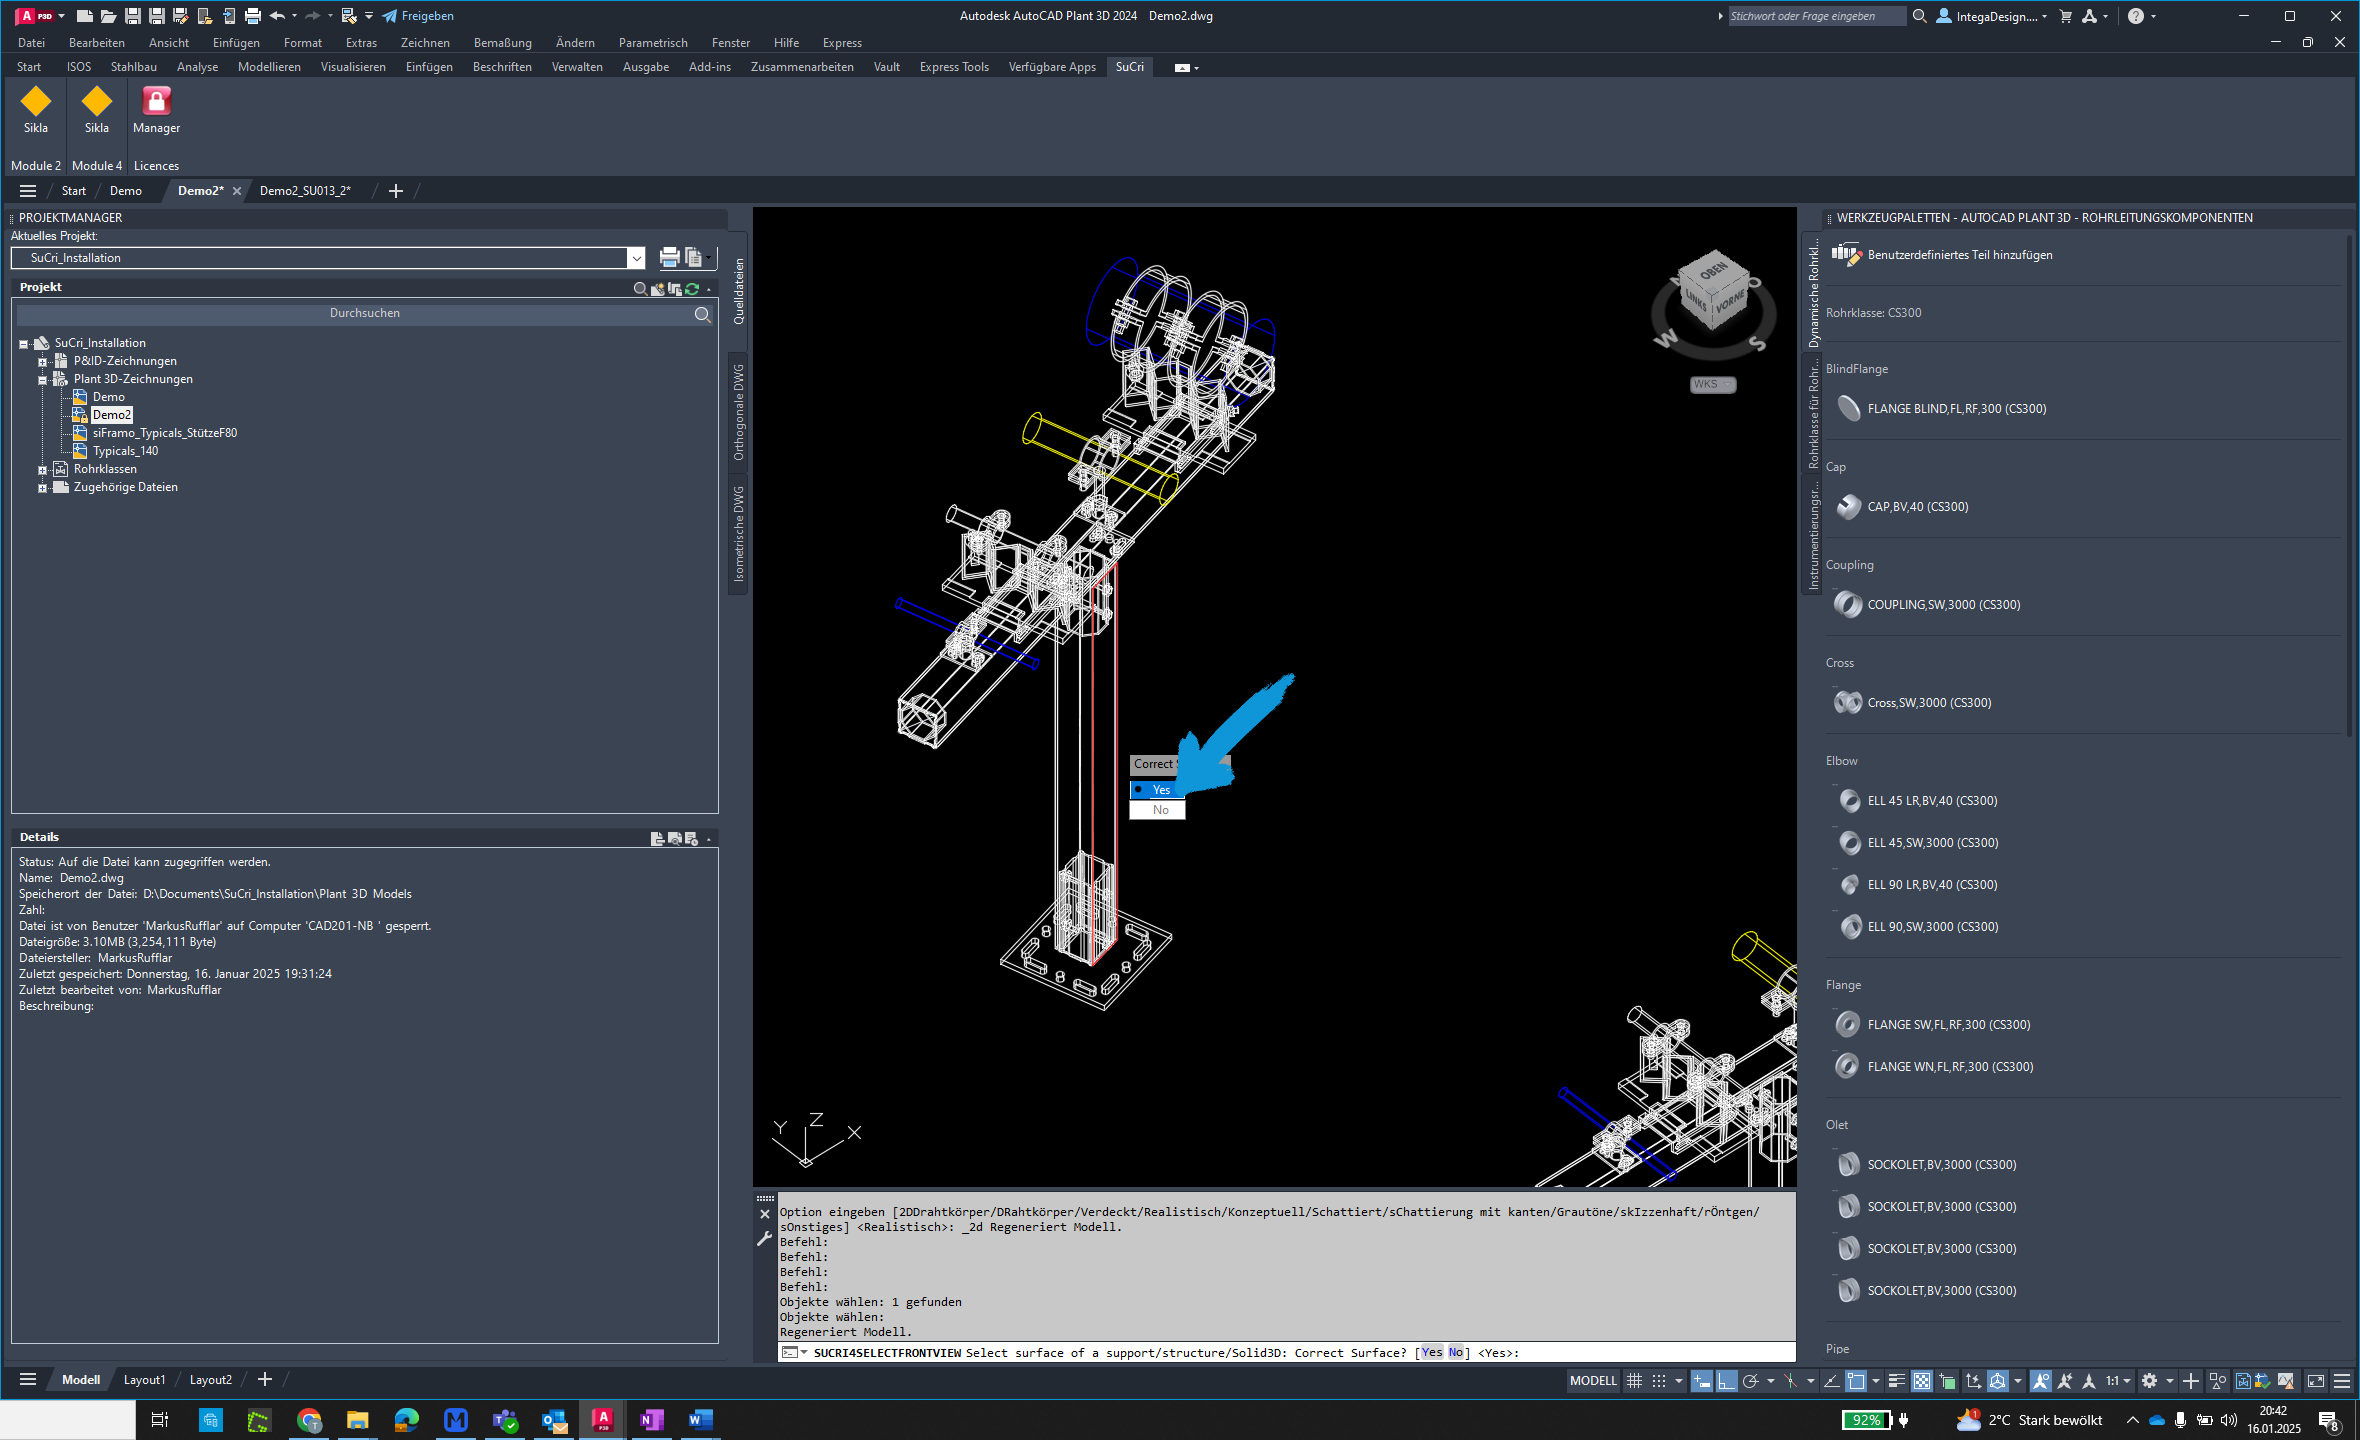
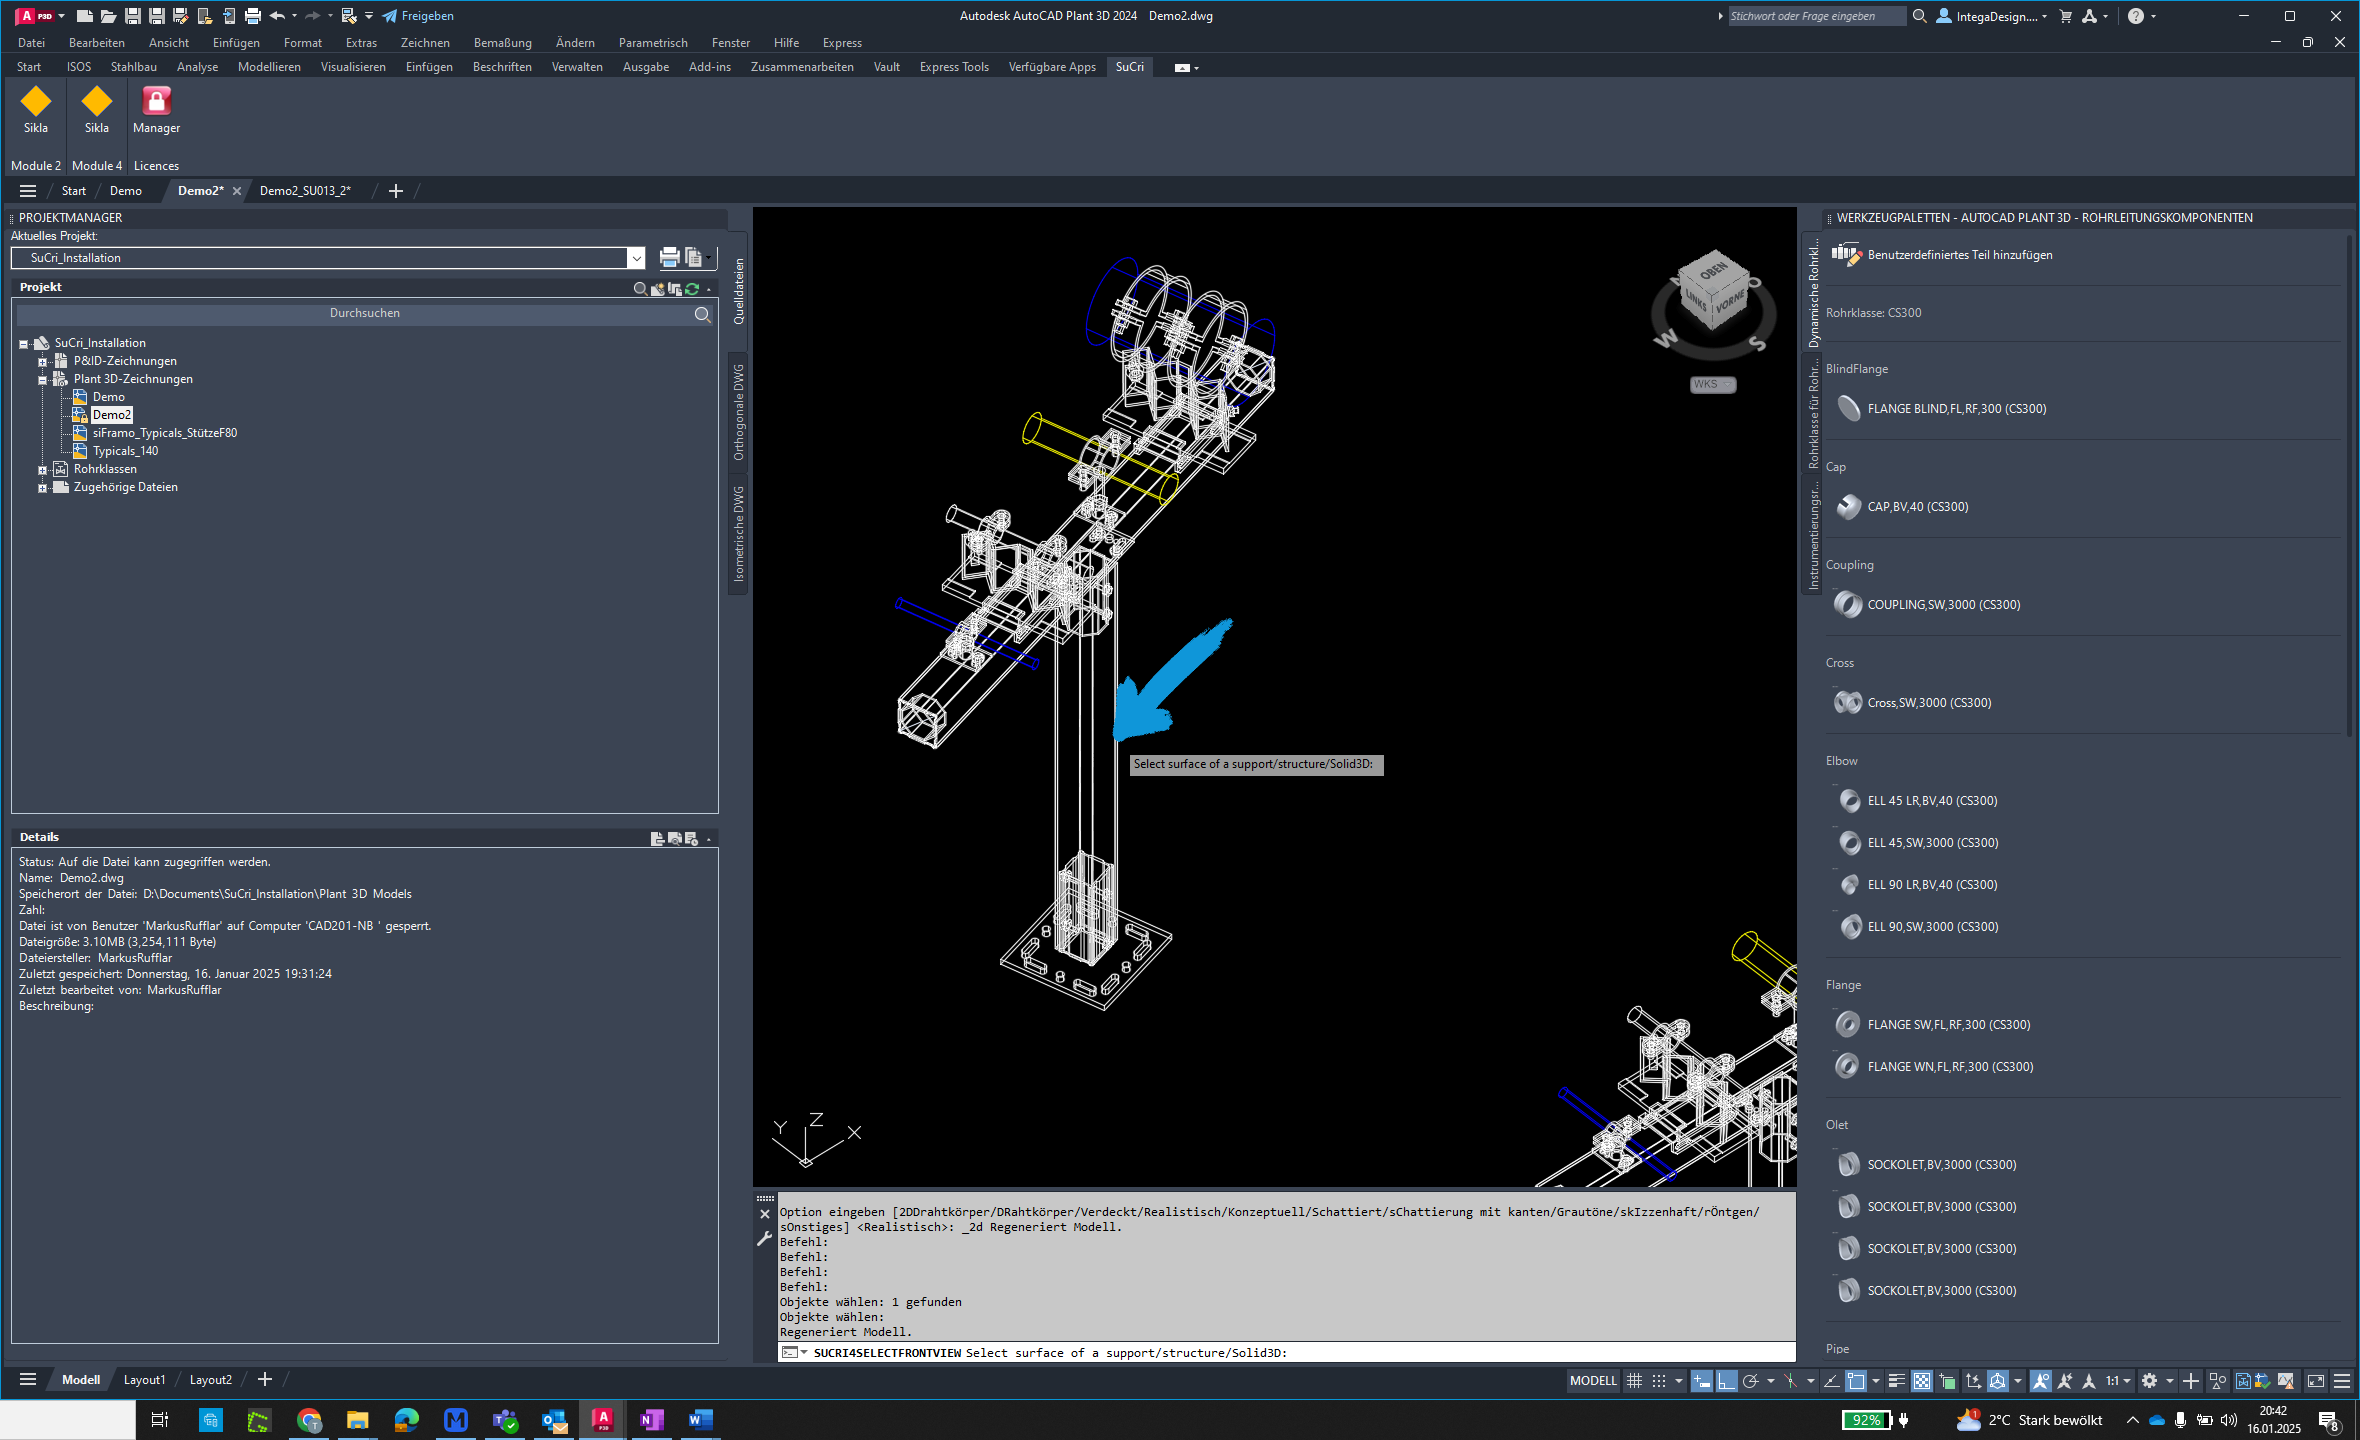
Step 5: Choose Surface
Choose a surface that defines the orientation of the assembly for view generation.

Step 6: Confirm Control Question
Confirm the control question with "Yes". If the red surface is not displayed, try using a different visual style.
Step 7: Verify Success
The front view has been successfully set. Verify the settings.